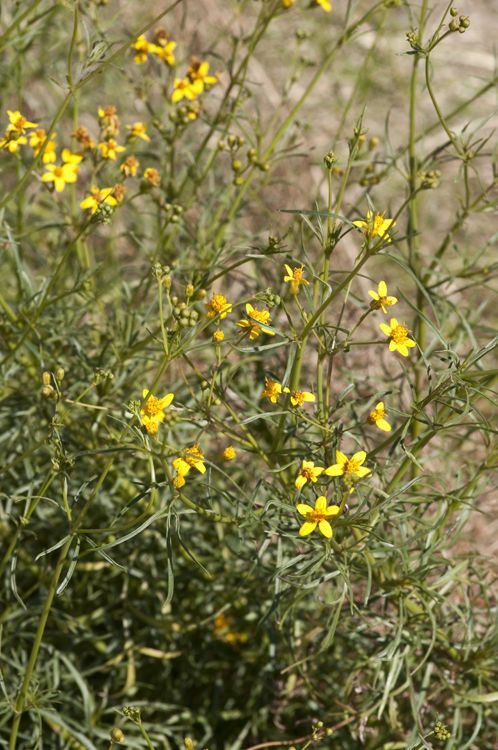
Hello there, fellow garden enthusiasts! I’m so excited to chat with you today about a plant that truly captures the spirit of the desert Southwest: Coreocarpus arizonicus, or more commonly, the Arizona River Aster. I’ve been growing these beauties for two decades now, and let me tell you, their cheerful, daisy-like flowers are a welcome sight, especially when they’re bringing a bit of that arid, sun-drenched charm to our own gardens. Propagating them is incredibly rewarding, and I think you’ll find it’s a pretty **straightforward” process, even for those just starting out in the world of plant multiplication.
The Best Time to Start
For the highest success rate with Coreocarpus arizonicus, I always recommend starting in late spring to early summer. This is when the plant is actively growing and has plenty of energy to put into forming new roots. You’ll want to take cuttings from healthy, pliable stems that haven’t yet started to flower or set seed. Think of it as capturing the plant at its most vibrant and ambitious!
Supplies You’ll Need
Gathering your supplies beforehand makes the whole process flow so much smoother. Here’s what you’ll want to have ready:
- Sharp, clean pruning shears or a razor blade.
- A well-draining potting mix. I personally like a blend of equal parts perlite, coarse sand, and a good quality potting soil. You want to avoid anything that holds too much moisture.
- Small pots or seedling trays with drainage holes.
- An anti-fungal root hormone (optional, but can give a nice boost).
- A plastic bag or a larger plastic container with a lid to create a mini-greenhouse.
- A spray bottle filled with clean water.
- A label and marker to keep track of your precious propagations!
Propagation Methods
The most successful way I’ve found to propagate Coreocarpus arizonicus is through stem cuttings. It’s reliable and you can get a good number of new plants from a healthy parent.
Stem Cuttings:
- First, select a healthy, non-flowering stem from your mature plant.
- Using your clean pruning shears or razor blade, take a cutting that is about 4-6 inches long. Make sure the cut is clean and just below a leaf node (the point where leaves stem from the main stem).
- Gently remove the lower leaves from the cutting, leaving just a few at the top. We want to reduce water loss while still allowing for photosynthesis.
- If you’re using rooting hormone, dip the cut end into the hormone to coat it evenly.
- Prepare your pots by filling them with your well-draining mix. Make a small hole in the center with your finger or a pencil.
- Insert the cutting into the prepared hole, ensuring the leaf nodes that were below the soil line are covered. Gently firm the soil around the stem to hold it upright.
- Water the potting mix thoroughly until water drains from the bottom.
- Now, create that mini-greenhouse effect. You can place a clear plastic bag loosely over the pot, securing it with a rubber band, or cover it with a clear plastic container. This helps maintain humidity, which is crucial for root development.
- Place the pot in a bright location, but out of direct, harsh sunlight. A sunny windowsill is usually perfect.
The “Secret Sauce” (Pro Tips)
Now for a couple of my tried-and-true tips that have helped me get a fantastic strike rate:
- Don’t let the leaves touch the water. When creating your mini-greenhouse, ensure the foliage of your cuttings isn’t sitting in condensation. If leaves are constantly wet, they’re far more prone to rotting before they even have a chance to root. I’ll often gently trim away any leaves that might be getting too cozy with the plastic.
- Bottom heat makes a big difference. If you have a heating mat designed for seedlings, placing your pots on it can significantly speed up root formation. The warmth encourages the plant to send out those vital roots more rapidly. Just be careful not to overheat, especially if you’re in a really warm climate already.
Aftercare & Troubleshooting
Once your cuttings have rooted, you’ll start to see new growth emerging from the top. This is a great sign!
- When you see new leaves appearing, it’s time to gradually acclimate your new plants to drier air. Carefully remove the plastic bag or lid for a few hours each day, increasing the duration until they are fully exposed.
- Continue to water them whenever the top inch of soil feels dry. Keep them in bright, indirect light.
- The most common issue you might encounter is rot. If you see your cuttings wilting, turning black and mushy at the base, or if the leaves are yellowing and dropping off excessively, it’s usually a sign of overwatering or poor drainage. Unfortunately, once rot sets in, it’s very difficult to save the cutting. In this case, it’s best to discard it and try again, ensuring your soil and watering are just right next time.
Propagating plants is a journey of patience and observation. Don’t be discouraged if not every cutting takes. Each attempt is a learning experience, and the joy of watching a tiny cutting develop into a beautiful new plant is absolutely unparalleled. So, grab your tools, find a healthy Arizona River Aster, and give it a go! Happy gardening!
Resource:
https://identify.plantnet.org/k-world-flora/species/Coreocarpus%20arizonicus%20S.F.Blake/data