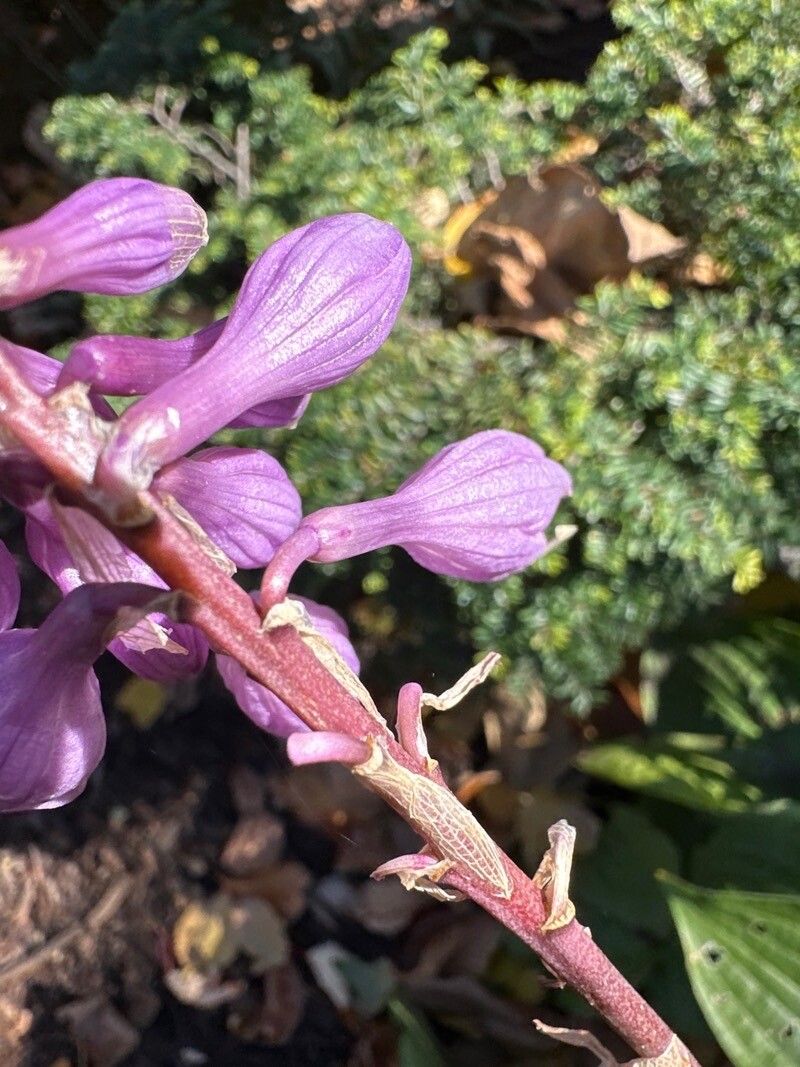
Hello fellow plant enthusiasts! Today, I want to chat about a truly magnificent orchid – Corallorhiza striata, the Striped Coralroot. This woodland beauty, with its delicate, intricate blooms, brings a touch of wild elegance to any shady corner. And let me tell you, successfully propagating it? That’s a special kind of gardening joy. Now, for the beginner gardener, I’ll be honest, Corallorhiza striata isn’t the easiest plant to propagate. It requires a little patience and understanding of its unique needs, but the reward is immense.
The Best Time to Start
For the best chance of success, early spring, just as new growth begins to emerge, is your sweet spot. You’re looking for healthy, robust specimens. If you’re propagating via division, wait until after flowering is complete, but before the heat of summer really sets in.
Supplies You’ll Need
Getting your workspace ready is half the battle. Here’s what I always have on hand:
- Sterilized sharp pruning shears or a clean knife. Crucial for clean cuts!
- A balanced, well-draining potting mix. I often use a blend of coarse peat moss, perlite, and a bit of orchid bark.
- Small pots or trays with drainage holes.
- A mister or spray bottle for gentle watering.
- Rooting hormone (optional) for added boost, though Corallorhiza can be a bit particular about it.
- A tray or container for bottom watering.
- Clear plastic bags or domes to create a humid microclimate.
Propagation Methods
Corallorhiza striata is primarily propagated through division. This is where we gently separate a mature plant into smaller sections, each with its own roots and shoots.
- Carefully unearth the plant. Gently loosen the soil around the base. You want to avoid damaging those precious roots.
- Identify natural breaking points. Look for divisions where a new shoot is emerging from the main rhizome or where the rhizome naturally splits.
- Use your sterilized tool. With a clean, sharp tool, carefully make a distinct cut at these natural divisions. Ensure each section has at least one or two healthy shoots and some root mass.
- Allow the cuts to callus. This is important! Let the divided sections sit for a few hours, or even overnight, in a slightly shaded, dry spot. This allows the cut surfaces to form a protective dry layer, preventing rot.
- Pot them up. Plant each division in its own pot, using your prepared, well-draining mix. Plant them at the same depth they were growing before. The top of the rhizome should be visible, not buried too deeply.
The “Secret Sauce” (Pro Tips)
Here are a few things I’ve learned over the years that can make a big difference:
- Don’t overwater, ever. This is probably the most common mistake. Corallorhiza hates soggy feet. I prefer bottom watering, allowing the pot to soak up moisture from the tray for about 20-30 minutes, then letting it drain completely.
- Mimic their natural habitat. Think dappled shade and good air circulation. Avoid direct sun like the plague! A shaded patio or a bright windowsill out of direct light is perfect.
- Be patient with the rooting hormone. Some orchids react well, others get a bit fussy. If you choose to use it, apply a very light dusting and tap off any excess. Too much can sometimes hinder rather than help.
Aftercare & Troubleshooting
Once potted, place your divisions in their new home. Keep the humidity high by covering them with a clear plastic bag or dome, but ensure there’s still some air exchange. Mist them lightly when the surface of the soil starts to feel dry.
The biggest enemy here is rot. If you see the shoots turning mushy or brown, it’s a sign of too much moisture or poor air circulation. If this happens, gently unpot the affected division, remove any rotten parts with a clean knife, and allow the remaining healthy sections to callus over again before repotting in fresh, drier mix. If they look shriveled and dry, they might just need a bit more humidity or a very light watering.
A Little Patience Goes a Long Way
Propagating Corallorhiza striata is a journey, not a race. Don’t be discouraged if your first attempt isn’t a roaring success. Each time you try, you learn a little more about these fascinating orchids. Enjoy the process, celebrate the small victories, and soon you’ll be marveling at your own beautiful, home-grown Striped Coralroots. Happy gardening!
Resource:
https://identify.plantnet.org/k-world-flora/species/Corallorhiza%20striata%20Lindl./data