Well hello there, fellow plant enthusiasts! It’s a pleasure to be back with you today, ready to delve into the fascinating world of Copiapoa echinoides. I’ve spent two decades coaxing life from seeds and cuttings, and I can tell you, there’s a special kind of joy in watching a new plant emerge from a fragment of an old one.
The Allure of Copiapoa Echinoides
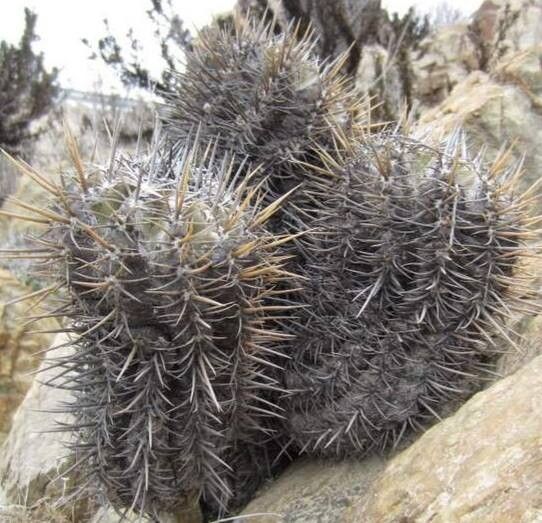
Copiapoa echinoides, with its woolly crown and intriguing spination, is a true gem for any cactus collection. Its sculptural form and unique texture make it stand out, and honestly, propagating it is a fantastic way to build up your own little army of these beauties. Now, I’ll be honest, Copiapoa echinoides isn’t the easiest cactus to propagate for absolute beginners. It requires a bit of patience and attention to detail, but with these tips, you’ll be well on your way to success. The reward? A whole new generation of these captivating desert dwellers, grown with your own expert touch.
The Best Time to Start
For propagation, timing is everything, and with Copiapoa echinoides, we want to work with its natural rhythm. The spring and early summer are your golden windows. This is when the plant is actively growing, meaning it has the energy reserves to heal from cuttings and develop new roots. Waiting until after the plant has survived its winter dormancy is key. You’ll see new growth starting to emerge, signaling it’s ready for a bit of botanical adventure.
Supplies You’ll Need
Gathering your tools beforehand makes the whole process smoother. Here’s what I always have on hand:
- Well-draining potting mix: A cactus and succulent blend is perfect. I often mix in extra perlite or pumice for even better aeration. Think gritty, not thirsty!
- Clean, sharp pruning shears or a knife: Sterilize them with rubbing alcohol to prevent any nasty surprises from spreading.
- Rooting hormone (optional but recommended): This powder or gel encourages faster and stronger root development.
- Small pots or seed trays: Ensure they have drainage holes. A 3-4 inch pot is usually ample for a good-sized cutting.
- Gravel or pebbles: For top dressing and to help keep the cutting stable.
- A watering can with a fine rose or a spray bottle: Gentle watering is crucial.
- A sunny, warm location: But avoid direct, scorching sun initially.
Propagation Methods
Copiapoa echinoides is most successfully propagated from stem cuttings. It’s straightforward, and typically yields the best results.
Taking the Cutting:
- Choose a healthy offset or segment. Look for a mature part of the cactus that looks plump and free from any signs of distress.
- Carefully slice it off. Using your sterilized shears or knife, make a clean cut as close to the main body as possible. Try to get a piece that’s at least 2-3 inches long if you can.
- Allow it to callous. This is the MOST important step. Place the cutting in a dry, shaded spot for at least 5-7 days, or even up to two weeks. You want the cut end to dry and seal over completely. This prevents rot from setting in when you plant it. It will look and feel like a scab.
Planting the Cutting:
- Prepare your pot. Fill it with your well-draining potting mix.
- Dip in rooting hormone (if using). Lightly dust the calloused end of the cutting with rooting hormone. Tap off any excess.
- Plant the cutting. Make a small hole in the soil with your finger or a pencil. Gently insert the calloused end of the cutting into the hole. You want it to be stable, so it might go in about an inch or so.
- Add top dressing. Cover the base of the cutting with a layer of gravel or pebbles. This helps keep the cutting upright and also improves drainage around the base.
- Do NOT water immediately. Wait another few days, or even a week, before giving it its first gentle watering. This gives the plant another chance to settle in without excess moisture.
The “Secret Sauce” (Pro Tips)
Now, for a couple of things that make a real difference:
- Bottom heat works wonders. If you have a seedling heat mat, use it! Placing your pot on a gentle heat source (around 70-75°F or 21-24°C) can significantly speed up root development. It mimics the warmth of the soil in its natural habitat.
- Patience is truly a virtue with cacti. Don’t be tempted to tug on the cutting to check for roots every few days. Resist the urge! You’ll only disturb any delicate new growth. Give it at least a month to six weeks before you even think about checking. Sometimes, it takes even longer.
- Give it air circulation. While you don’t want the cutting to dry out completely, you also don’t want it sitting in stagnant, humid air. Good airflow around your cuttings will help prevent fungal issues.
Aftercare & Troubleshooting
Once you’ve waited patiently and give the cutting a gentle tug (it should resist slightly, indicating roots), it’s time for slightly more regular watering. Water when the soil is completely dry. It’s better to underwater than overwater at this stage. You’ll slowly introduce it to brighter light, but always avoid harsh, direct sun for the first few months.
The most common adversary you’ll face is rot. If you notice the cutting becoming soft, mushy, or developing dark, waterlogged spots, especially at the base, it’s a sign of rot. Unfortunately, if rot sets in deeply, it’s often unrecoverable. This is why proper callousing and excellent drainage are so crucial in the first place. If you catch it very early, you might be able to cut away the affected part and re-callous, but it’s a tricky situation.
A Gentle Encouragement
Growing new plants is a journey, and with Copiapoa echinoides, it’s a beautiful testament to perseverance. Don’t get discouraged if your first attempt isn’t a roaring success. Every gardener has had their share of failed cuttings! Learn from the experience, adjust your approach, and keep trying. The satisfaction of nurturing a new life, and seeing that little cactus thrive, is truly unparalleled. Happy propagating!
Resource: