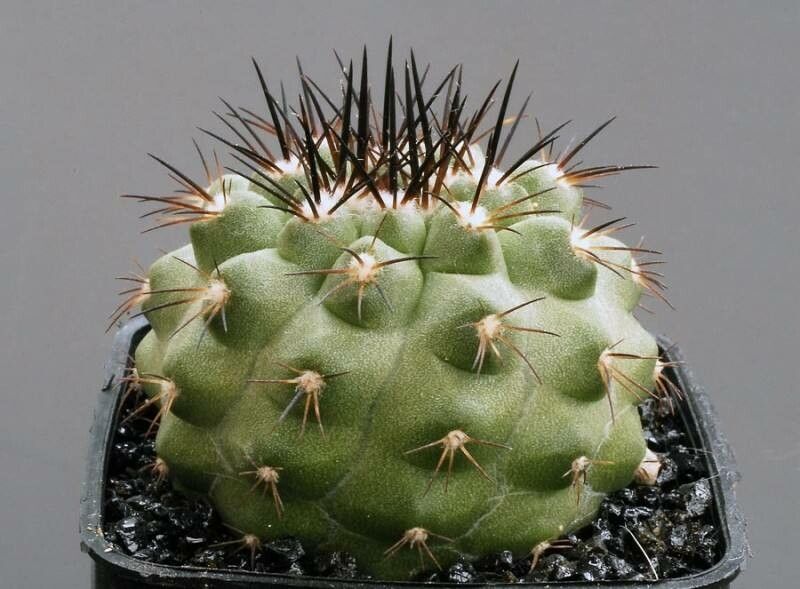
Oh, Copiapoa angustiflora! If you’ve ever marveled at these sculptural beauties, with their fuzzy crowns and often captivating colors, you’re not alone. They have a certain quiet charm that just draws you in. And the joy of growing your own from scratch? Pure gardening bliss.
While not as straightforward as, say, a pothos, propagating Copiapoa angustiflora is absolutely achievable, and honestly, quite rewarding. It’s a wonderful way to expand your collection or share these unique succulents with fellow plant lovers. I find it’s best suited for those who have a little bit of experience under their belt, but with a little care and attention, you can certainly succeed.
The Best Time to Start
For Copiapoa angustiflora, spring is truly your best friend. As the days get longer and warmer, the plants are actively growing, which means they’re primed for producing new shoots and, importantly, developing roots. You’ll want to start this process when your parent plant is at its most vigorous, usually after its winter dormancy.
Supplies You’ll Need
Gathering your materials beforehand makes the whole process go so much smoother. Here’s what I typically have on hand:
- Well-draining potting mix: A cactus and succulent mix is a must. I often amend mine with extra perlite or pumice for even better drainage.
- Sharp, clean pruning shears or a knife: For making clean cuts. Sterilize them with rubbing alcohol to prevent disease.
- Rooting hormone (optional but helpful): For encouraging faster root development.
- Small pots or seedling trays: Clean and with drainage holes, of course!
- Labels or plant markers: So you don’t forget what you planted where!
- Watering can with a fine rose or a spray bottle: For gentle watering.
- A warm, bright location: Think a windowsill that gets good indirect light.
Propagation Methods
Copiapoa angustiflora can be propagated from offsets (pups) or stem cuttings. Offsets are the easiest route, as they already have a small root system.
1. Propagating from Offsets (Pups):
This is my go-to method for Copiapoa.
- Gently remove the offset: Look for pups growing from the base of the parent plant. Using a clean, sharp knife or even gently wiggling it, carefully detach the pup from the mother plant. Try to get as much of its base, where roots will form, as possible.
- Allow it to callous: This is crucial! Place the offset in a dry, airy spot for a few days to a week. You want the cut surface to dry and form a protective callus. This prevents rot when it’s planted.
- Plant the offset: Once calloused, gently plant the offset in your prepared well-draining soil mix. Don’t bury it too deep; just enough to keep it upright.
- Wait before watering: Resist the urge to water immediately. Wait another week or so, then water very sparingly.
2. Propagating from Stem Cuttings (Less Common but Possible):
This method is a bit more involved for Copiapoa, as they tend to be slower growing.
- Take a cutting: Select a healthy stem or a portion of the main body. Use your sterilized shears to make a clean cut.
- Allow it to callous: Just like with offsets, the cut end needs to dry and form a callus. This can take a week or even longer, depending on the thickness of the cutting. Patience is key here!
- Plant the cutting: Once calloused, insert the cut end into your well-draining soil mix. You can use rooting hormone on the cut end before planting if you choose.
- Water with extreme caution: This is where things can get tricky. Wait for a good while before the first watering – maybe two weeks after planting. When you do water, do so very lightly. You want the soil to be barely moist.
The “Secret Sauce” (Pro Tips)
Here are a couple of things I’ve learned over the years that make a difference:
- Bottom Heat is Your Friend: If you can, especially for stem cuttings, placing the pots on a gentle heat mat can significantly speed up root formation. It mimics the warmth of spring and encourages activity below the soil surface.
- The “Finger Test” for Watering: Forget schedules! When you think it’s time to water, stick your finger about an inch into the soil. If it feels dry, water lightly. If there’s any hint of moisture, wait. Overwatering is the number one enemy of succulent propagation.
Aftercare & Troubleshooting
Once you see signs of new growth or feel a gentle tug when you lightly pull on the offset (testing for roots), you can gradually start watering a bit more regularly, but always allow the soil to dry out between waterings. Think of it as building up its confidence!
The biggest challenge you’ll face is rot. If your cutting or offset starts to look mushy, discolored, or turns black at the base, it’s a sign of rot. Usually, this is due to too much moisture. If you catch it early, you might be able to cut away the rotted part and try again, ensuring better drying and less water.
A Encouraging Closing
Growing these specialized cacti can feel like a bit of an art form, can’t it? Be patient with your little Copiapoa. They operate on their own timeline, and sometimes it takes a while for those roots to appear. But when they do, and you see that new growth emerge, the feeling of accomplishment is just fantastic. Enjoy the process, observe your plants, and happy propagating!
Resource: