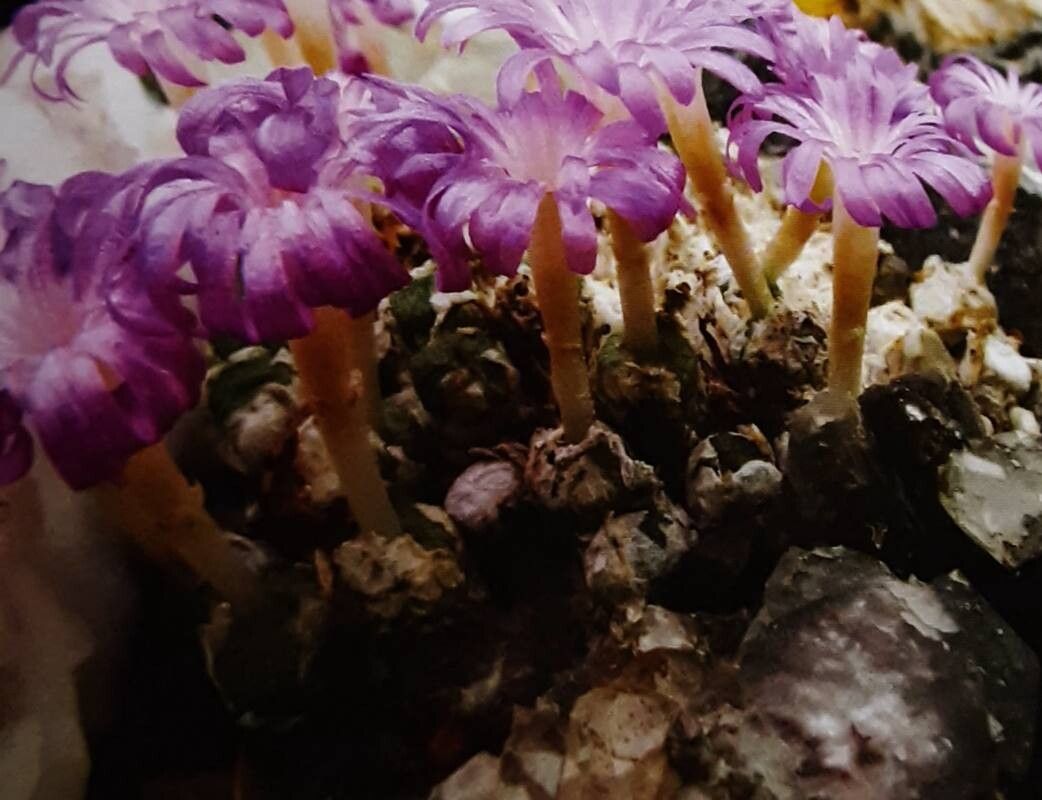
Oh, hello there! Come on in, grab a cuppa. Today, we’re diving into the delightful world of Conophytum ectypum. If you’ve ever seen these little living stones, you know what I mean – their quirky charm is just captivating, isn’t it? Think of them as tiny, perfectly formed sculptures straight from nature. Propagating them is honestly one of the most satisfying things you can do. It’s like growing your own little collection from scratch. Now, I won’t lie, Conophytum ectypum can be a tad fussy for absolute beginners. They like things just so, but with a bit of know-how, you’ll be well on your way to success!
The Best Time to Start
For Conophytum ectypum, the sweet spot for propagation is quite simply their active growing season. This usually falls in late spring and early summer. You want to catch them when they’re plump and full of life, ready to put out new growth. Trying to propagate them when they’re dormant, usually in the heat of summer or the depths of winter, is a recipe for disappointment. Trust me on this one!
Supplies You’ll Need
Here’s what you’ll want to have on hand before we get started:
- Well-draining succulent or cactus mix: I like to make my own by combining equal parts perlite, coarse sand, and a quality potting mix.
- Sharp, sterile pruning shears or a clean knife: Precision is key to a clean cut.
- Small pots or seed trays with drainage holes: About 2-3 inches in diameter is perfect.
- Rooting hormone (optional but recommended): This little helper can give your cuttings a boost.
- A fine-tipped watering can or spray bottle: For gentle watering.
- A clean, dry surface: Like a paper towel or a shallow tray.
- A pencil or plant tag: For labeling your precious propagations.
Propagation Methods
There are a couple of ways we can go about this, but for Conophytum ectypum, division is usually the most reliable, especially if your plant is already a nice clump.
Propagation by Division
This is my go-to method for Conophytum ectypum. It’s really about separating the plant into smaller, manageable pieces.
- Gently remove the parent plant from its pot. You want to be as gentle as possible to avoid damaging those delicate roots.
- Carefully brush away excess soil. You’re looking for natural divisions where the plant has already started to split. Sometimes, you can see where a new body is beginning to emerge from the old one.
- Using your clean fingers or a small, blunt tool (like a plastic plant label), gently tease apart the individual bodies. If they are very tightly joined, you might need to use your sterile pruning shears or knife to make a clean cut. Aim to get a piece that has at least one or two bodies and some intact root system.
- Allow the cut surface to callus over. This is a crucial step! Place the divided pieces on a dry paper towel or in a shallow, empty tray in a bright, airy spot out of direct sunlight for 2-3 days. This allows the cut to dry and form a protective scab, preventing rot when you plant it.
- Pot your new divisions. Once callused, gently plant each division into its own small pot filled with your well-draining succulent mix. Bury the bottom part of the body slightly in the soil, ensuring good contact with the substrate.
- Wait to water! This is the hardest part. Do not water immediately. Wait at least another week after planting. This gives any tiny, disturbed roots time to heal.
The “Secret Sauce” (Pro Tips)
Now, here are a few little tricks I’ve picked up over the years that make a real difference:
- Don’t overcrowd your pots. Give each new division a little space to breathe and grow. Overcrowding can lead to poor air circulation and encourage fungal issues.
- Humidity is your friend, but not too much. For the initial callusing period, good air circulation is more important. Once they’re potted, a light misting can be beneficial, but ensure the pots are drying out between waterings. I often place my potted divisions in a shallow tray with a bit of pebble top dressing – it provides a touch of humidity without waterlogging the roots.
- Bottom heat can be a game-changer. While not strictly necessary, placing your potted divisions on a seedling heat mat set to a low temperature (around 70-75°F) can really encourage root development. It mimics the warmth they’d feel in their natural habitat.
Aftercare & Troubleshooting
Once those little beauties are potted and have had a week to settle, you can begin watering very sparingly. Think of it as giving them a gentle sip, not a drowning. Water only when the soil is completely dry. You’ll know you’re on the right track when you see new growth appearing, or the bodies look plumper and more vibrant.
The most common issue you’ll encounter is rot. If you see a division turning mushy, discolored (often brown or black), or collapsing, that’s a bad sign. This usually means too much moisture, poor drainage, or not allowing it to callus properly. If you catch it early, you can try to salvage the healthy parts by cutting away the rotted bits and letting them callus again, but often, a rotted plant is a goner.
A Encouraging Closing
Growing Conophytum ectypum from division is a journey. Be patient. These little plants grow at their own pace. Don’t get discouraged if it takes a while for them to establish. Celebrate every bit of new growth. Enjoy the process of nurturing these unique treasures into your own thriving collection. Happy growing!
Resource:
https://identify.plantnet.org/k-world-flora/species/Conophytum%20ectypum%20N.E.Br./data