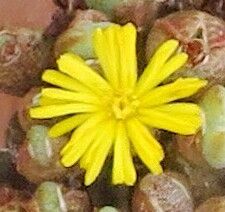
Oh, hello there! Come on in and grab a mug. I’m so glad you’re interested in Conophytum bilobum. These little gems are like tiny, living sculptures, aren’t they? Their split tops, often a deep russet or vibrant green, just beg to be admired. Propagating them is a truly satisfying endeavor, and while they might have a reputation for being a bit fussy, I promise, with a little know-how, you’ll be well on your way to having a whole collection. Don’t let their delicate appearance intimidate you!
The Best Time to Start
For Conophytum bilobum, the magic time to think about propagation is during its active growing season. For most of us, this means late spring and early summer. You’ll notice the plants plump up and show new growth. Trying to propagate when they’re dormant or stressed is just asking for disappointment. We want them to be full of life and ready to get going!
Supplies You’ll Need
Here’s what you’ll want to have on hand before you get your hands dirty:
- Well-draining soil mix: This is crucial. I use a blend of pumice, coarse sand, and a tiny bit of coco coir. Many succulent or cactus mixes work well, but always feel free to add more grit.
- Sharp, clean pruning shears or a razor blade: For making clean cuts.
- Rooting hormone (optional but helpful): Especially for encouraging quicker root formation.
- Small pots or trays: Terracotta pots are great because they breathe.
- A fine-tipped watering can or spray bottle: For gentle watering.
- A shady spot: To keep your new propagations from scorching.
- Labels and a pen: To keep track of what you’ve done!
Propagation Methods
Conophytum bilobum is primarily propagated through offsets or division. They don’t typically produce stem cuttings in the way a leafy succulent might.
-
Separating Offsets (The Easiest Way!)
- When your Conophytum bilobum clumps up, you’ll often see smaller baby plants, called offsets, forming at the base of the parent plant.
- Wait until the parent plant is actively growing so the offset has the best chance to establish itself.
- Gently tease the soil away from the base of the offset.
- With a bit of gentle wiggling and perhaps a tiny bit of levering with a clean tool, you should be able to separate the offset from the parent. Aim to get as many roots attached to the offset as possible. If a few roots break, don’t fret too much.
- Let the separated offset callus over for a day or two in a dry, shady spot. This prevents rot.
- Plant the callused offset into your well-draining soil mix. Don’t bury it too deep; just firm the soil around its base.
- Resist the urge to water immediately. Wait at least a week, and then water very sparingly.
-
Division (For Larger Clumps)
- If your Conophytum bilobum has become a dense clump, you might want to divide it.
- Gently remove the entire clump from its pot.
- Carefully brush away as much of the old soil as you can to expose the roots.
- Using your clean shears or razor blade, carefully slice through the clump to create smaller sections. Ensure each section has some of the original body and roots.
- Allow each divided section to callus over for a couple of days in a dry, shaded area.
- Pot each division into its own small pot with fresh, free-draining soil.
- Again, wait a week or so before giving them their first drink, and keep watering light.
The “Secret Sauce” (Pro Tips)
Here are a couple of things I’ve learned over the years that really make a difference:
- Don’t let the leaves touch the soil immediately after planting. When you first pot up your offset or division, I like to give them a light dusting of soil, but I avoid pressing it down too firmly. This helps prevent the base of the plant from staying too wet, which is a fast track to rot.
- Bottom heat is your friend! If you have a bit of a cooler spot in your house, placing your pots on a seed-starting heat mat (set on its lowest setting) can really encourage root development. It mimics the warmth of summer soil and gives those little roots a nudge. Just make sure the heat isn’t too intense!
Aftercare & Troubleshooting
Once your Conophytum begins to show signs of settling in – perhaps a bit of plumpness or even a tiny new growth nub – you can start watering a little more regularly, but always err on the side of caution. Let the soil dry out almost completely between waterings.
The biggest enemy here is rot. If you see signs of mushy tissues, discoloration, or the plant collapsing, it’s likely rot. This usually happens from overwatering or poor drainage. If you catch it early, you might be able to salvage a healthy section by cutting away the rot and letting the clean part callus over again. When in doubt, underwater.
A Encouraging Closing
Propagating Conophytum bilobum is a journey, and like all good gardening endeavors, it requires patience and observation. Don’t be discouraged if your first attempt isn’t perfect. Every plant is a little lesson. Enjoy the process, celebrate the small victories, and before you know it, you’ll have a beautiful cluster of these captivating little plants. Happy growing!
Resource:
https://identify.plantnet.org/k-world-flora/species/Conophytum%20bilobum%20(Marloth)%20N.E.Br./data