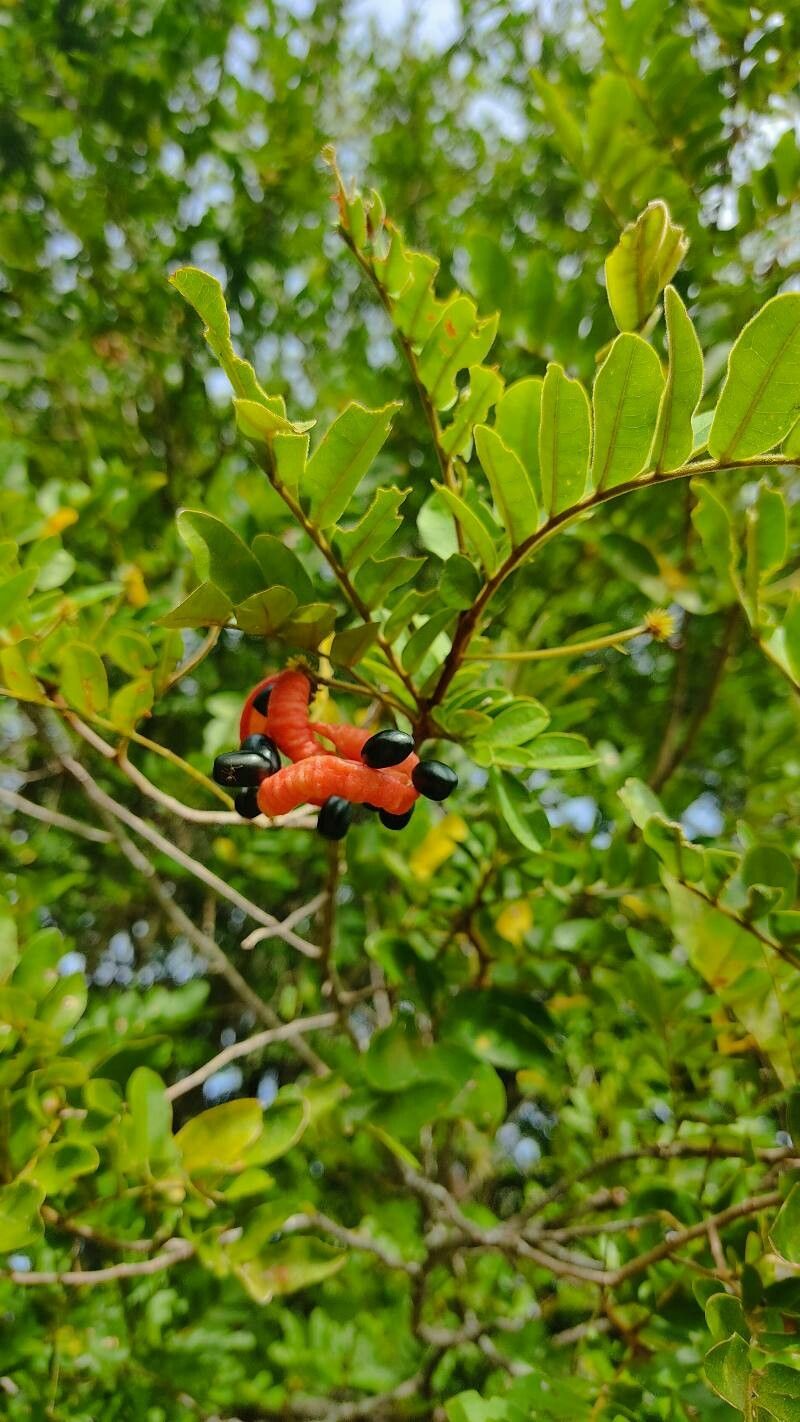
Hello fellow plant lovers! I’m so excited to talk to you today about one of my absolute favorites: Cojoba rufescens. This beautiful specimen, with its delicate, fern-like foliage and charming habit, brings a touch of the tropics right into our homes. And the best part? You can easily multiply this beauty to share with friends or fill every sunny windowsill you have! While it’s not the easiest plant for a complete beginner, with a little patience and these tips, you’ll be propagating your own Cojoba rufescens in no time. It’s truly one of those projects that fills you with a sense of accomplishment.
The Best Time to Start
For the highest success rate, I always recommend propagating Cojoba rufescens during its active growing season. This is typically in the late spring and early summer. The plant has more energy at this time to put into root development, giving your cuttings a real head start. Waiting until your plant is robust and healthy isn’t a bad idea either; a strong mother plant means stronger cuttings.
Supplies You’ll Need
Gathering your tools beforehand makes the whole process smooth and enjoyable. Here’s what I always have on hand:
- Sharp Pruning Shears or a Clean Knife: For taking clean cuts.
- Potting Mix: A well-draining mix is crucial. I like to use a blend of peat moss, perlite, and a bit of compost. You can also find specific “seed starting” or “propagation” mixes that work wonderfully.
- Small Pots or Seedling Trays: Make sure they have drainage holes!
- Rooting Hormone (Optional but Recommended): This really speeds up root formation. Look for one formulated for stem cuttings.
- Plastic Bags or a Clear Propagator: To create a humid environment.
- Spray Bottle: For misting.
- Labels and a Marker: To keep track of your cuttings.
Propagation Methods
My go-to method for Cojoba rufescens is stem cuttings, as it’s quite reliable.
Stem Cuttings
- Select Your Cuttings: On your healthy, established plant, identify non-flowering, semi-hardwood stems. These are usually stems that are green but have started to firm up a little. Look for stems that are about 4-6 inches long.
- Make the Cut: Using your sharp pruning shears or knife, make a clean cut just below a leaf node. A leaf node is where a leaf meets the stem – this is where roots are most likely to emerge.
- Prepare the Cutting: Gently remove the lower leaves, leaving about 2-3 leaves at the top. This prevents leaves from rotting when they sit in the soil or water. If the remaining leaves are very large, you can even cut them in half crosswise to reduce water loss.
- Apply Rooting Hormone (If Using): Dip the cut end of the stem into your rooting hormone powder, tapping off any excess.
- Plant Your Cuttings: Fill your small pots with your moistened propagation mix. Make a small hole in the center of the soil with a pencil or your finger. Insert the cut end of the stem into the hole, and gently firm the soil around it.
- Create a Humid Environment: Water the soil lightly until it’s evenly moist but not soggy. Then, cover the pots with a clear plastic bag or place them in a propagator. This traps humidity, which is vital for cuttings to root. You can use stakes to keep the bag from touching the leaves.
- Slightly Open for Air: Once a day, lift the bag or open the propagator for a few minutes to allow for air circulation and prevent fungal issues.
The “Secret Sauce” (Pro Tips)
Here are a couple of things I’ve learned over the years that can make a big difference:
- Don’t Let Leaves Touch the Water (If Using Water Propagation): While I primarily focus on soil cuttings for Cojoba as I find it more reliable, if you do try water propagation with this plant, be extra vigilant about ensuring no leaves are submerged. They will rot quickly and can infect the entire cutting.
- Bottom Heat is Your Friend: If you put your potted cuttings in a slightly warmer spot, like on a heat mat designed for plants or even on top of a gently warm refrigerator, it can significantly speed up root development. It mimics the warmth that comes up from the soil in the ground during the growing season.
Aftercare & Troubleshooting
Once your cuttings have rooted, you’ll start to see new growth! This is a good sign. You’ll likely see little white roots poking out of the drainage holes, or you’ll feel some resistance when you gently tug on the cutting.
- Transitioning: Once rooted, gradually acclimatize your new plants to normal conditions. This means slowly increasing their exposure to fresh air and reducing humidity over a week or two before removing the plastic bag entirely.
- Watering: Continue to water them as you would an adult Cojoba rufescens, keeping the soil consistently moist but not waterlogged.
- Fertilizing: Wait a few weeks after the new growth appears before offering a diluted liquid fertilizer.
- Rot: The most common sign of failure is rotting. If your cuttings turn black and mushy, it’s usually due to too much moisture combined with poor air circulation. Make sure your soil is well-draining, and don’t be afraid to open up that propagator for air! Yellowing leaves that then drop can mean insufficient light or stress.
Keep Going!
Don’t get discouraged if your first few attempts aren’t perfect. Gardening is an act of learning and patience. Each plant you grow, each cutting you take, teaches you something new. Enjoy the process, celebrate your successes, and before you know it, you’ll have a whole collection of Cojoba rufescens to admire and share. Happy propagating!
Resource: