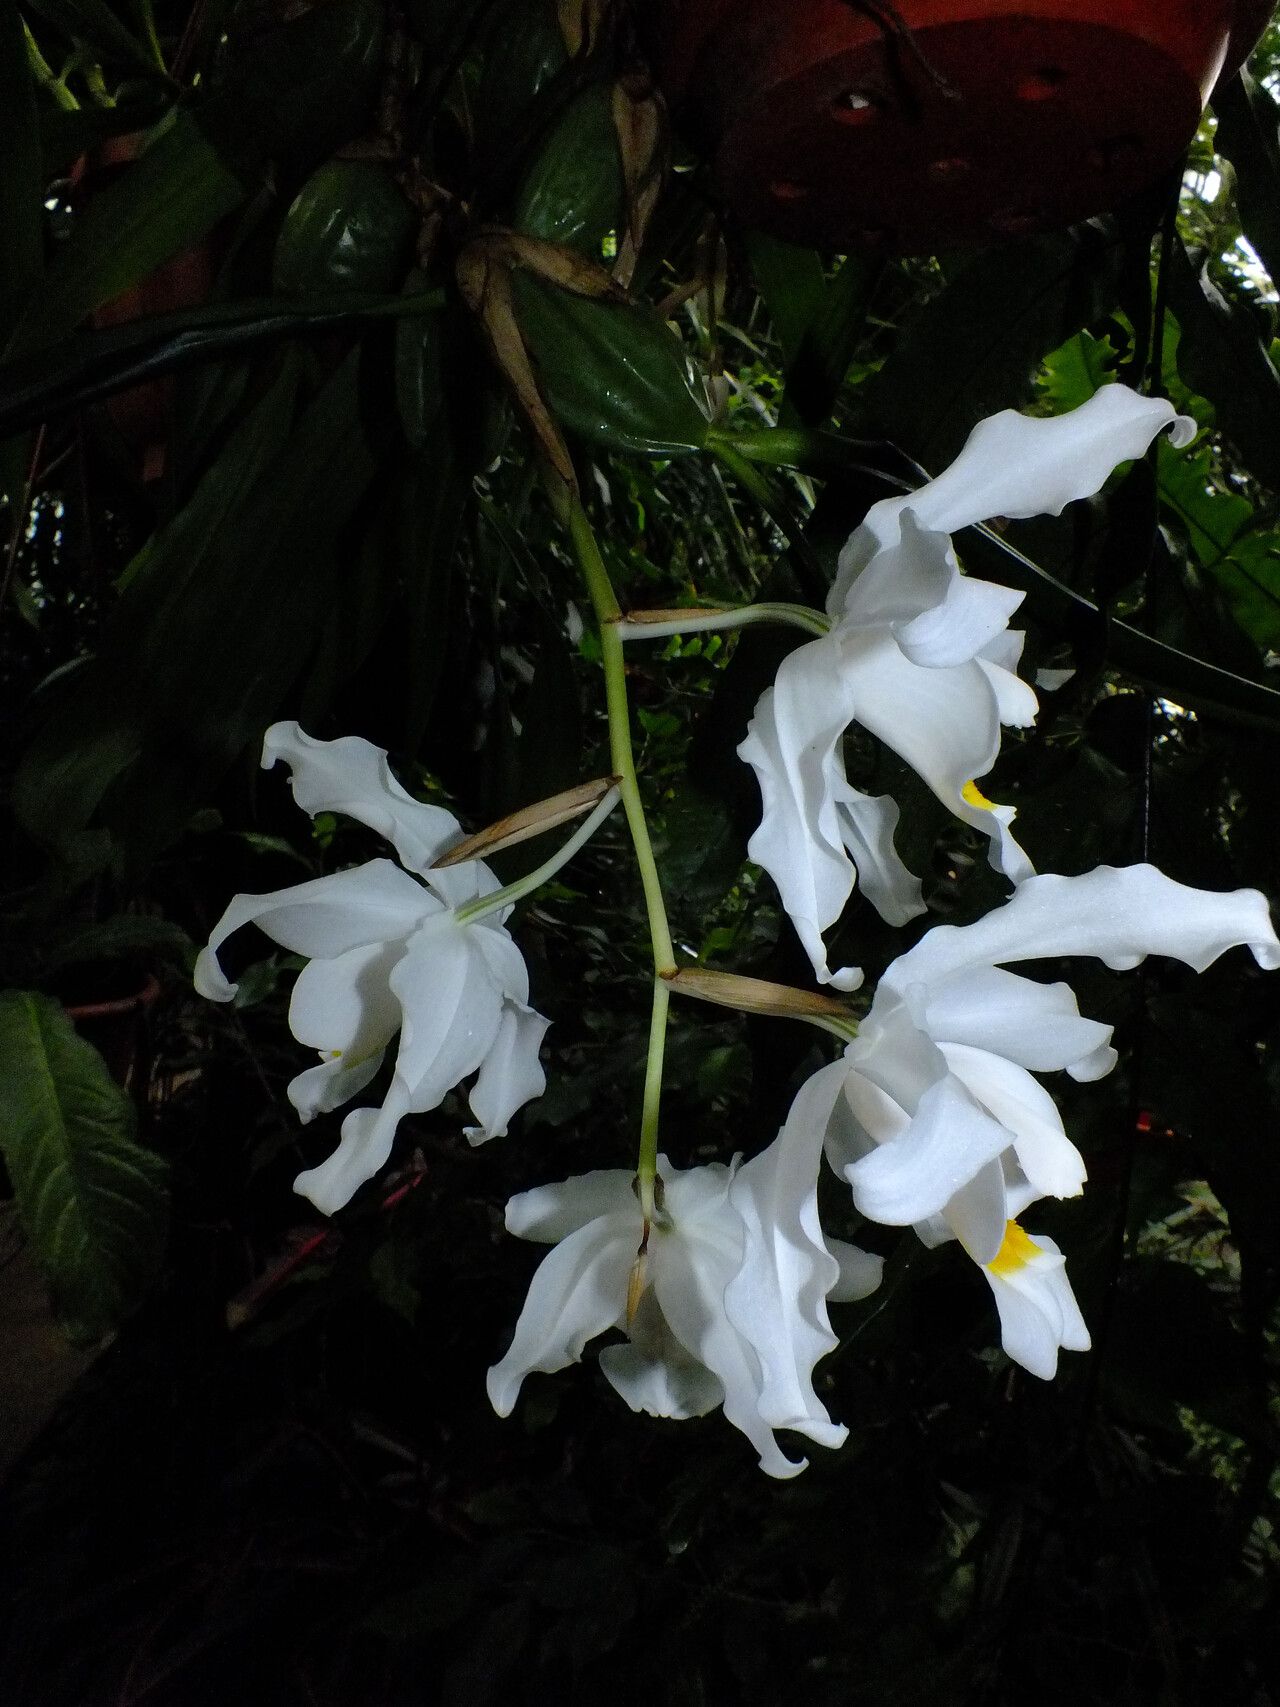
Oh, the Coelogyne cristata! If you’re a lover of delicate, cascading beauty, you’ve probably fallen for this orchid. Those ethereal white flowers, with their fringed, ruffled lips, always seem to bring a touch of elegance to any space. And the best part? You can multiply that beauty! Propagating this orchid can be incredibly rewarding, though I’ll be honest, it’s not quite as straightforward as, say, a pothos. It requires a bit of patience and understanding, but don’t let that daunt you. With a little guidance, you can absolutely succeed.
When to Get Your Hands Dirty
Timing is everything, isn’t it? For Coelogyne cristata, the ideal time to propagate is right after it finishes flowering. You’ll notice the blooms have faded, and the plant is entering a period of active growth. This usually happens in late spring or early summer. Starting when the plant is ready to put on new energy practically guarantees you’re setting your new babies up for success.
Your Propagation Toolkit
Gathering your supplies beforehand makes the whole process smoother. Here’s what you’ll want to have on hand:
- Sharp, sterilized pruning shears or a clean knife: Your best friend for making clean cuts that heal well.
- Orchid potting mix: A good quality, airy mix is crucial. I usually lean towards a blend of bark, perlite, and sphagnum moss.
- New pots: Small, clean pots that are just big enough for your new divisions.
- Optional: Rooting hormone (powder or gel): While not strictly necessary for Coelogyne, it can give a gentle nudge.
- Optional: Humidity tray or plastic bag: To keep humidity levels high for new divisions.
Making More Magic: Propagation Methods
For Coelogyne cristata, division is by far the most common and successful method. These orchids grow in pseudobulbs, and you can gently separate them.
Here’s how I do it:
- Gently Remove from Pot: Carefully take the orchid out of its current pot. If it’s tightly bound, you might need to gently break away some of the old potting material.
- Inspect the Rhizome: Look at the part of the stem connecting your pseudobulbs, called the rhizome. This is where new growth happens.
- Identify Sections: You want to divide the plant into sections that have at least 2-3 healthy pseudobulbs and some good-looking roots. Sometimes, you’ll find older, leafless pseudobulbs. These are often still viable and can contribute to the division’s success.
- Make the Cut: Using your sterilized shears or knife, cut through the rhizome between the sections you want to separate. Make sure each division has enough roots to support itself.
- Trim Old Roots (Optional): If you have very old, woody roots, you can trim them back a bit to encourage new root growth.
- Potting Up: Place each division into its new, clean pot. Tuck the potting mix in gently around the roots, ensuring the pseudobulbs are sitting on top of the mix, not buried. The new growths should be facing where you want them to go.
My Little “Secret Sauce”
Over the years, I’ve learned a few tricks that seem to make all the difference.
- The “Rest” Period is Key: Don’t be tempted to divide right after a flowering spurt. Give the plant a week or two to settle down and start its new growth phase. This means it’s got energy to share!
- Don’t Drown Your Babies: After potting, water very sparingly. These divisions are sensitive and prone to rot. I usually wait a few days before the first light watering, just enough to moisten the mix. Then, I let it dry out considerably between waterings until I see definite new root or growth activity.
- A Little Warmth Helps: If you have a young division that seems a bit hesitant, placing it on a heat mat set to a low temperature (around 70-75°F or 21-24°C) can really encourage root development. It mimics that natural warmth they crave.
Nurturing Your New Sprouts & What to Watch For
Once your divisions are potted, the real fun (and vigilance!) begins.
- Humidity is Your Friend: Young divisions need higher humidity to thrive. You can achieve this by placing their pots on a humidity tray (a tray filled with pebbles and water, making sure the pot isn’t sitting directly in the water) or by loosely tenting them with a clear plastic bag. Remember to air them out daily to prevent fungal issues.
- Light and Watering: Place your new divisions in bright, indirect light. Water only when the potting mix is nearly dry. It’s better to underwater slightly than to overwater these new babies.
- Signs of Trouble: The most common problem is rot. If you see pseudobulbs becoming mushy, black, or falling off easily, it’s a sign of too much moisture. If a division shows no signs of new growth after several months, don’t despair! Some can be slow starters. However, if you see significant leaf yellowing and no root activity, it might not be happy.
Go Forth and Propagate!
Taking cuttings or dividing plants can feel a bit daunting at first, but it’s such a gratifying way to expand your collection and share the orchid love. Be patient with your Coelogyne cristata divisions. They’re not instant gratification plants, but with a little care and understanding, you’ll be rewarded with more of their exquisite blooms before you know it. Enjoy the journey!
Resource:
https://identify.plantnet.org/k-world-flora/species/Coelogyne%20cristata%20Lindl./data