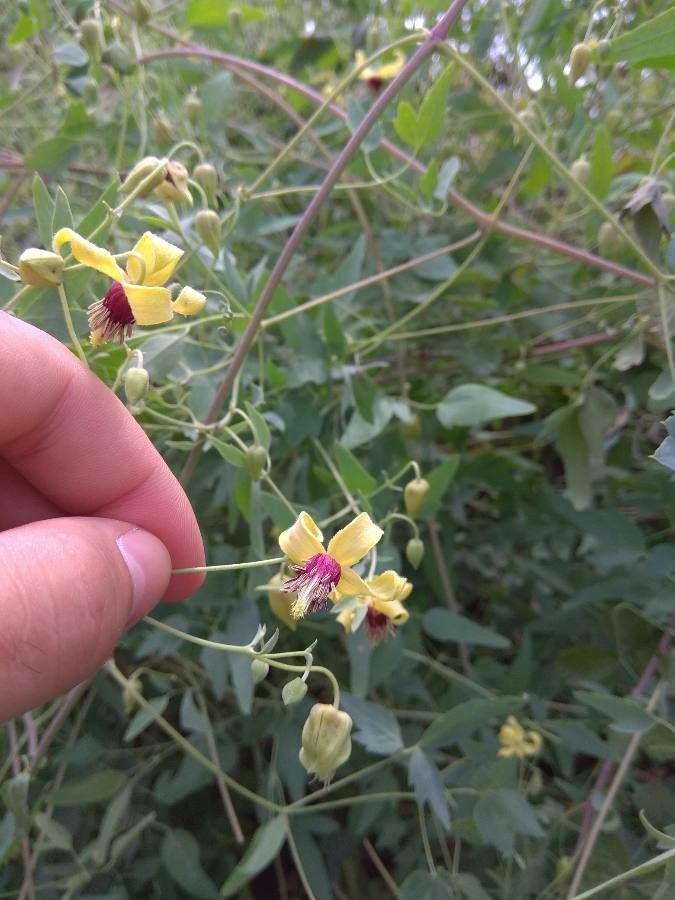
Hello, fellow garden enthusiasts! It’s so lovely to have you join me today. I’m excited to dive into the wonderful world of propagating Clematis glauca. This vine, with its delicate, often bluish-tinged foliage and charming, star-shaped flowers, is a true gem. For me, watching a new plant emerge from a tiny cutting or a division is pure magic. It’s a testament to life’s resilience and a deeply satisfying way to expand your garden without spending a fortune. Now, Clematis glauca can be a smidge particular, so it might not be the absolute first plant I’d suggest for someone brand new to propagating, but with a little patience and a few key steps, you’ll be well on your way.
The Best Time to Start
My golden rule for taking cuttings of Clematis glauca is late spring to early summer. This is when the plant is in its active growth phase, and you’ll be looking for semi-ripe wood. Think of it – the new growth from this year is starting to firm up, but it’s not yet woody and hard. This sweet spot gives your cuttings the best chance to root. You can also try layering in the summer, but cuttings are my preferred method for this particular clematis.
Supplies You’ll Need
Gathering your tools before you start is half the battle, isn’t it? Here’s what I always have on hand:
- Sharp pruning shears or a clean craft knife: For making precise cuts.
- Seedling trays or small pots (around 3-4 inches): Cleanliness is key here!
- A good quality potting mix: I prefer a blend that’s light and airy. A mix of peat moss, perlite, and a little bit of coarse sand works wonderfully. This ensures good drainage, which clematis absolutely adores.
- Rooting hormone: This is a little helper that encourages root development. I usually opt for a powder form.
- A clear plastic bag or a propagator lid: To create a humid environment for your cuttings.
- Watering can or spray bottle: For gentle watering.
- Labels and a pen: So you don’t forget what’s what!
- Optional: Bottom heat mat: This can really speed things up if you have a cool greenhouse.
Propagation Methods: Let’s Get Our Hands Dirty!
For Clematis glauca, my go-to method is stem cuttings. It’s reliable and yields great results if done correctly.
Taking Stem Cuttings:
- Select your plant: Find a healthy, vigorous Clematis glauca plant.
- Locate suitable stems: Look for those semi-ripe stems I mentioned. They should be flexible enough to bend slightly without snapping but firm enough to hold their shape. Aim for stems that are about pencil-thick.
- Make your cut: Using your clean shears or knife, take a cutting that’s about 4-6 inches long. Make the basal cut (the bottom cut) just below a leaf node (where a leaf attaches to the stem). This is where most of the rooting hormones are concentrated. For the apical cut (the top cut), take it about ¼ inch above a leaf node.
- Prepare the cutting: Gently remove the lower leaves, leaving just one or two leaves at the top. If the top leaves are very large, I often cut them in half horizontally. This reduces water loss through transpiration while still allowing for photosynthesis.
- Apply rooting hormone: Dip the cut end of the stem into your rooting hormone powder, tap off any excess.
- Pot up your cuttings: Fill your clean pots with your prepared potting mix. Make a hole with a pencil or your finger in the center of the soil. Insert the cutting into the hole, ensuring the leaf nodes are buried (this is where roots will emerge). Firm the soil gently around the cutting.
- Water gently: Water the soil thoroughly but gently. You don’t want to disturb the cutting.
- Create humidity: Cover the pot with a clear plastic bag (making sure it doesn’t touch the leaves) or place it in a propagator. Ventilate it daily for a few minutes to prevent fungal issues.
Water Propagation (for the adventurous!):
While I primarily use soil, some people have success with water.
- Follow steps 1-5 above, but omit the rooting hormone.
- Place the prepared cuttings in a clean jar or vase filled with fresh, clean water.
- Crucially, ensure that no leaves are submerged in the water. Any leaf in the water is a recipe for rot.
- Place the jar in a bright spot out of direct sunlight.
- Change the water every few days to keep it fresh and oxygenated.
- Once you see small roots forming (usually after a few weeks), you can carefully transplant them to soil using the potting method described above.
The “Secret Sauce” (Pro Tips)
Here are a few little tricks I’ve picked up over the years that make a big difference:
- Don’t be afraid of bottom heat! If you have a propagator or even just a sunny windowsill that gets warm, providing gentle bottom heat (around 70-75°F or 21-24°C) really encourages root development. It mimics the warmth of the soil on a lovely summer day and gives your cuttings a real boost.
- Think about “cleanliness is next to godliness.” I cannot stress enough how important it is to use sterile pots and tools. Clematis can be prone to fungal diseases, and starting with clean equipment gives your cuttings the best defense. A quick soak in a diluted bleach solution or a run through the dishwasher works wonders for pots.
- Mist, don’t soak: When misting your cuttings under a bag, a light, frequent misting is far better than drenching the soil. You want to maintain high humidity, not waterlogged conditions, which can lead to rot.
Aftercare & Troubleshooting
Once your cuttings have developed a good root system – you can gently tug on them, and they’ll feel firm, or you might see roots peeking out of drainage holes – it’s time for them to move into their own slightly larger pots. Continue to keep them in a bright, indirect light and maintain that consistent moisture. Gradually, over a week or two, you can begin to introduce them to more direct sunlight and start feeding them with a diluted liquid fertilizer.
The most common issue you might encounter is rot. If you see a cutting turning mushy or black at the base, it’s usually a sign of too much moisture and not enough air circulation or drainage. Unfortunately, these are usually beyond saving. If your cuttings look limp and sad, it could be they aren’t getting enough humidity, or they are drying out too quickly. Double-check your bag or lid is sealed well.
A Little Patience Goes a Long Way
Propagating plants is always a journey, and Clematis glauca is no exception. There will be times when things don’t go as planned, and that’s perfectly okay. Learn from it, adjust your approach, and keep trying! The joy of successful propagation is immense, and soon you’ll have beautiful new clematis vines to adorn your garden or share with friends. Happy growing!
Resource:
https://identify.plantnet.org/k-world-flora/species/Clematis%20glauca%20Willd./data