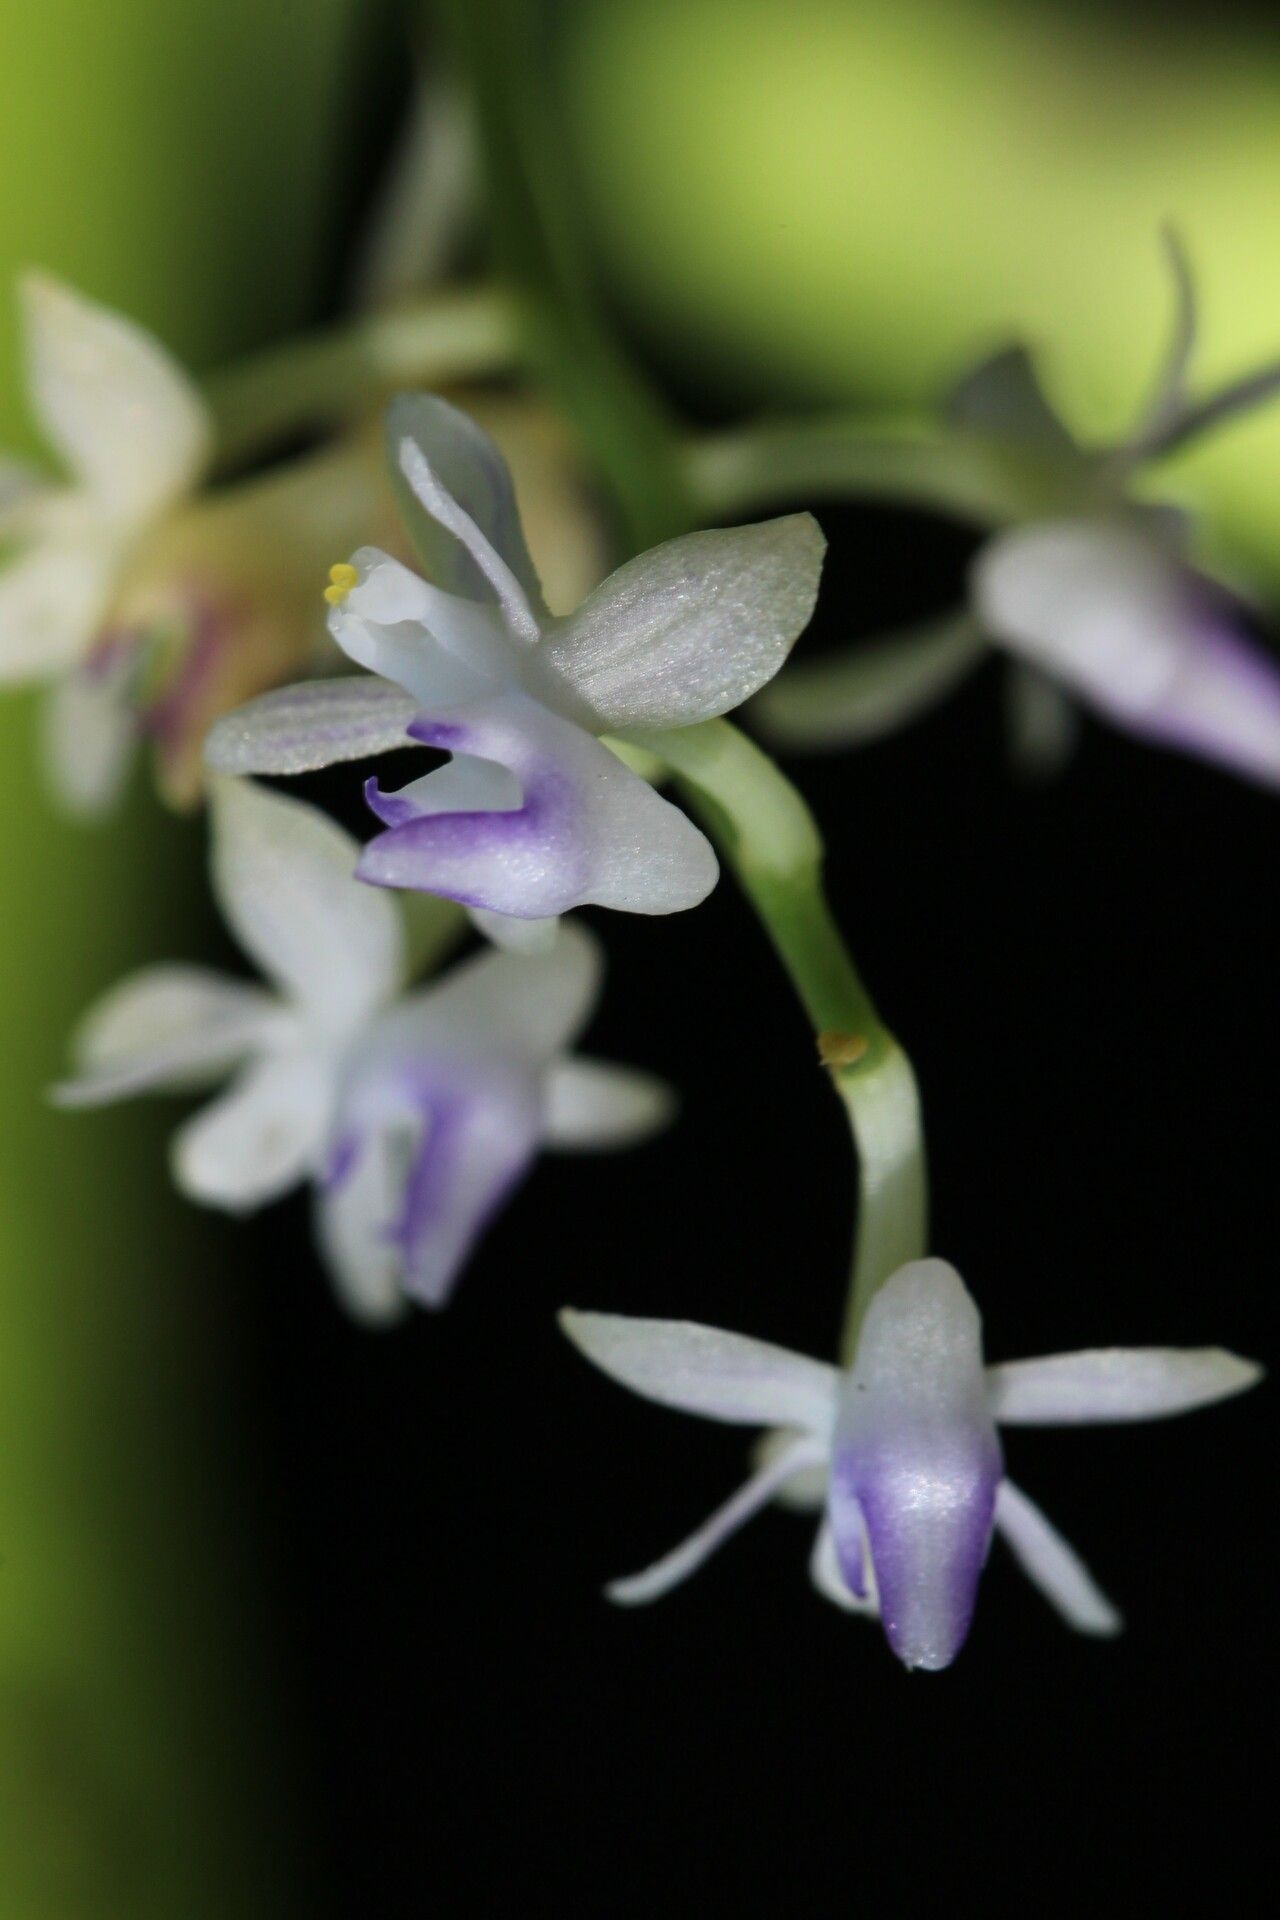
Oh, hello there, fellow plant enthusiast! Grab a mug of your favorite brew, and let’s chat about a truly special orchid: Cleisostoma firmulum. If you’ve ever been captivated by its delicate blooms and charming, almost whimsical growth habit, you’re not alone. Propagating this beauty is a wonderfully rewarding endeavor, a chance to multiply that joy and share it with others. Now, I’ll be honest, Cleisostoma firmulum isn’t quite a “throw it in water and forget it” kind of plant for a complete beginner. It requires a bit of thoughtful attention, but with these tips, you’ll be well on your way to success!
The Best Time to Start
Timing is everything when it comes to giving our green friends the best start. For Cleisostoma firmulum, the absolute sweet spot for propagation is during its active growing season. Think late spring through early summer. This is when the plant has plenty of energy stored up from the warmer weather and longer days, making it more receptive to forming new roots. You’ll be looking for healthy, mature stems that aren’t actively flowering.
Supplies You’ll Need
Before we dive in, let’s gather our toolkit. Having everything ready makes the process so much smoother:
- Sharp, sterile pruning shears or a clean razor blade: We want clean cuts to minimize stress and prevent disease.
- Orchid bark mix (fine grade): A well-draining bark mix is crucial for these epiphytic beauties.
- Optional: Rooting hormone: This can give your cuttings an extra boost, especially if you’re a bit nervous.
- Small pots or containers: Clean, breathable pots are best.
- Clear plastic bags or a propagator: To create a humid environment.
- Watering can with a fine rose or spray bottle: Gentle watering is key.
- Labels and a pen: To keep track of your precious new propagations.
Propagation Methods
Let’s get our hands dirty! The most reliable way to propagate Cleisostoma firmulum is through stem cuttings. It’s straightforward and gives you the best chance of success.
- Select Your Cutting: Look for a healthy, mature stem that has at least two or three pseudobulbs (those swollen nodes where leaves emerge). Avoid any stems that look limp, damaged, or are currently producing flowers.
- Make the Cut: Using your sterile shears or razor, make a clean cut just below a pseudobulb. This is where the magic of new root formation will happen. If you’re taking multiple cuttings, repeat this process, ensuring each cutting has at least two pseudobulbs.
- Prepare the Cutting: Gently remove any lower leaves that might be yellowing or look unhealthy. You want to expose those basal nodes. If you’re using rooting hormone, lightly dip the cut end into it, tapping off any excess.
- Planting: Fill your small pots with the fine-grade orchid bark mix. Make a small indentation in the center and carefully insert the cut end of your Cleisostoma firmulum stem. The bottom pseudobulb should be nestled into the bark, but not deeply buried. Give it gentle support so it stands upright.
- Create Humidity: Water the bark mix lightly. Then, place the pot inside a clear plastic bag, sealing it loosely to create a mini-greenhouse effect. Alternatively, you can use a propagator. This high humidity is vital for encouraging root development.
The “Secret Sauce” (Pro Tips)
Now for a couple of my favorite tricks that really make a difference:
- Avoid “Wet Feet” at All Costs: Even though we’re creating humidity, you never want the leaves of your cutting to sit in standing water. This is a fast track to rot. Ensure any condensation that forms on the bag drips down the sides, not onto the leaves.
- Gentle Bottom Heat is Your Friend: Orchids often appreciate a little warmth to kickstart root growth. Placing your propagator or bagged cuttings on a gentle seedling heat mat can significantly speed up the process. Just be sure it’s not too hot – we’re aiming for cozy, not cooked!
Aftercare & Troubleshooting
Once your cuttings are potted, the waiting game begins. Place them in a bright location that receives indirect light. Avoid direct sun, which can scorch delicate new growth. Water sparingly, only when the bark starts to feel dry. The goal is consistently moist but never waterlogged.
The first sign of success will be the appearance of new roots. These often emerge from the nodes near the base. You might also see a tiny new shoot, called a keiki, start to form. Be patient here; root development can take several weeks, sometimes even a couple of months.
If you notice mushy, blackened stems or leaves, that’s a sure sign of rot. Unfortunately, if rot sets in, it’s often hard to save the cutting. This usually happens from overwatering or poor air circulation. Don’t be discouraged if you lose one; just learn from it and try again!
A Encouraging Closing
Propagating Cleisostoma firmulum is a journey, and like any good gardening adventure, it requires patience and a gentle touch. Don’t be disheartened if your first attempt isn’t perfect. The satisfaction of seeing those tiny roots emerge and a new plant begin to thrive is absolutely immense. So, go ahead, get started, and enjoy the magic of bringing more of these lovely orchids into your world! Happy growing!
Resource:
https://identify.plantnet.org/k-world-flora/species/Cleisostoma%20firmulum%20Rchb.f./data