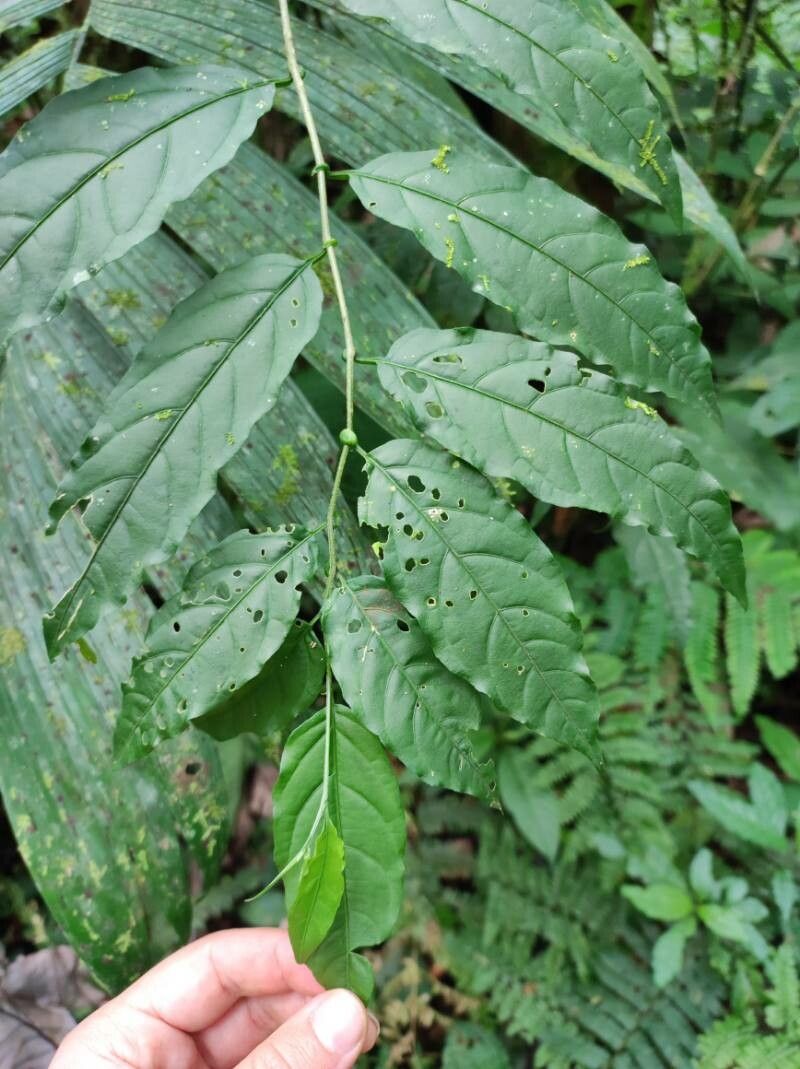
Well hello there, fellow plant lover! It’s so good to have you here. Today, we’re diving into the delightful world of propagating Cestrum fragile, also known as fragile cestrum or delicate cestrum. If you’ve ever admired those elegant, often fragrant blooms that cascade so beautifully, you’re in for a treat. Propagating these beauties is incredibly rewarding. You get to multiply your joy, share with friends, and fill your garden (or porch!) with even more of their charm. And I’ll let you in on a little secret: while some plants can be fussy, Cestrum fragile is actually quite forgiving, making it a wonderful project for beginners and seasoned gardeners alike.
The Best Time to Start
For the absolute best chance of success, I find that late spring or early summer is the sweet spot. This is when the plant is actively growing, and the new, healthy shoots are full of vigor. You’re looking for stems that are semi-hardwood – not brand new and floppy, but not old and woody either. Think of it like a pencil: firm, but with a little give. If you miss this window, don’t fret! You can often get away with taking cuttings in late summer if your climate allows for a long growing season.
Supplies You’ll Need
Gathering your supplies beforehand makes the process so much smoother. Here’s what I usually have on hand:
- Sharp pruning shears or a clean craft knife: For making clean cuts.
- Rooting hormone: A powder or gel. This really gives your cuttings a boost.
- A well-draining potting mix: I like a blend of peat moss, perlite, and coarse sand. Or, you can buy a commercial seed-starting mix.
- Small pots or propagation trays: With drainage holes, of course!
- Clear plastic bags or a propagation dome: To create a humid environment.
- Water: For misting or moistening your soil.
- Slow-release fertilizer (optional): For later on.
Propagation Methods
The easiest and most reliable way I’ve found to propagate Cestrum fragile is through stem cuttings. Here’s how we do it:
- Select your stems: Gently inspect your healthy Cestrum fragile. Look for those lovely semi-hardwood stems that are about 4-6 inches long and have a few sets of leaves. Avoid any stems with flowers or signs of stress.
- Make the cut: Using your clean shears or knife, make a clean cut just below a leaf node. A leaf node is where a leaf attaches to the stem – this is where the magic of root development often begins.
- Prepare the cutting: Carefully remove the lower leaves from the cutting, leaving just a few at the very top. This prevents them from rotting in the soil and helps the plant focus its energy on root production.
- Dip in rooting hormone: Lightly moisten the cut end of the stem, then dip it into your rooting hormone. Tap off any excess.
- Plant your cuttings: Fill your pots or trays with your prepared potting mix. Make a hole in the center with your finger or a pencil. Gently insert the cuttings, ensuring the leaf nodes are covered by the soil. You can usually fit several cuttings into one pot, giving them a little space.
- Water gently: Lightly water the soil to settle it around the cuttings.
Water propagation can also work, though sometimes it’s a bit less reliable for getting a robust root system. If you go this route: take your cuttings as described above, remove all but the top leaves, and place them in a jar of water. Make sure no leaves are submerged in the water, as this will cause them to rot. Change the water every few days. Once you see nice roots forming, you can transplant them into soil.
The “Secret Sauce” (Pro Tips)
Now, for a few little tricks that have made all the difference for me over the years:
- Bottom Heat is Your Friend: Cestrum fragile loves a little warmth to encourage root growth. If you have a heat mat designed for plants, place your pots on top of it. It’s not strictly necessary, but it can significantly speed up root development.
- Don’t Over-Water Initially: It’s tempting to drench the soil, but it’s better to keep it consistently moist but not waterlogged. Too much water at the start can lead to rot before roots even have a chance to form.
- Be Patient with Dormancy: Sometimes, especially if taking cuttings later in the season, you might not see immediate signs of growth. Don’t give up too soon! Give them at least 6-8 weeks, sometimes longer, to establish themselves.
Aftercare & Troubleshooting
Once you see new leaves appearing or feel a gentle tug when you lightly pull on a cutting, congratulations! Roots are forming.
- Gradual Acclimation: If you’ve been using a plastic bag or dome, start to gradually remove it over a few days to let your new plants adjust to the ambient humidity.
- Light and Water: Move your new plants to a spot with bright, indirect light. Continue to water when the top inch of soil feels dry.
- Transplanting: Once they have a good root system and are looking sturdy, you can transplant them into slightly larger individual pots.
- Troubleshooting: The most common issue is rot. If your cuttings look mushy or black, it’s usually a sign of overwatering or poor drainage. Discard any rotted cuttings. If you see no growth after a long time, it might just be that the cuttings weren’t viable or the conditions weren’t quite right. Don’t be discouraged; just try again!
A Little Encouragement
Propagating plants is a journey, and like any good garden project, it requires a bit of patience and a lot of love. Don’t be afraid to experiment and learn from each attempt. The joy of seeing a tiny cutting unfurl its first new leaf is truly special. So go ahead, gather your tools, take those cuttings, and happy propagating! You’ve got this.
Resource:
https://identify.plantnet.org/k-world-flora/species/Cestrum%20fragile%20Francey/data