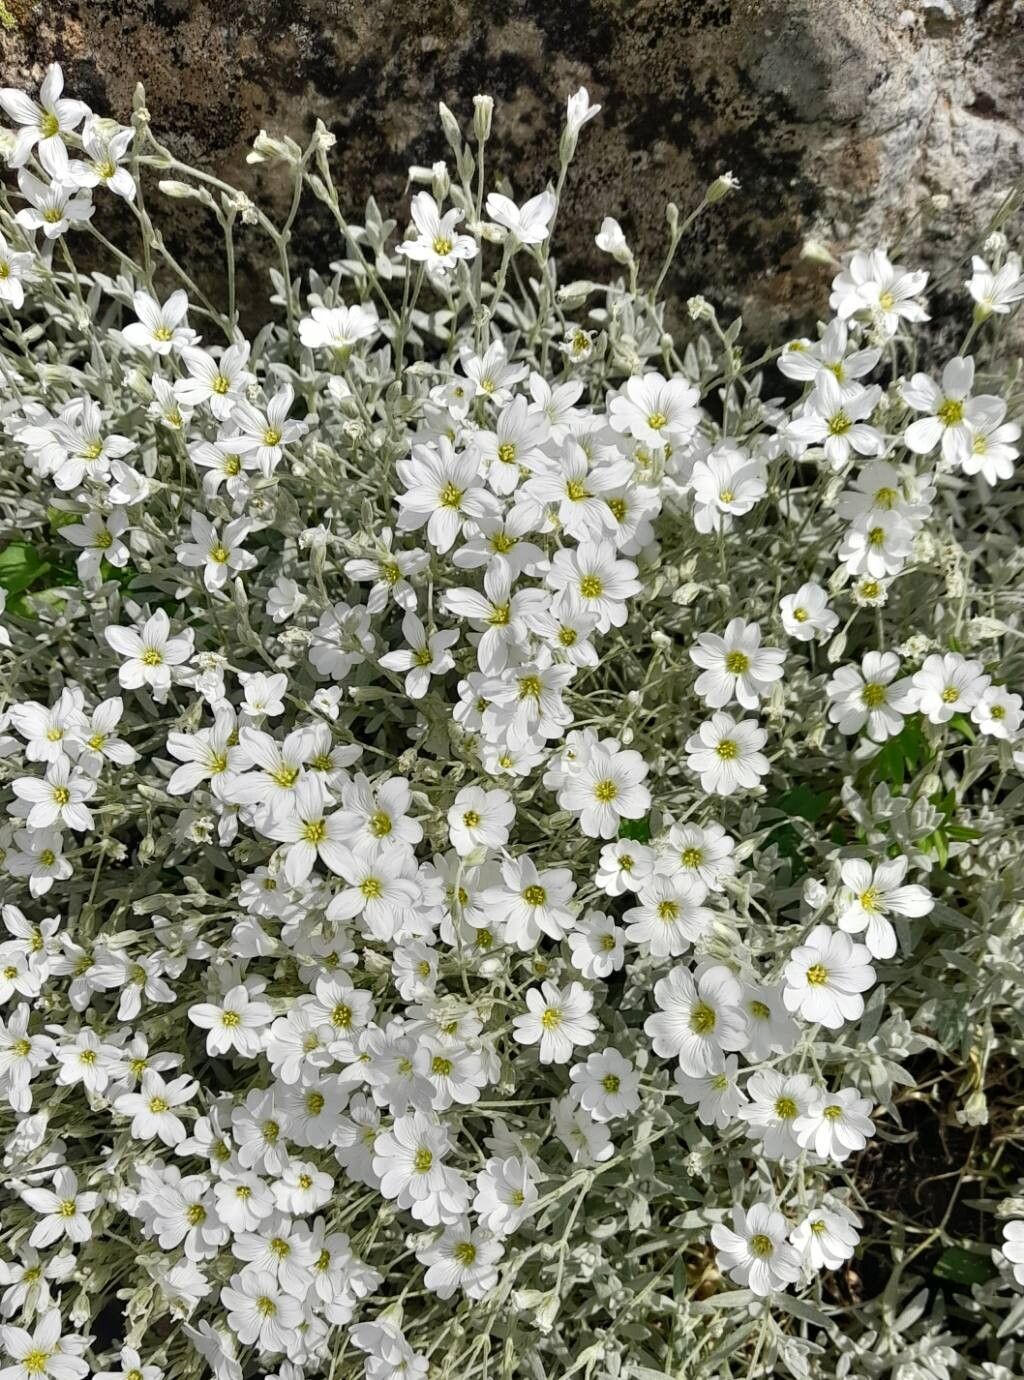
Hello fellow plant lovers! Today, I want to gush about a delightful groundcover that’s truly stolen my heart: Cerastium candidissimum, also known as Snow-in-Summer. Its clusters of pure white, star-shaped flowers truly pop against its silvery, fuzzy foliage. It’s a plant that brings such a vibrant, fresh feel to any garden, and the best part? It’s incredibly rewarding to propagate! Don’t be intimidated; while it has a few quirks, Cerastium candidissimum is quite forgiving, making it a wonderfully accessible plant for even newer gardeners looking to expand their collection.
The Best Time to Start
The sweet spot for propagating Cerastium candidissimum is definitely late spring to early summer, right after it’s finished its spectacular bloom. This is when the plant is brimming with energy and has plenty of healthy new growth to work with. Waiting until after flowering helps ensure you’re taking cuttings that are mature enough to root but still young and vigorous.
Supplies You’ll Need
Gathering your supplies beforehand makes the whole process so much smoother. Here’s what I usually have on hand:
- Sharp pruning shears or a clean knife: For taking precise cuttings.
- A well-draining potting mix: I often use a blend of equal parts peat moss, perlite, and coarse sand. If you can’t find coarse sand, regular potting soil with extra perlite works in a pinch.
- Small pots or containers: Seedling trays or 3-4 inch pots are perfect. Make sure they have drainage holes!
- Rooting hormone (optional but recommended): This little booster can significantly speed up root development.
- A watering can with a fine rose: To avoid disturbing your cuttings.
- A plastic bag or propagation dome: To create a humid environment.
- Labels: To keep track of what you’ve planted and when!
Propagation Methods
Cerastium candidissimum is wonderfully versatile, but my go-to methods are stem cuttings and division.
Stem Cuttings
This is a fantastic way to get several new plants from a single parent.
- Select your stems: Look for healthy, non-flowering stems that are about 4-6 inches long. They should be firm but still somewhat flexible.
- Make the cut: Using your sharp shears, make a clean cut just below a leaf node. A leaf node is where a leaf attaches to the stem. This is where roots are most likely to form.
- Prepare the cutting: Gently remove the lower leaves from the bottom 2-3 inches of the stem. You want to expose the nodes. You can leave the top few leaves.
- Apply rooting hormone: If you’re using it, dip the cut end of the stem into the rooting hormone powder, tapping off any excess.
- Plant your cuttings: Moisten your potting mix slightly. Make a small hole in the mix with a pencil or your finger and insert the cutting, ensuring the nodes you removed leaves from are buried. Gently firm the soil around it.
- Water gently: Give the pot a light watering.
- Create humidity: Cover the pot with a plastic bag or propagation dome. You can prop the bag up with a few skewers so it doesn’t touch the leaves.
Division
This is a super simple method, especially for established clumps.
- Dig carefully: In late spring or early summer, gently dig up your Cerastium candidissimum clump. You can do this after it’s finished flowering.
- Examine the root ball: You’ll likely see that it naturally pulls apart into smaller sections.
- Separate the divisions: Gently tease apart the clump into smaller pieces, making sure each division has a good amount of roots and some leafy top growth. If a section is really tough to separate, you can use a clean trowel or knife to help.
- Replant immediately: Plant each division into its new home or into pots with fresh, well-draining soil. Water them well after planting.
The “Secret Sauce” (Pro Tips)
Here are a few tricks I’ve picked up that really boost my success:
- Don’t let those leaves touch the water! This is especially crucial for water propagation if you choose that route, but it applies to cuttings too. If leaves sit in stagnant water, they’ll rot. Keep them elevated and ideally, on the dry side between waterings.
- Bottom heat is your friend: If you can, placing your pots or trays on a heat mat designed for seedlings can make a huge difference. Warmer soil temperatures encourage faster root development. I find it sped up my rooting time significantly.
- Don’t overcrowd: Give your cuttings a bit of breathing room in their pots. Overcrowding can lead to poor air circulation and increased risk of fungal issues.
Aftercare & Troubleshooting
Once your cuttings have developed a good root system – you’ll know they’re ready when you gentle tug on them and feel resistance, or see roots peeking out the drainage holes – it’s time to move them into their own pots if they aren’t already. Water them regularly, but make sure the soil dries out slightly between waterings. They love good drainage; soggy soil is their nemesis.
The most common issue you might encounter is rot. If your cuttings look mushy or black at the base, it’s usually a sign of too much moisture and not enough air circulation. Sadly, if rot sets in deeply, it’s hard to save them. Another sign things aren’t going well is if the leaves turn yellow and fall off before any roots appear. This can also point to overwatering or insufficient light. Just keep an eye on them, and don’t be discouraged if a few don’t make it. That’s gardening for you!
A Little Patience Goes a Long Way
Propagating plants is a journey, and Cerastium candidissimum is a delightful companion for that journey. Be patient, observe your little plantlets, and celebrate each sign of success. Soon, you’ll have a garden full of this enchanting Snow-in-Summer, and that’s a truly wonderful feeling. Happy gardening!
Resource:
https://identify.plantnet.org/k-world-flora/species/Cerastium%20candidissimum%20Correns/data