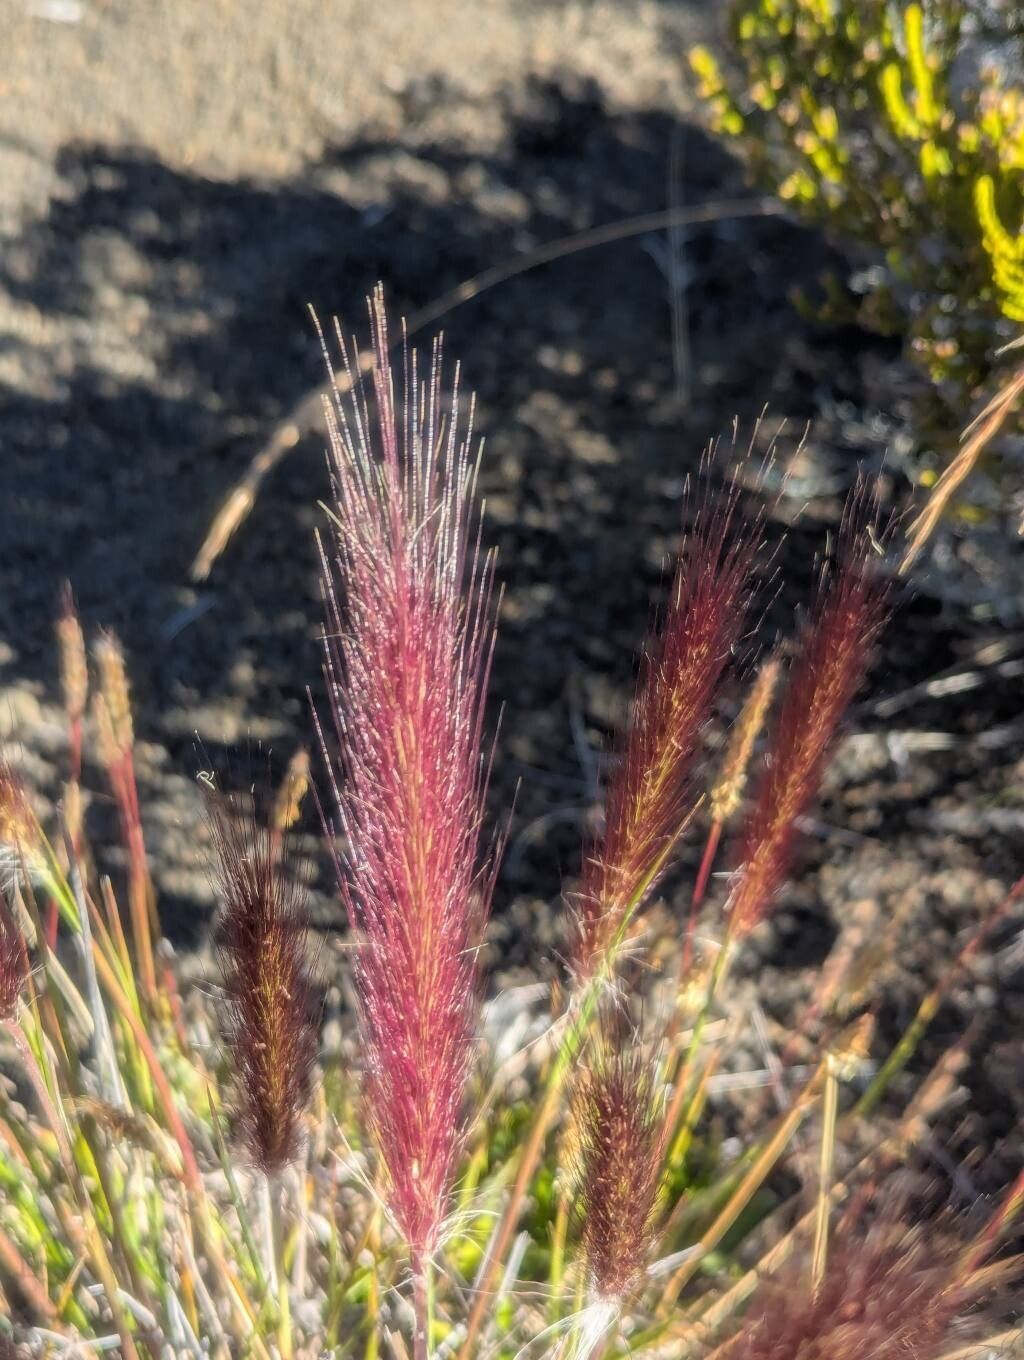
Hello fellow garden enthusiasts! I’m so excited to chat with you today about a plant that brings such delightful texture and movement to any landscape: Cenchrus cafer. You might know it by its more common name, African feather grass. Its airy plumes, swaying in the breeze like elegant dancers, are truly captivating. And guess what? Propagating this beauty is a surprisingly rewarding endeavor, even for those just dipping their toes into the gardening world. It’s not a finicky plant at all, making it a fantastic choice for beginners looking to expand their plant family.
The Best Time to Start
Spring is your best friend when it comes to propagating Cenchrus cafer. As the days start to lengthen and the soil warms up, everything is invigorated and ready to grow. Aim for late spring or early summer, after the last frost has passed. This is when the plant is actively producing new growth, giving you the best chance of success with your cuttings.
Supplies You’ll Need
For this propagation adventure, you’ll want to gather a few essentials:
- Sharp pruning shears or a clean knife: For making neat cuts.
- Rooting hormone (optional but helpful): A powder or gel that encourages root development.
- Well-draining potting mix: A good blend of potting soil, perlite, and coarse sand works wonders. You can also use a specialized seed-starting mix.
- Small pots or trays: With drainage holes, of course!
- Watering can with a fine rose: For gentle watering.
- Clear plastic bags or a propagator: To create a humid environment.
- Labels and a marker: So you don’t forget what you planted where!
Propagation Methods
There are a couple of straightforward ways to multiply your Cenchrus cafer. I find these two to be the most reliable and easy for home gardeners.
Stem Cuttings
This is my go-to method for Cenchrus cafer. It’s wonderfully efficient!
- Take your cuttings: Look for healthy, non-flowering stems. Using your sharp pruning shears, cut sections about 4-6 inches long. Make your cut just below a leaf node (that little bump where a leaf grows from the stem).
- Prepare the cuttings: Gently remove the lower leaves from the part of the stem that will be in the soil. If using rooting hormone, dip the cut end into the powder or gel.
- Pot them up: Fill your small pots with your well-draining potting mix. Make a small hole in the center of the soil with your finger or a pencil. Insert the cut end of your stem cutting into the hole, ensuring at least one leaf node is below the soil surface. Gently firm the soil around the stem.
- Water gently: Water thoroughly but carefully, making sure the soil is moist but not waterlogged.
- Create humidity: Cover the pots with a clear plastic bag or place them in a propagator. This traps moisture, which is crucial for cuttings to root. Make sure the leaves don’t touch the plastic bag – if they do, you can prop the bag up with a few small sticks.
Division
If your Cenchrus cafer is already a mature clump, division is a fantastic way to get multiple plants.
- Unpot the plant: Carefully remove your Cenchrus cafer from its pot. You might need to gently loosen the soil around the edges.
- Loosen the root ball: Gently tease apart the root ball with your fingers or a trowel. Look for natural divisions where the plant has grown into separate sections.
- Separate the sections: You can use your hands to pull the sections apart, or if it’s a bit stubborn, use your clean pruning shears or knife to cut through the roots. Each section should have a healthy mass of roots and some foliage.
- Pot them up: Plant each new division into its own pot filled with your well-draining potting mix, treating them like you would a new transplant. Water well.
The “Secret Sauce” (Pro Tips)
Here are a few things I’ve learned over the years that can really boost your propagation success:
- Bottom Heat is Your Friend: For stem cuttings, placing the pots on a seedling heat mat can make a world of difference. It encourages root formation from the bottom up, mimicking the warmth of spring soil. Don’t get it too hot, just a gentle warmth is perfect.
- Patience with Foliage: When doing water propagation (which you can also try with Cenchrus cafer stems), remember this golden rule: don’t let any leaves touch the water. Only the stem should be submerged. Leaves sitting in water are a prime invitation for rot!
- The Art of the Gentle Water: When watering your newly potted cuttings or divisions, use a watering can with a fine rose attachment. This prevents disturbing the soil too much and damaging any delicate new root hairs. Think of it as a gentle misting, not a downpour.
Aftercare & Troubleshooting
Once you see signs of new growth – tiny leaves or shoots emerging – that’s a good indication your cuttings have rooted!
- Acclimatize slowly: If you’ve used a plastic bag or propagator, start to gradually remove it over a few days. Open the bag for a few hours each day, then leave it off completely. This helps the new plant adjust to normal humidity levels.
- Watering: Continue to water when the top inch of soil feels dry. Avoid overwatering, as this is the most common cause of problems.
- Light: Place your newly rooted plants in bright, indirect light. They don’t need intense sun initially.
Troubleshooting: The most common issue you might face is rot. If your cutting turns mushy and black, or the leaves start to yellow and drop rapidly, it’s likely due to too much moisture and/or poor air circulation. If you suspect rot, it might be best to discard the affected cutting and review your watering and humidity levels for the others.
A Little Encouragement
Propagating plants is a journey, a delightful dance with nature. Don’t be discouraged if not every attempt is a roaring success. Each time you try, you learn something new. Enjoy the process of nurturing these tiny beginnings into beautiful plants that will bring you joy for years to come. Happy propagating!
Resource:
https://identify.plantnet.org/k-world-flora/species/Cenchrus%20cafer%20(Bory)%20Veldkamp/data