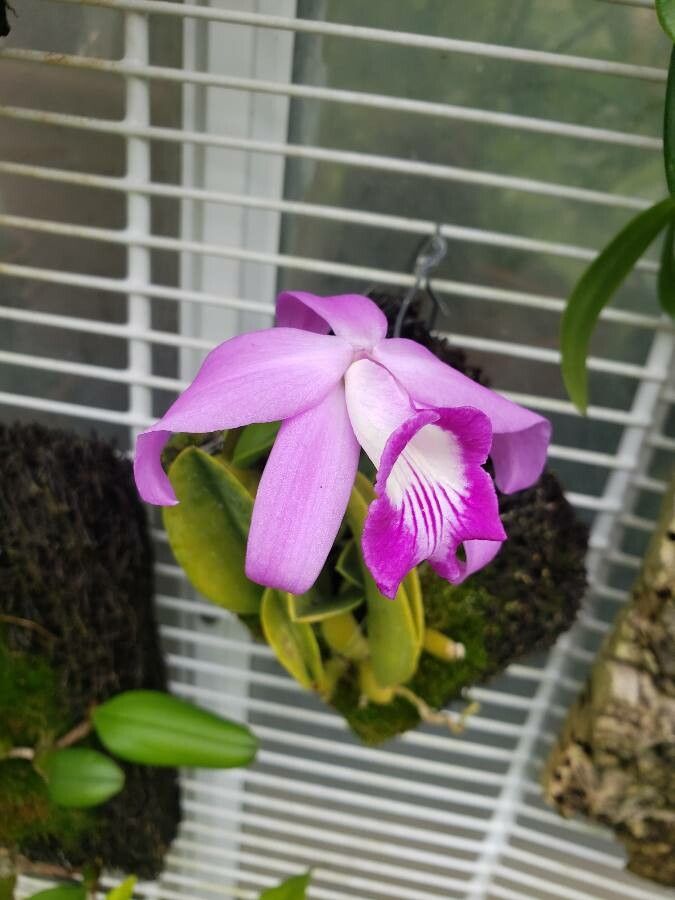
Oh, hello there! Pull up a chair, let’s chat about one of my absolute favorites: Cattleya sincorana. Isn’t she a beauty? Those lovely, compact pseudobulbs and the way her blooms unfurl, simply stunning. If you’ve ever admired one, you might be tempted to try your hand at propagating it. And let me tell you, it’s a deeply satisfying journey, watching a new life sprout from your efforts. Now, I won’t lie, Cattleya sincorana can be a tad bit fussy, so it’s not the absolute easiest for a complete beginner, but with a little care and attention, you can absolutely succeed.
When to Get Your Hands Dirty
The best time to begin propagating Cattleya sincorana is when the plant is actively growing, usually after it has finished blooming. Think of it as giving it a little boost when it’s feeling energetic. For most of us, this means late spring or early summer is usually prime time. You’ll notice new pseudobulbs starting to form, or maybe even new roots emerging from the base. That’s your cue!
What You’ll Need to Gather
Before we dig in, let’s make sure you’re well-equipped. It’s always better to have everything ready to go.
- Sharp, clean pruning shears or a sterile knife: We want to make clean cuts to prevent disease.
- Cinnamon powder or a fungicide: This acts as a protective seal for any cuts.
- Orchid potting mix: Specifically for epiphytic orchids. I like a mix that includes bark, perlite, and a little bit of charcoal to ensure good drainage and aeration.
- Small pots or community trays: Enough to house your new propagations.
- Optional: Rooting hormone: Some folks swear by it for a little extra kick, but it’s not always strictly necessary for Cattleya sincorana.
- Optional: Humidity dome or clear plastic bag: To create a tiny greenhouse effect.
Let’s Get Growing: Division is Key
For Cattleya sincorana, the most reliable and common method of propagation is by division. These orchids grow from rhizomes, and over time, they naturally form multiple pseudobulbs that create a clump.
- Gently remove the orchid from its pot. If it’s been in there for a while, you might need to tease it out carefully.
- Inspect the rhizome. Look for natural breaks where you can divide the plant. You’re aiming for divisions that have at least two to three good pseudobulbs and a healthy-looking base. Don’t be tempted to make tiny divisions; larger ones have a much better chance of survival.
- Using your clean pruning shears or knife, carefully separate the divisions. Try to make a clean cut through the rhizome.
- Inspect the cut surfaces. If there’s any sign of mushiness or rot, you might have a problem. For healthy divisions, you can gently dust the cut ends with cinnamon powder or a bit of fungicide. This helps to dry out the wound and prevent infection.
- Pot up your new divisions. Plant each division in its own small pot, using your orchid potting mix. Ensure the pseudobulbs are sitting mostly above the surface of the mix, which is typical for Cattleya orchids. You want the base to be in contact with the medium.
- Water lightly. Give them a gentle watering to settle the mix, but avoid saturating it right away.
My Little “Secrets” for Success
I’ve learned a few things over the years that can make a difference.
- Don’t overwater initially: This is crucial after division. New divisions don’t have a robust root system to take up a lot of water. Overwatering is the quickest way to invite rot. Let the potting mix dry out between waterings.
- Think about humidity: New divisions are vulnerable to drying out. If you can, place the potted divisions inside a clear plastic bag that’s propped open slightly, or under a humidity dome. This creates a humid microclimate that encourages root development without drowning the plant. Just remember to air it out daily for a few minutes to prevent fungal issues.
- Patience is a virtue (and good air circulation): While the bag or dome helps with humidity, once you see signs of new growth, it’s important to gradually introduce them to more open air. Good air circulation is vital for orchids to prevent disease.
What Happens Next & What to Watch For
Once your new divisions are potted, keep them in bright, indirect light. Avoid direct sun, which can scorch those tender new growths. Water only when the potting medium is almost dry. You’re looking for the emergence of new roots – tiny green nubs that will eventually anchor the plant.
The biggest thing to watch out for is rot. If you see pseudobulbs shriveling and becoming mushy, or dark, soft spots appearing, it’s a sign of too much moisture and potentially a fungal infection. In this case, you might need to unpot, cut away the rotted section with a sterile knife, let it dry thoroughly, and repot in fresh, dry mix. It’s disheartening, but it happens!
Keep Going, You’ve Got This!
Propagating Cattleya sincorana takes a bit of finesse, but it’s so rewarding. Watching those tiny roots emerge and a new pseudobulb swell is pure magic. Be patient with your new charges, observe them closely, and trust your instincts. Happy growing!
Resource: