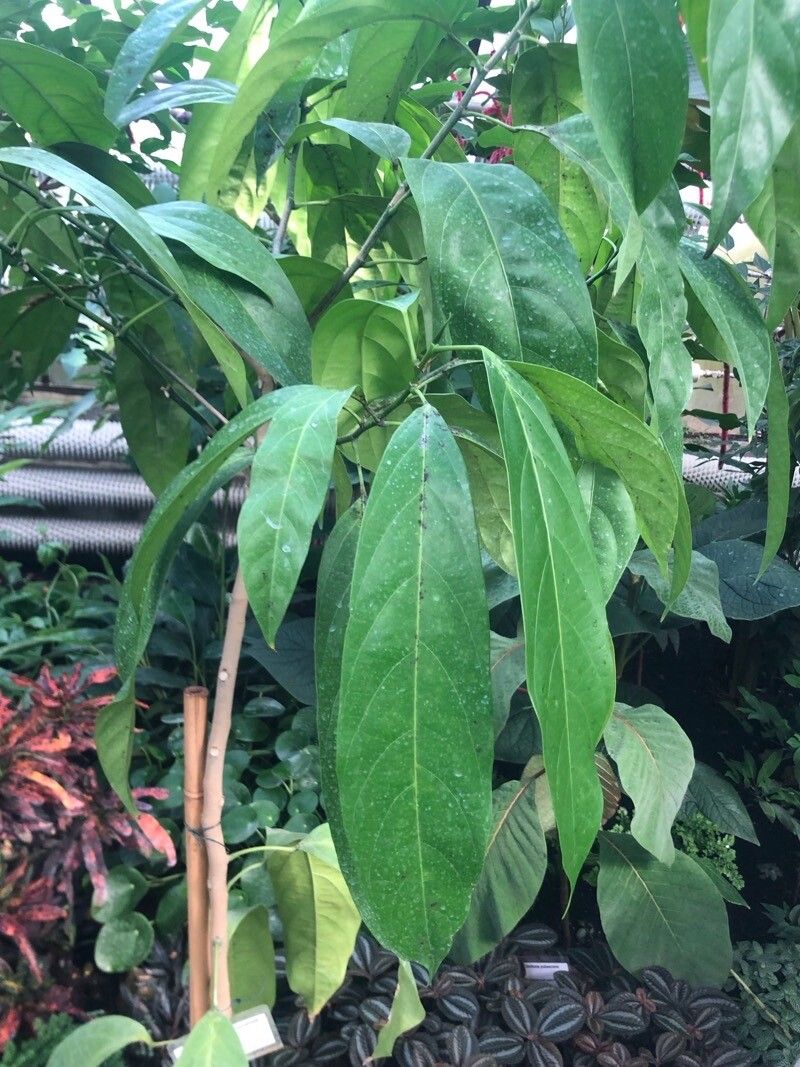
Oh, hello there! Pull up a chair. I’m so excited to chat with you today about one of my favorite, less common treasures: Caryodendron orinocense, often called the “Sandpaper Tree” for its distinctive, textured leaves. Honestly, this tree has such a subtle elegance, a quiet beauty that really grows on you. And propagating it? It’s a rewarding little project, a way to bring more of that gentle charm into your garden.
Now, is it a tricky plant to start from scratch? For absolute beginners, it can be a tad more challenging than, say, a simple pothos. But don’t let that deter you! With a little understanding and patience, you’ll find it quite manageable. It’s a plant that rewards your observation.
The Best Time to Start
When it comes to getting your Caryodendron orinocense cuttings to take root, late spring to early summer is your sweet spot. This is when the plant is actively growing and has plenty of vigor. You want to take cuttings from new, semi-hardwood growth – that’s wood that’s gotten a little firm, but isn’t old and woody. Think of it as being somewhere between a brand-new, bendy shoot and a sturdy, established branch.
Supplies You’ll Need
Gathering your tools beforehand makes the whole process much smoother. Here’s what I usually have on hand:
- Sharp, sterilized pruning shears or a sharp knife: Cleanliness is paramount to prevent disease.
- Rooting hormone (optional, but recommended): A powder or gel really helps give those cuttings a boost.
- A well-draining potting mix: I like a blend of equal parts peat moss or coco coir, perlite, and a little bit of compost. Or, you can buy a good quality seed-starting mix.
- Small pots or propagation trays: Clean ones, of course!
- Plastic bags or a clear plastic dome: To create a humid environment.
- A watering can with a fine rosette: For gentle watering.
- Labels: Trust me, you’ll thank yourself later!
Propagation Methods
While you can sometimes find it grown from seed, taking stem cuttings is generally the most reliable and quickest way to propagate Caryodendron orinocense.
Stem Cuttings:
- Select your cutting: Look for healthy stems that are about 4-6 inches long. Make your cut just below a leaf node (where a leaf attaches to the stem). This is where the magic happens, biologically speaking, and where roots are most likely to form.
- Prepare the cutting: Gently remove the lower leaves. You want to expose at least one or two leaf nodes. If the upper leaves are very large, you can cut them in half horizontally. This reduces water loss through transpiration.
- Apply rooting hormone: Dip the cut end of the stem into your rooting hormone, tapping off any excess.
- Plant the cutting: Make a hole in your prepared potting mix with a pencil or your finger. Gently insert the cut end of the stem into the hole, ensuring the leaf nodes are below the soil surface. Firm the soil around the stem.
- Water gently: Water thoroughly but gently, so you don’t dislodge the cutting.
- Create humidity: Cover the pot with a plastic bag or a clear plastic dome to keep the humidity high. Make sure the plastic doesn’t directly touch the leaves if possible. Pop a few small sticks or skewers into the pot to hold the bag up.
- Placement: Place the pot in a warm location with bright, indirect light. Avoid direct sun, which can scorch the young cuttings.
The “Secret Sauce” (Pro Tips)
Here are a couple of things I’ve learned over the years that really seem to make a difference:
- Bottom Heat is Your Friend: If you have a heat mat designed for seedlings and cuttings, using it can significantly speed up the rooting process. Caryodendron orinocense really appreciates a little warmth from below.
- Mist, Don’t Drench: While you want to maintain humidity, overwatering is a fast track to rot. I prefer to mist the leaves and soil surface lightly every few days, or whenever the soil starts to feel a little dry. Another trick is to open the plastic cover for an hour or so each day to allow for some air circulation, which also helps prevent fungal issues.
- Patience with the Leaf Nodes: When preparing your cuttings, really try to get at least one or two leaf nodes buried in the soil. This is where the plant is most likely to send out those vital roots. Don’t be shy about removing those lower leaves.
Aftercare & Troubleshooting
Once you see new growth appearing on your cutting, that’s a very good sign! It means roots are forming. You can gently tug on the cutting; if you feel resistance, it’s likely rooted.
To transition your new rooted cutting to more independent life, gradually acclimate it to lower humidity by opening the plastic cover for longer periods each day over a week or two. Continue to keep it in bright, indirect light. Water when the top inch of soil feels dry.
What if things go wrong? The most common culprit is rot. If your cutting turns mushy or black, or if you see mold on the soil, it’s usually a sign of too much moisture and not enough air circulation. Sadly, in these cases, it’s best to discard the cutting and start again, being more mindful of watering and humidity. Yellowing leaves that aren’t accompanied by mushiness might just mean it’s adjusting or perhaps needs a touch more light, but rot is usually a more definitive sign of failure.
A Encouraging Closing
So there you have it. Growing more Caryodendron orinocense from your existing plants is a delightful journey. It’s about observation, a touch of intuition, and a whole lot of gentle care. Don’t be discouraged if your first few attempts aren’t perfect. Every gardener learns by doing, and the satisfaction of seeing a new plant sprout from a simple cutting is truly unmatched. Happy propagating!
Resource:
https://identify.plantnet.org/k-world-flora/species/Caryodendron%20orinocense%20H.Karst./data