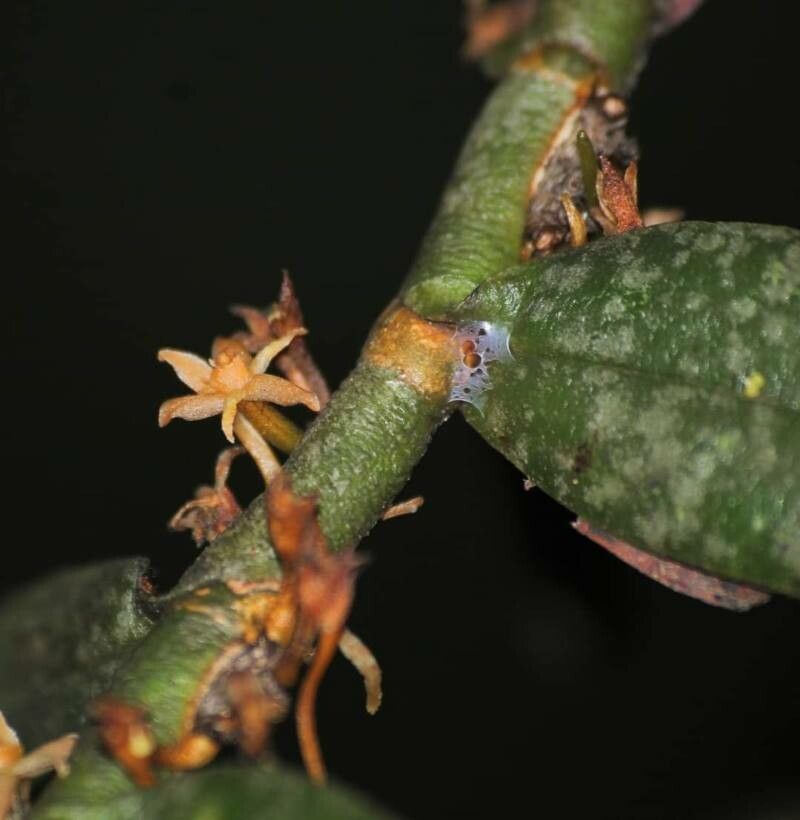
Oh, hello there! Come on in, pull up a chair. I’m so glad you’re interested in Campylocentrum neglectum. This little orchid is truly a marvel. Its delicate, almost ethereal blooms are like tiny snowflakes, and the way it grows, clinging to its chosen perch, has a subtle charm all its own. Propagating it is so satisfying. It’s not a “chuck it in the dirt and forget it” kind of plant, but the rewards are immense. For a beginner, it might seem a touch daunting at first, but with a little care and attention, you’ll find success.
When to Get Your Hands Dirty
The absolute best time to start propagating Campylocentrum neglectum is during its active growing season. For most of us, this means late spring and summer, when the days are longer and the plant is full of vigor. You’ll see new roots emerging, and that’s your signal that it’s ready to share. Trying to propagate when the plant is resting is like trying to start a conversation when someone’s asleep – it’s just not going to work.
What You’ll Need to Gather
Don’t worry, it’s not a long list of fancy gadgets. Here’s what I usually have on hand:
- Sharp, sterile pruning shears or a razor blade: Cleanliness is key to preventing disease.
- Orchid bark mix: A fine grade is usually best for these smaller roots. I often mix in a bit of perlite for drainage.
- Sphagnum moss: High-quality New Zealand sphagnum is my go-to.
- Small, clear pots or containers: Being able to see the root development is a game-changer.
- Rooting hormone (optional but helpful): A gentle powder formulated for orchids can give your cuttings a boost.
- Distilled or rainwater: Tap water can be too harsh for many orchids.
- Spray bottle: For keeping things consistently humid.
- Labels and a marker: Trust me, future you will thank you!
Let’s Get Propagating!
The most common and reliable way to propagate Campylocentrum neglectum is through stem cuttings. This orchid grows monopodially, meaning it grows from a single point, so we’ll be working with pieces of that stem.
- Find a healthy stem: Look for a section of the main stem that has several leaves and, ideally, shows signs of aerial root development.
- Make the cut: Using your sterilized shears or razor, make a clean cut. Aim for a cutting that is at least 2-3 nodes long. Nodes are those little bumps on the stem where leaves attach.
- Prepare the cutting: If your cutting looks a little worse for wear, you can gently trim any damaged leaves. If you’re using rooting hormone, dip the cut end into it now.
- Potting it up: I prefer to pot my cuttings in a well-draining orchid bark mix in a clear pot. Gently place the cut end into the mix, ensuring at least one node is buried. You can support the cutting with a small stake if needed.
- Water propagation is an alternative: Some folks have success by simply placing the cut end in a small amount of distilled water in a clear container. The key here is that no part of the leaves should touch the water. This prevents rot. You’ll see roots emerge directly into the water. Once those roots are about an inch long, you can then pot it into bark.
The “Secret Sauce” From My Greenhouse
Here are a few things I’ve learned over the years that make a real difference:
- Don’t over-pot: These little guys like to feel a bit snug. A pot that’s too big can lead to soggy conditions and rot.
- Humidity is your friend (but not soggy leaves!): Once potted, I like to place the pot inside a larger, clear plastic bag or a mini-greenhouse. This creates a humid environment. Make sure there’s some air circulation though – don’t seal it completely like a tomb! I’ll often pop the bag open for a few minutes each day.
- Bottom heat can work wonders: If you have a seedling mat or a warm spot on top of a refrigerator, placing your potted cuttings there can significantly speed up root development. Think of it as giving them a cozy little incubator.
After You See Roots & What to Watch For
Once you start to see little white roots peeking out from the bark or emerging in the water, congratulations! That’s a huge milestone. At this point, you can gradually reduce the humidity a bit and start watering more normally. Water thoroughly when the bark is almost dry, and make sure to drain any excess water away.
Now, about troubleshooting. The number one enemy of any new orchid cutting is rot. If you notice the stem turning black or mushy, or if your cutting just completely wilts and nothing seems to help, it’s likely rot. This usually happens from too much moisture, poor air circulation, or using unsterilized tools. If you see a little bit of rot starting, you might be able to cut away the affected part with your sterile blade and try to reroot the healthy section, but sometimes it’s just not meant to be. Don’t be discouraged!
Keep Nurturing Those Sprouts
Propagating Campylocentrum neglectum is a journey, and like all good garden adventures, it requires a little patience. Watch your new plants closely, provide them with consistent warmth and humidity, and celebrate every new root and leaf. You’re creating new life, and that’s a truly wonderful thing. Happy growing!
Resource: