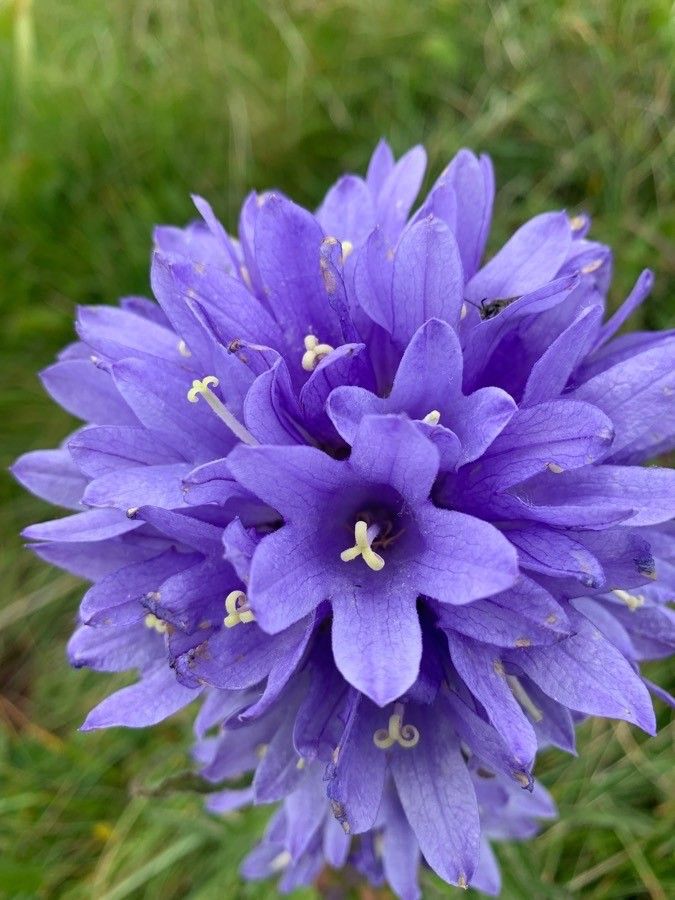
Hey there, fellow plant enthusiasts! I’m so excited to talk to you today about a truly special bloom: Campanula cervicaria, or as it’s often called, the Bristly Bellflower. I’ve been growing these beauties for two decades now, and let me tell you, there’s nothing quite like seeing those elegant, upright spires of deep blue flowers nodding in the breeze. They have a wonderful, almost architectural presence in the garden, and they attract so many beneficial pollinators.
If you’ve ever admired them and thought, “I wish I had more of those!”, you’re in luck. Propagating Campanula cervicaria is a very rewarding endeavor. Now, for beginners, I’d say it’s moderately easy. It’s not a wild sprint to the finish line, but with a little care and attention, you’ll be well on your way to a delightful plant-filled future.
The Best Time to Start
For the highest success rate with Campanula cervicaria, I’ve found that early spring is your golden ticket. Think March or April, just as the plant is waking up from its winter slumber and before it gets too hot. You can also have success with softwood cuttings in late spring to early summer, but my personal preference, and what I’ve seen give the most vigorous results, is that early spring push.
Supplies You’ll Need
Gathering your tools beforehand makes the whole process so much smoother. Here’s what you’ll want to have on hand:
- Sharp, clean pruning shears or a sharp knife: For making clean cuts.
- Rooting hormone powder or gel: This isn’t strictly essential for every plant, but it definitely gives a nice boost to Campanula cervicaria.
- Well-draining potting mix: A good blend of perlite, peat moss, and a little bit of compost works wonders. You can also buy specialized seed-starting or cutting mixes.
- Small pots or seedling trays: Clean ones are key to preventing disease.
- A mister or spray bottle: For keeping your cuttings turgid.
- Plastic bags or a propagation dome: To create a humid environment.
- A warm location: An unheated greenhouse, a sunny windowsill, or a heated propagator.
Propagation Methods
While Campanula cervicaria can be grown from seed, I find division and stem cuttings to be the most reliable and rewarding methods for home gardeners.
Division: The Root Runner’s Delight
This is my go-to for established plants. It’s like giving your Campanula cervicaria a really good haircut and a chance to spread its wings!
- Dig Carefully: In early spring, when the soil is workable, gently dig up your Campanula cervicaria plant. Try to disturb the roots as little as possible.
- Inspect the Roots: You’ll often see where the main crown has naturally divided, or you might have clumps of growth.
- Separate Gently: Using your hands or a clean trowel, carefully pull apart the desirable sections. Each section should have some healthy roots and at least one shoot or bud. If you need to make a cut, use your sharp shears to ensure a clean break.
- Replant Immediately: Get your divided sections into their new homes or pots right away. Water them in well and give them a little TLC for the first few weeks.
Stem Cuttings: A Little Rooting Magic
This method is fantastic for increasing your stock when you don’t have an established clump to divide, or when you want to experiment with newer growth.
- Select Your Stems: Look for healthy, non-flowering shoots that are about 3-4 inches long. These are often referred to as “softwood cuttings.”
- Make the Cut: Using your sharp pruning shears, make a clean cut just below a leaf node (where a leaf attaches to the stem). This is crucial!
- Prepare the Cutting: Gently remove the lower leaves, leaving just a couple at the top. This prevents disease and encourages the plant to focus on root development.
- Dip in Rooting Hormone: Dip the cut end of the stem into your rooting hormone powder or gel. Tap off any excess.
- Plant Your Cuttings: Fill your pots or trays with your well-draining potting mix. Gently make a hole with a pencil or your finger and insert the cutting, firming the soil around it.
- Create a Humid Environment: Water the soil lightly and then cover the pots with a plastic bag or propagation dome. Make sure the leaves don’t touch the plastic if possible to avoid rot.
The “Secret Sauce” (Pro Tips)
After years of tinkering, I’ve picked up a few tricks that always seem to make a difference for Campanula:
- Bottom Heat is Your Best Friend: For stem cuttings, placing your pots on a heat mat can significantly speed up root development. It mimics the warmth of spring soil and really encourages those roots to get going.
- Don’t Overwater, Don’t Underwater: This is a delicate balance. You want the soil to be consistently moist but not soggy. Overwatering is the fastest way to invite rot, which is your cuttings’ worst enemy. Check the soil moisture with your finger; if the top inch feels dry, it’s time for a gentle watering or misting.
- Patience with Priming: When dividing, I sometimes gently brush away some of the older, darker soil from the root ball. This allows me to clearly see the healthy, white roots and make better decisions about where to divide. It also just feels cleaner!
Aftercare & Troubleshooting
Once you see signs of new growth on your cuttings, or if you’ve just planted divisions, it’s time for attentive aftercare.
- Gradual Acclimation: Once your cuttings show roots (you might see them peeking out the drainage holes, or gently tugging on the stem will offer resistance), it’s time to gradually introduce them to open air. Lift the cover for longer periods each day over a week or so.
- Watering: Continue to keep the soil consistently moist. As the plants grow, you can begin to let the soil dry out slightly between waterings.
- Light: They’ll appreciate bright, indirect light once they’ve rooted. Direct, scorching sun can be too much for young plants.
If you encounter problems, don’t despair! The most common issue is rot. This usually happens due to overwatering or poor air circulation. If you see stems turning black and mushy, it’s a clear sign of rot. Remove the affected cuttings immediately and try to improve drainage and air flow for the remaining ones. Sometimes, a cutting might just not take. That’s part of gardening; not every experiment is a resounding success, and that’s okay!
Growing more of your beloved Campanula cervicaria is such a joyful process. It connects you more deeply with your plants and provides a wonderful sense of accomplishment. So, grab your tools, get your hands dirty, and enjoy the journey. Happy propagating!
Resource:
https://identify.plantnet.org/k-world-flora/species/Campanula%20cervicaria%20L./data