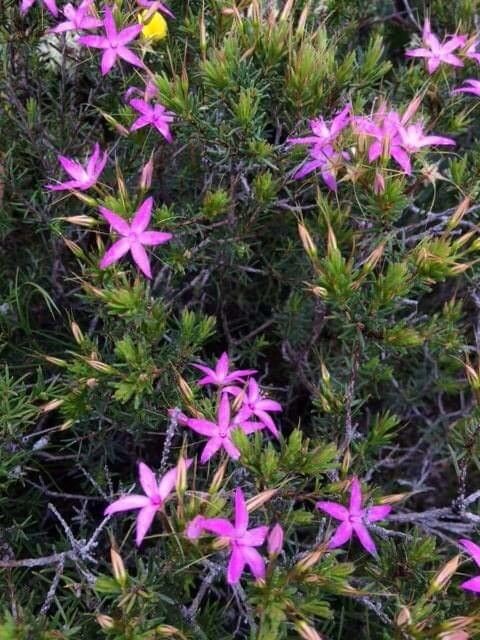
Hello there, fellow garden enthusiasts! It’s always a joy to connect with you, and today, we’re diving into the wonderful world of Calytrix glutinosa.
Why You’ll Love Propagating Calytrix Glutinosa
If you haven’t met Calytrix glutinosa yet, you’re in for a treat. It’s a beautiful native Australian shrub, often called the “Star Flower” for its delicate, star-shaped blooms that seem to glitter in the landscape. They add a touch of ethereal beauty to any garden, and their subtle fragrance is just lovely. As for propagating it? While it might not be the absolute easiest plant for a brand-new gardener, with a little attention and the right approach, it’s absolutely achievable and incredibly rewarding. Seeing a tiny cutting transform into a thriving plant is such a special feeling, don’t you think?
The Best Time to Start Your Calytrix Journey
Generally, the spring and early summer months are your best bet for propagating Calytrix glutinosa. This is when the plant is actively growing and has plenty of energy to put into developing new roots. Look for new, but not completely soft, growth. These semi-hardwood cuttings tend to have a good balance of flexibility and firmness, making them ideal.
What You’ll Need to Get Started
Gathering your supplies before you begin will make the whole process much smoother. Here’s what I usually have on hand:
- Sharp pruning shears or a clean razor blade: For making clean cuts.
- A well-draining potting mix: I often use a mix of equal parts perlite and seed-raising mix. This ensures excellent aeration and prevents waterlogging.
- Small pots or seed trays: Clean and with drainage holes, of course!
- Rooting hormone (optional, but recommended): A powder or gel can give your cuttings a significant boost.
- Plastic bags or a propagator lid: To create a humid environment.
- Soft ties or plant labels: For marking your cuttings.
Let’s Get Propagating: Stem Cuttings
Stem cuttings are my go-to method for Calytrix glutinosa. It’s reliable and you can get several new plants from a single parent.
- Take your cuttings: In late spring or early summer, select healthy, non-flowering shoots from your mature plant. Using your sharp shears, cut pieces about 10-15 cm long. Make the cut just below a leaf node (where a leaf attaches to the stem). This is where roots are most likely to form.
- Prepare the cuttings: Gently remove the leaves from the bottom half of each cutting. If there are any flower buds, pinch them off. This encourages the plant to focus its energy on rooting, not flowering.
- Apply rooting hormone (if using): Dip the bottom end of each cutting into your rooting hormone, tapping off any excess.
- Place in pots: Fill your small pots with your prepared potting mix. Make a hole in the center with a pencil or your finger, deep enough for the cutting.
- Insert the cuttings: Gently insert each cutting into the hole, ensuring that the leaf nodes you’ve cleared are below the soil surface. Firm the soil around the cutting. You can usually get 3-4 cuttings per pot, depending on their size.
- Water gently: Water the mix thoroughly but gently. You don’t want to dislodge the cuttings.
The “Secret Sauce” – My Insider Tips
Here are a few little tricks that I’ve learned over the years that often make all the difference:
- Don’t let the leaves touch the water: If you’re doing any sort of water propagation (which can sometimes work, but I find soil is more reliable for Calytrix), make sure no leaves are submerged. Rot sets in so quickly if they are.
- Bottom heat is your friend: Calytrix glutinosa responds really well to a bit of warmth from below. If you have one, placing your pots on a heated propagator mat can significantly speed up root development. It mimics the warmth of spring soil.
- Mist, don’t soak: Once your cuttings are in their pots and covered with a plastic bag or propagator lid to maintain humidity, mist the leaves lightly every few days instead of watering heavily. This keeps the humidity up without making the soil soggy, which is the quickest way to invite rot.
Aftercare and What to Watch For
Once your cuttings are potted, place them in a bright spot, but out of direct, harsh sunlight. A greenhouse, a bright windowsill, or a sheltered outdoor position is perfect. Keep the soil consistently moist but not waterlogged.
You’ll know your cuttings are rooting when you see new leaf growth or when they resist gently when tugged (don’t pull too hard to check!). This can take anywhere from 4-8 weeks, sometimes longer. Be patient!
What about trouble? The most common villain is rot. If you see your cuttings turning black and mushy, it’s usually a sign of too much moisture and not enough air circulation. On the flip side, if the leaves start to look shriveled and dry, they aren’t getting enough humidity. Adjust your misting and ventilation accordingly.
Happy Growing!
Propagating Calytrix glutinosa is a beautiful way to connect with your plants and expand your garden repertoire. It takes a bit of patience and observation, but the reward of nurturing a new life from a tiny cutting is truly unparalleled. So, grab your tools, get your hands dirty, and enjoy the journey of bringing more of these wonderful Star Flowers into your world! Happy gardening!
Resource:
https://identify.plantnet.org/k-world-flora/species/Calytrix%20glutinosa%20Lindl./data