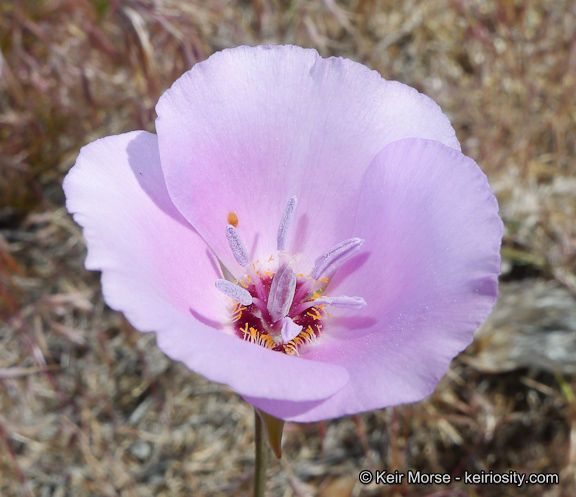
Hello there, fellow plant enthusiasts! Today, we’re diving into the charming world of Calochortus palmeri, also known as Palmer’s Mariposa Lily. Isn’t it a beauty? Those delicate, often ruffled petals, usually in shades of soft peach and creamy white, can truly steal the show in a wildflower garden. And the best part? Growing them yourself from cuttings or divisions is wonderfully rewarding. Now, I won’t lie, Calochortus can be a tad particular, so for absolute beginners, it might present a little challenge. But stick with me, and we’ll coax these beauties to multiply!
The Best Time to Start
The secret to success with Calochortus palmeri propagation lies in mimicking their natural cycle. The ideal time to gather your material is generally after flowering has finished and the foliage begins to naturally yellow and die back. This usually happens in late spring to early summer. At this point, the plant is storing energy in its bulb (or corms, to be technically precise) and the stem sections are often firm and ready. Trying to propagate when the plant is in active growth or flowering can be much less successful.
Supplies You’ll Need
Before we get our hands dirty, let’s gather our little toolkit:
- Well-draining potting mix: A blend of potting soil, coarse sand, and perlite is a good start. Many growers swear by a mix formulated for succulents or cacti.
- Sharp, clean pruning shears or a sharp knife: To make clean cuts and avoid damaging the plant.
- Rooting hormone (optional but recommended): A powder or gel helps to encourage root development.
- Small pots or trays: With good drainage holes, of course!
- Perlite or coarse sand: For extra drainage in the pots.
- A spray bottle: For gentle misting.
- Labels: To keep track of what you’ve propagated.
Propagation Methods
Calochortus palmeri is typically propagated from stem cuttings or division of corms.
1. Stem Cuttings:
This is my go-to method for increasing my Calochortus numbers.
- Harvest the Cuttings: Gently snap or cut sections of stem that are at least 3-4 inches long and still have a few leaves attached. Look for stems that are firm, not yet woody, and have started their natural drying process. Avoid any material that looks mushy or diseased.
- Prepare the Cuttings: If you’re using stem cuttings, you might want to remove the lower leaves that would otherwise be below the soil line. This prevents rot.
- Apply Rooting Hormone: Dip the cut end of each stem into your chosen rooting hormone, tapping off any excess.
- Plant the Cuttings: Fill your small pots with your well-draining mix. Make a small hole with your finger or a pencil and insert the cutting, ensuring the base is buried about an inch deep. Gently firm the soil around it. You can usually fit several cuttings into one pot, spaced a couple of inches apart.
- Water Gently: Water the soil lightly from the bottom or use your spray bottle to mist the surface. You don’t want to waterlog them at this stage.
- Provide the Right Environment: Place the pots in a bright location, but out of direct sunlight. A warm spot is beneficial.
2. Corm Division:
This method is best done when you’re handling the bulbs/corms for repotting or transplanting.
- Gently Excavate: When the foliage has died back, carefully dig up the entire plant. You’ll see a cluster of small corms (think tiny onions) at the base.
- Separate the Corms: Gently break apart the smaller corms from the main bulb. They usually detach quite easily. Ensure each corm has at least a tiny piece of the basal plate (where roots emerge) attached.
- Let Them Dry (Optional but Recommended): Some growers like to let these separated corms air dry for a day or two in a shaded, airy spot. This helps to heal any cuts.
- Replant: You can replant these corms directly into well-draining soil in pots or their final garden location. Plant them about 2-3 inches deep, just as you would the parent plant.
The “Secret Sauce” (Pro Tips)
Here are a couple of things I’ve learned over the years that can really make a difference:
- The Air Gap is Crucial: When you’re propagating from stem cuttings, never let the leaves touch the water or damp soil surface if you’re using water propagation initially. Rot sets in incredibly quickly, and a healthy leaf turning mushy is a sure sign of trouble. It’s better to keep them slightly drier than too wet.
- Bottom Heat is Your Friend (for cuttings): Calochortus really appreciate a bit of warmth at their base to encourage root formation. If you’re doing stem cuttings indoors, consider placing your pots on a seedling heat mat. It makes a huge difference in speeding up root development. Just keep the heat at a gentle setting.
- Patience with Corms: When dividing corms, understand that tiny corms might take a year or two before they grow to a flowering size. Don’t be discouraged if they seem to do very little in their first season. They’re establishing themselves!
Aftercare & Troubleshooting
Once roots have started to form on your cuttings (you should see them emerging from the drainage holes, or feel a gentle tug when disturbed), or once you’ve replanted your corms, it’s time for gentle care.
- Watering: Keep the soil consistently moist, but not waterlogged. A good rule of thumb is to water when the top inch of soil feels dry. Misting the foliage occasionally can be beneficial, but let the soil surface dry out between waterings to prevent fungal issues.
- Light: Continue to provide bright, indirect light. As the new plant gets stronger, you can gradually introduce it to more direct sun, mimicking its native habitat.
- Signs of Failure: The most common enemy is rot. If your cuttings turn yellow and mushy, or if you see fuzzy white mold on the soil surface, it’s likely too wet. You might need to pull out the affected cuttings, trim away any rotted parts, and replant in fresh, drier soil. If your corms don’t seem to be growing, ensure they are planted at the correct depth and are receiving adequate light and drainage. Sometimes, they just need a bit more time to establish.
A Encouraging Closing
Growing Calochortus palmeri from propagation might involve a learning curve, but the joy of nurturing a new life from a tiny piece of a parent plant is simply unmatched. Be patient with yourself and your little green charges. Embrace the process, observe what your plants are telling you, and enjoy the magic of gardening. Happy propagating!
Resource:
https://identify.plantnet.org/k-world-flora/species/Calochortus%20palmeri%20S.Watson/data