Hello fellow plant lovers!
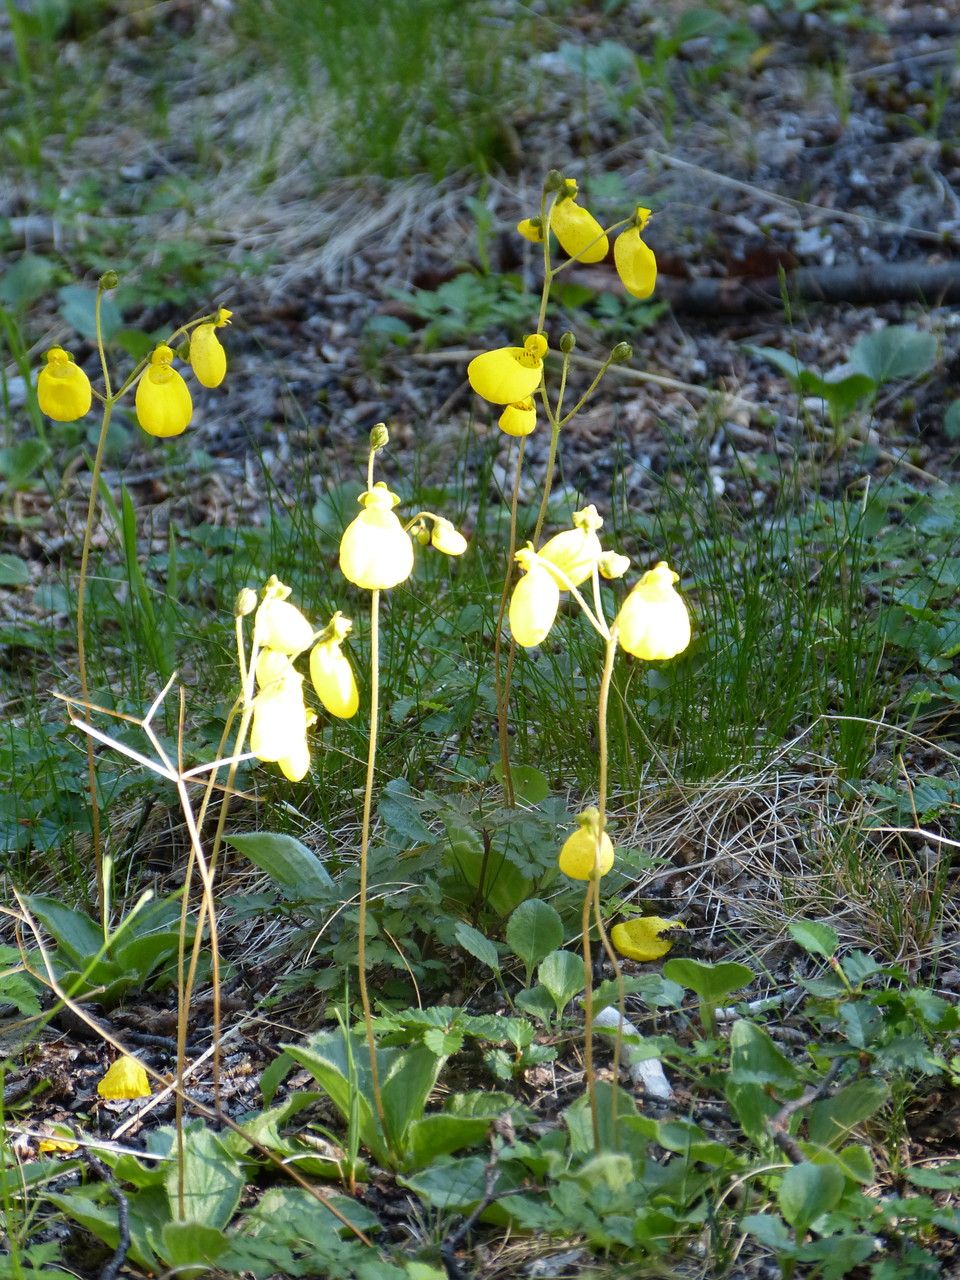
There’s something truly magical about coaxing new life from an existing plant. And when it comes to Calceolaria germainii, also known as the “Slipper Flower” or “Pocketbook Plant,” that magic is undeniable. Its whimsical, pouch-like blooms in vibrant yellows and oranges add such a cheerful pop to any garden or indoor space. Plus, propagating these beauties yourself is incredibly rewarding – imagine filling your home with these unique flowers, all grown from your own efforts! Now, I’ll be honest, Calceolaria germainii can be a little finicky, but don’t let that deter you. With a bit of know-how and patience, it’s absolutely achievable.
The Best Time to Start
For the highest success rate, I always recommend starting your Calceolaria germainii propagation in late spring or early summer. This is when the plant is actively growing and has plenty of energy to put into developing new roots. You’re looking for healthy, non-flowering shoots that are at least 3-4 inches long.
Supplies You’ll Need
Before we dive into the fun part, let’s gather our tools:
- Sharp, clean pruning shears or a sharp knife: For making clean cuts.
- Rooting hormone powder (optional but recommended): This can give your cuttings a boost.
- Well-draining potting mix: I like a blend of equal parts perlite, coco coir, and a good quality peat-free compost.
- Small pots or trays: Clean and with drainage holes, of course!
- Plastic bags or a clear plastic propagator lid: To create a humid environment.
- Watering can or spray bottle: For gentle watering.
- Small labels: To keep track of your efforts!
Propagation Methods
I’ve found the most successful method for Calceolaria germainii is through stem cuttings. Here’s how I do it:
- Take Your Cuttings: Using your clean shears or knife, carefully take cuttings from healthy, non-flowering stems. Aim for pieces that are about 3-4 inches long and have at least two sets of leaves. Make your cut just below a leaf node (where a leaf attaches to the stem), as this is where root development often begins.
- Prepare the Cuttings: Gently remove the lower leaves from the cutting, leaving just the top two or three leaves. This helps prevent rotting and allows the plant to focus its energy on root formation. If you’re using rooting hormone, dip the cut end into the powder, tapping off any excess.
- Potting Up: Fill your small pots with your prepared, well-draining potting mix. Make a small hole in the center of the soil with your finger or a pencil.
- Plant the Cuttings: Insert the cut end of each Calceolaria cutting into the hole, making sure the lowest leaf node is just at or slightly below the soil surface. Gently firm the soil around the base of the cutting.
- Create a Humid Environment: Water the soil thoroughly but gently. Then, cover the pot with a plastic bag, securing it around the rim with a rubber band, or place it inside a clear plastic propagator. This creates a mini-greenhouse, which is crucial for preventing the cuttings from drying out.
The “Secret Sauce” (Pro Tips)
Here are a couple of things I’ve learned through trial and error that really make a difference:
- Don’t let the leaves touch the water: If you decide to try the water propagation method (which I find less reliable for Calceolarias but some have success), make absolutely sure the leaves aren’t submerged. Any leaf in the water is a prime spot for rot to set in. For stem cuttings, this means stripping off those lower leaves is more important than you might think!
- Think about bottom heat: Calceolarias really appreciate a bit of warmth to encourage root growth. If you have a heat mat designed for propagation, placing your pots on it can significantly speed up the process. It mimics the warmth of spring soil beautifully.
Aftercare & Troubleshooting
Once your Calceolaria germainii cuttings are potted, the real waiting game begins. Keep the soil consistently moist but not waterlogged. You want it to feel like a wrung-out sponge. Also, ensure good air circulation to prevent fungal diseases. You might want to temporarily lift the plastic bag for a few minutes each day to let it breathe.
You’ll know your cuttings are starting to root when you see new leaf growth appearing at the top and they feel a little resistant when you gently tug on them. This usually takes anywhere from 4 to 8 weeks.
Now, for the tricky bit: rot. If the stem of your cutting turns black and mushy, or if the leaves start to yellow and drop off prematurely, it’s usually a sign of too much moisture or poor air circulation. Unfortunately, once rot sets in, it’s very difficult to save the cutting. Don’t despair, though; it just means you’ll learn for your next attempt! Another sign of trouble is a crispy, dried-out stem, which means it’s not getting enough humidity.
A Encouraging Closing
Growing new plants is a journey, and propagation is a wonderful way to deepen your connection with your garden. Be patient with your Calceolaria germainii cuttings. Some will take off beautifully, while others might be a little more shy. Don’t be discouraged by failures – each one is a learning opportunity. Just keep experimenting, keep caring, and soon you’ll be rewarded with your very own Slipper Flowers. Happy propagating!
Resource:
https://identify.plantnet.org/k-world-flora/species/Calceolaria%20germainii%20Witasek/data