Hey there, fellow plant enthusiasts! Today, we’re going to dive into something truly special: multiplying our beloved Butia eriospatha. If you’ve ever admired the fuzzy, elegant fronds of this Pindo palm, you’re not alone. There’s something about their graceful arch and that unique, almost velvety texture that just enchants me.
Propagating Butia eriospatha might seem a little intimidating at first glance, especially if you’re new to the palm world. But trust me, with a bit of patience and the right approach, it’s a rewarding venture that can see you with a whole grove of these beauties. It’s definitely not as straightforward as sticking a succulent cutting in the dirt, but the thrill of success is absolutely worth the effort.
The Best Time to Start
When it comes to getting new Butia eriospatha plants going, timing is key. The absolute best time to propagate is during the active growing season, which for most of us in warmer climates means late spring through early summer. This is when the plant has the most energy reserves to put into developing new roots or shoots. Waiting for those warmer, longer days truly gives your propagation efforts a much-needed boost.
Supplies You’ll Need
To give your Butia eriospatha cuttings the best chance at life, having the right tools is essential. Here’s what I always have on hand:
- Sharp, clean pruning shears or a knife: For making clean cuts. Sterilize them with rubbing alcohol to prevent disease.
- Well-draining potting mix: A blend of coarse sand, perlite, and peat moss works wonders. You want something airy that won’t hold onto too much moisture.
- Rooting hormone powder (optional but recommended): This can give your cuttings an extra kickstart. Look for one specifically for woody plants or palms.
- Small to medium-sized pots or a propagation tray: Ensure they have drainage holes.
- Clear plastic bags or a propagation dome: To create a humid environment.
- A spray bottle with clean water: For misting.
- Labels and a permanent marker: To keep track of what’s what and when you started them.
Propagation Methods
Butia eriospatha is typically propagated from seeds, but I’ve had good success with division, especially when dealing with older, multi-stemmed plants.
Seed Propagation
This is the most common and often easiest method for Butia eriospatha.
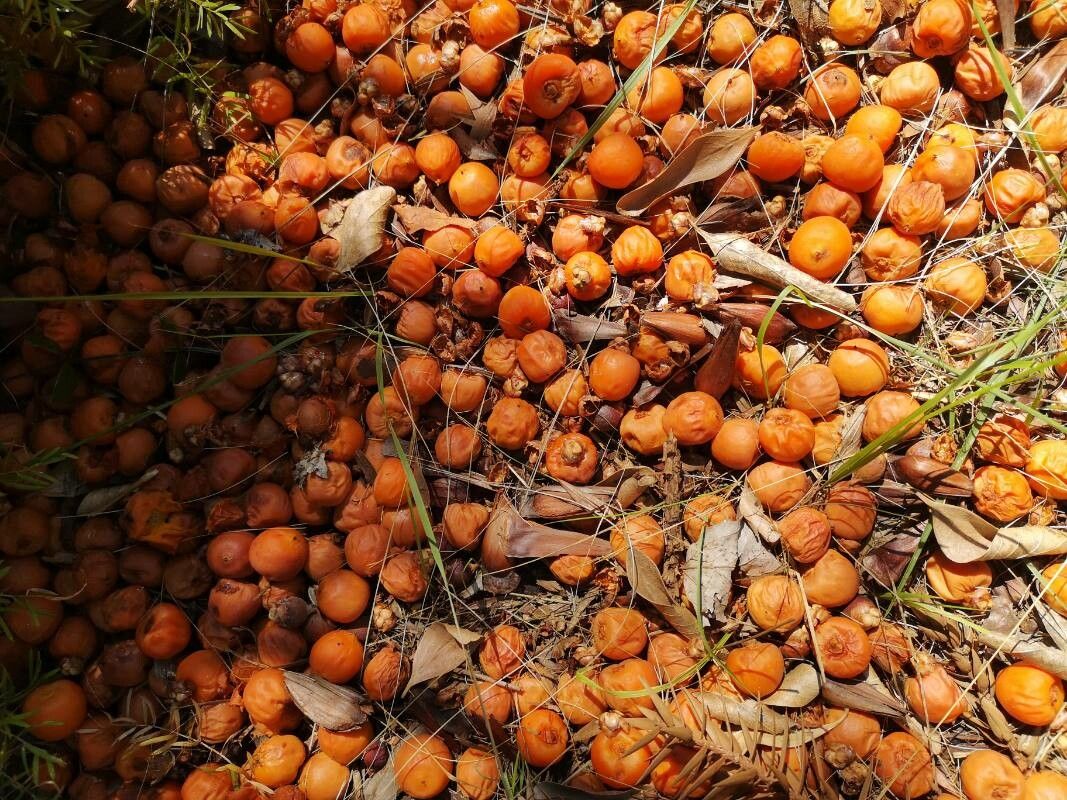
- Harvesting and Cleaning Seeds: If you’re lucky enough to have a fruiting palm, wait for the fruits to ripen and fall. Gently remove the fleshy pulp from the seeds. You can do this by soaking them in water for a few days and then rubbing them clean. I find rinsing them under running water with a soft brush works well.
- Soaking Seeds: Soak the cleaned seeds in lukewarm water for 24-48 hours. This helps to soften the seed coat and encourage germination.
- Planting the Seeds: Fill your pots or trays with your well-draining potting mix. Plant the seeds about 1 inch deep. Space them out if planting in a tray.
- Keeping it Warm and Moist: Water the soil gently so it’s consistently moist but not waterlogged. Cover the pots or tray with a clear plastic bag or propagation dome to maintain high humidity. Place them in a warm location, ideally around 75-85°F (24-29°C). A heat mat can be very beneficial here.
- Patience is Key: Germination can be slow and erratic, sometimes taking several months to over a year. Don’t give up! Keep the soil consistently moist and warm.
Division
This method is for mature palms that have started to produce offshoots or suckers.
- Careful Excavation: Gently dig around the base of the mature palm, exposing the roots. You’re looking for any smaller, independent shoots that have their own root system.
- Separating the Offshoot: Using your sharp, sterilized knife or pruning shears, carefully cut the offshoot away from the mother plant, ensuring it has a good portion of roots attached. Try to disturb the main plant as little as possible.
- Pruning Excess Foliage: To reduce water loss, trim back some of the larger, older fronds on the offshoot.
- Potting Up: Plant the separated offshoot in its own pot filled with your well-draining potting mix. Water lightly.
- Creating Humidity: Similar to seed propagation, cover the pot with a plastic bag or propagation dome to maintain humidity. Keep it in a warm, bright spot out of direct harsh sun.
The “Secret Sauce” (Pro Tips)
Over the years, I’ve learned a few tricks that seem to make a real difference.
- “Air Pruning” Seeds: With seeds, I like to lightly nick the seed coat on the side opposite the “eye” (the germinating point) with a sharp blade. This isn’t about cutting into the embryo, but just breaking the tough outer shell a tiny bit. It lets water penetrate more easily and can speed things up. Always sterilize your blade before and after!
- Bottom Heat is Your Best Friend: For both seeds and divisions, providing gentle bottom heat is a game-changer. A seedling heat mat placed underneath your pots or propagation tray creates a consistently warm environment for root development, which is crucial for palms.
- Don’t Overwater, Ever! This is probably the most common mistake. Palms, especially young ones or cuttings, are very susceptible to root rot. The goal is consistently moist, not soggy. If you see any signs of mold or a sour smell, you’re overwatering.
Aftercare & Troubleshooting
Once you see those first tiny signs of life – a new shoot emerging, or the division looking perky – you’re on the right track!
- Gradual Acclimation: As new leaves develop, gradually remove the plastic bag or dome over a week or two to help the new plant get used to normal humidity levels.
- Light and Water: Continue to provide bright, indirect light. Water only when the top inch of soil feels dry to the touch.
- Fertilizing (Much Later): Don’t fertilize too soon. Wait until the plant is actively growing and has several healthy leaves. When you do, use a diluted palm fertilizer a quarter to half strength.
Now, what if things aren’t going as planned? The most common issue is rot. If your seed turns mushy and black, or a division wilts and goes slimy, it’s almost always due to overwatering and lack of air circulation. If you catch it early, you might be able to save a division by cleaning off any rot and repotting in fresh, dry mix, but often it’s a goner. Another sign of trouble is yellowing leaves on a division, which can indicate it hasn’t established roots or is struggling with transplant shock – ensure it has adequate humidity and warmth.
A Little Patience Goes a Long Way
Propagating Butia eriospatha is a journey. There will be moments of anticipation, and perhaps a few setbacks, but the reward of nurturing a new palm from its very beginnings is incredibly satisfying. Be patient with the process, observe your little ones closely, and most importantly, enjoy the magic of watching life sprout from your efforts. Happy gardening!
Resource: