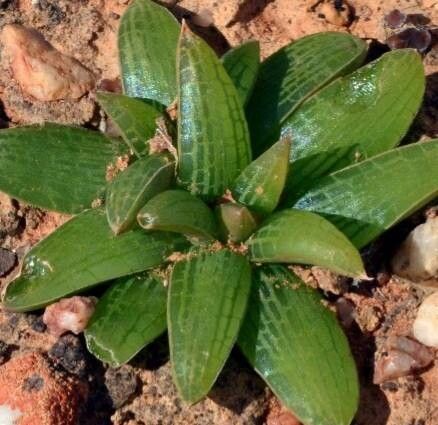
Oh, Bulbine fallax! What a delightful plant to get to know. If you’ve ever admired those charming spikes of star-shaped flowers, often in vibrant yellows or oranges, bursting from architectural succulent leaves, you’re not alone. Bulbine is a real winner in many gardens, with its tough constitution and sheer prettiness. The best part? It’s wonderfully easy to multiply! If you’re new to the gardening game, Bulbine is an excellent plant to start with. Its forgiving nature makes propagating it a joy, not a chore.
The Best Time to Start
My favorite time to get my hands dirty with Bulbine propagation is right after it’s finished its main blooming push. Think of it as giving your plant a little haircut and a chance to send out new energy. Late spring or early summer, as things warm up and the plant is actively growing, is usually your sweet spot. You can also have success with division in early spring before it really gets going.
Supplies You’ll Need
Gathering your tools beforehand makes the whole process so much smoother. Here’s what I usually have on hand:
- Sharp, clean pruning shears or a sharp knife: For making clean cuts.
- Well-draining potting mix: A cactus/succulent mix is perfect, or you can make your own by combining potting soil with perlite or coarse sand.
- Pots or trays with drainage holes: Small pots are ideal for cuttings, and shallow trays work well for divisions.
- Rooting hormone (optional, but helpful): A powdered or gel form.
- Watering can with a fine rose: For gentle watering.
- Labels and a marker: To keep track of your babies!
Propagation Methods
Bulbine fallax is wonderfully versatile, and you have a couple of great options for making more of these beauties.
Division
This is perhaps the simplest method, especially if your plant is already a bit crowded.
- Gently unpot the parent plant. Loosen the soil around the base.
- Inspect the root ball. You’ll often see clumps or offsets naturally forming.
- Carefully pull or cut the clumps apart. Make sure each division has some healthy roots attached. If you’re struggling, a sharp, clean knife can help.
- Allow the cut surfaces to callus over. Let the divisions sit out in a dry, shaded spot for a day or two until the cut edges look healed. This helps prevent rot.
- Pot up each division in your well-draining potting mix. Water them in lightly.
Stem Cuttings
This method is fantastic for creating lots of new plants from a single source.
- Select healthy stems from your mature Bulbine. Look for stems that are firm and have a good bit of growth.
- Using your clean shears, take cuttings that are about 3-6 inches long. Make your cut just below a leaf node (where a leaf attaches to the stem).
- Remove the lower leaves. You want a clean stem for about an inch or two at the bottom.
- (Optional) Dip the cut end in rooting hormone. This can speed up the process and improve success rates.
- Insert the cuttings about an inch deep into your prepared potting mix. You can fit several in a small pot, just give them a little space.
- Water gently to settle the soil around the cuttings.
The “Secret Sauce” (Pro Tips)
Here are a couple of things I’ve learned over the years that make a real difference:
- Don’t drown them! After the initial watering, let the potting mix dry out slightly between waterings. Overwatering is the quickest way to invite rot, especially on newly potted divisions or cuttings. For stem cuttings, a very light misting may be all they need until roots form.
- Patience is key with cuttings. You might not see much happening above ground for a few weeks. The magic is happening underground! Gently tugging a cutting after about 3-4 weeks will give you a sense of resistance if roots have formed.
Aftercare & Troubleshooting
Once your divisions or cuttings have established roots (you’ll see new growth or feel that resistance when you gently pull), you can begin treating them like young versions of your parent plant.
Continue to water sparingly, allowing the soil to dry out between waterings. Keep them in a spot with bright, indirect light. Gradually introduce them to more sun as they grow stronger.
The main issue you’ll likely encounter is rot. Signs of rot include mushy stems or leaves, or a generally limp and discolored appearance. If you see this, act fast. Remove the affected parts with a clean knife. If a whole cutting or division is too far gone, unfortunately, it’s best to discard it to prevent it from affecting other plants. It happens to the best of us!
A Encouraging Closing
See? It’s really quite straightforward. Propagating Bulbine fallax is a wonderful way to expand your collection, share with friends, or just delight in the cycle of growth. Don’t be discouraged if a few don’t make it – that’s all part of the learning curve. Just keep trying, enjoy the process, and soon you’ll have a whole garden full of these cheerful blooms! Happy gardening!
Resource:
https://identify.plantnet.org/k-world-flora/species/Bulbine%20fallax%20Poelln./data