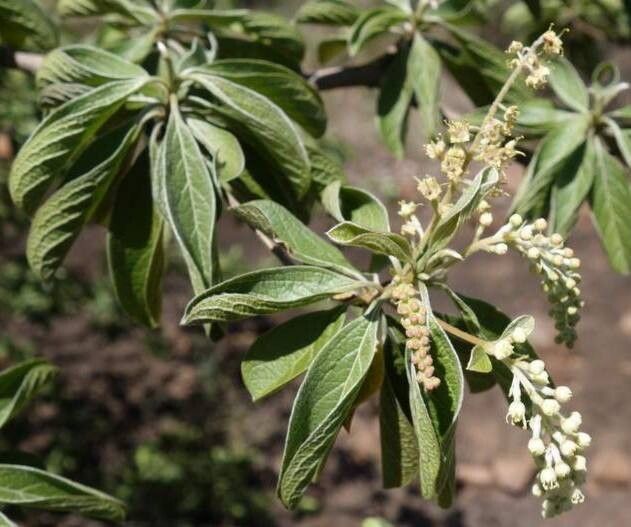
Hello fellow garden lovers! I’m so glad you’ve stopped by. Today, we’re diving into the wonderfully fragrant world of Buddleja cordata, also known as the Heartleaf Butterfly Bush. If you’ve ever been lucky enough to have one of these beauties gracing your yard, you know the joy they bring – a riot of sweet-smelling blooms that are an absolute magnet for butterflies.
Now, you might be thinking, “Can I actually grow more of these myself?” The answer is a resounding YES! Propagating Buddleja cordata is a truly rewarding experience, and I think you’ll find it’s not nearly as fiddly as you might imagine. In fact, for most gardeners, this is a pretty beginner-friendly plant to get started with. It’s a fantastic way to fill out your garden beds or share these beauties with friends.
The Best Time to Start
My go-to for propagating Buddleja cordata is late spring to early summer, right after the plant has finished its initial spring flush of growth. You’re looking for stems that are semi-hardwood. This means they’re not brand new and floppy (that’s softwood, which can be prone to rot) and they’re not old and woody (that’s hardwood, which can be slower to root). You want stems that snap cleanly when you bend them, with a bit of flexibility.
Supplies You’ll Need
Here’s what you’ll want to have on hand before you get started:
- A clean, sharp pruning shear or secateurs. Sharpness is key to making clean cuts that heal well.
- A rooting hormone powder or gel. This isn’t always strictly necessary, but it can give your cuttings a significant boost.
- A potting mix that drains well. I love a mix of equal parts peat moss (or coir), perlite, and a little bit of compost.
- Small pots or trays with drainage holes. Yogurt cups with holes poked in the bottom work in a pinch!
- A clear plastic bag or a propagation dome. This helps create a humid environment for your cuttings.
- A dibber or a pencil for making holes in the soil.
- A spray bottle filled with water.
Propagation Methods
For Buddleja cordata, I find stem cuttings to be the easiest and most reliable method. Here’s how I do it:
- Gather Your Cuttings: On a cool morning, select healthy stems from your chosen plant. Look for those semi-hardwood pieces I mentioned earlier.
- Make Your Cuts: Using your clean pruning shear, take 4-6 inch cuttings. Make the cut just below a leaf node (where a leaf attaches to the stem). This is where the magic happens for root development.
- Prepare the Cuttings: Gently remove the leaves from the bottom two-thirds of each cutting. You want to expose the nodes where roots will form. Leave just 2-3 leaves at the top. If the remaining leaves are very large, you can even cut them in half to reduce water loss through transpiration.
- Apply Rooting Hormone: Dip the bottom end of each cutting into your rooting hormone. Tap off any excess.
- Plant Your Cuttings: Fill your pots with the well-draining potting mix. Use your dibber or pencil to make a hole in the center of the soil. Gently insert the bottom of the cutting into the hole, making sure the nodes are covered by the soil. Firm the soil gently around the base of the cutting to ensure good contact.
- Water and Cover: Water thoroughly until you see water draining from the bottom of the pot. Then, place the pots inside your clear plastic bag or under a propagation dome. This creates a mini-greenhouse effect.
The “Secret Sauce” (Pro Tips)
Here are a few things I’ve learned over the years that really make a difference:
- Don’t let the leaves touch the water (if you were to try water propagation). While some plants root well in water, for Buddleja, keeping the leaves out of standing water is crucial to prevent rot if you’re using soil.
- Bottom heat is your friend! If you have a seedling heat mat, placing your pots on top of it can dramatically speed up root formation. It mimics the warmth of the soil that encourages growth.
- Location, location, location. Place your propagation pots in a bright spot, but out of direct, harsh sunlight. Too much sun can scorch those tender cuttings. A shady spot on your patio or a bright windowsill works perfectly.
Aftercare & Troubleshooting
Once your cuttings are potted, the key is to maintain consistent moisture and humidity.
- Check the soil regularly. It should feel damp, but not waterlogged. If it starts to dry out, give it a gentle watering or mist. If using a plastic bag, you might only need to mist every few days.
- Watch for new growth. This is your first sign that roots are forming! You might see tiny new leaves or stems appearing.
- Test for roots. After about 4-6 weeks, you can gently tug on a cutting. If you feel resistance, it means roots have developed. You can also carefully unpot one to check.
- If you see rot (mushy stems or black ends), unfortunately, that cutting is likely lost. Remove it immediately to prevent it from spreading to others. Ensure your potting mix is draining well and that you’re not overwatering. Good air circulation is also important.
A Word of Encouragement
Don’t be discouraged if not every single cutting takes. Gardening is a journey of learning and experimenting! Be patient with your new plants. The satisfaction of nurturing a brand new Buddleja cordata from a simple cutting is immense. Enjoy the process, happy propagating, and may your gardens be filled with blooms and butterflies!
Resource:
https://identify.plantnet.org/k-world-flora/species/Buddleja%20cordata%20Kunth/data