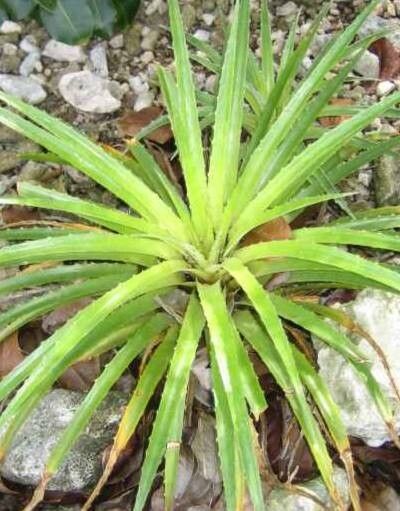
Hello fellow plant lovers! Today, we’re diving into the wonderfully accessible world of Bromelia humilis propagation. If you’ve ever admired these vibrant, architectural beauties with their striking bromeliad flowers and wondered how to get more of them, you’re in the right place. Sharing a new plant with a friend, or just wanting to fill your home with even more of their tropical charm, is incredibly fulfilling. And the good news? Bromelia humilis is generally a very forgiving plant, making it a fantastic choice for beginners looking to expand their plant family.
The Best Time to Start
Timing is everything in gardening, and for Bromelia humilis, the sweet spot is generally spring or early summer. This is when the plant is actively growing and has the energy reserves needed to produce new pups and root them successfully. You’ll also find it easier to spot where to make your cuts when the plant is in full growth mode.
Supplies You’ll Need
Gathering your supplies beforehand makes the whole process much smoother. Here’s what you’ll want to have on hand:
- Sharp, sterile pruning shears or a clean knife: Essential for making clean cuts.
- Cinnamon powder or a rooting hormone (optional but recommended): Helps prevent fungal infections and encourages root development.
- Well-draining potting mix: A blend designed for bromeliads or a mix of perlite, orchid bark, and peat moss works beautifully.
- Small pots or containers: Just big enough for your new plantlets.
- Spray bottle: For misting.
- Patience! This is the most important ingredient.
Propagation Methods: Dividing Off Pups
For Bromelia humilis, the most common and easiest way to propagate is by dividing off the pups that naturally grow at the base of the mother plant.
- Inspect your plant: Look for those smaller baby plants, called “pups,” that have started to emerge around the base of your mature bromeliad. You’re looking for pups that are at least a quarter to a third the size of the mother plant.
- Gently expose the pups: Carefully remove the mother plant from its pot. This allows you to see where the pups are attached. If the soil is compacted, gently loosen it around the pups.
- Separate the pups: Using your sterile pruning shears or knife, make a clean cut severing the pup from the mother plant. Try to get a bit of root attached to the pup if possible. If the pup is very small or hasn’t developed roots yet, don’t worry too much; it can still root if handled correctly.
- Allow to callus (the “secret sauce” step!): This is crucial! Let the cut end of the pup air dry for 24-48 hours. This creates a dry, scar-like layer called a callus. This step significantly reduces the risk of rot, which is the most common cause of failure when propagating bromeliads.
- Potting up: Once callused, you can plant your pup. Use your well-draining potting mix in a small pot. Plant the pup so that the base is just covered by the soil. Don’t bury it too deep.
The “Secret Sauce” (Pro Tips)
- The Callus is King: I can’t stress this enough – letting that cut end callus over is non-negotiable. It’s the single biggest factor in preventing rot and ensuring your pup has the best chance of survival. It feels counterintuitive to leave a cutting out, but trust me on this!
- Less is More with Watering Initially: For the first few weeks after potting, only water sparingly. You want the soil to be barely moist. Bromeliad pups can absorb moisture through their leaves, but their root system is still developing. Too much water in the soil can drown those nascent roots. A light misting of the leaves every few days is usually enough.
- Embrace a Little Ambient Humidity: While we don’t want soggy roots, keeping the humidity around your new pups slightly elevated can encourage root growth. You can achieve this by placing the pot on a pebble tray with water (making sure the pot isn’t sitting in the water) or grouping it with other plants.
Aftercare & Troubleshooting
Once your pup looks settled, keep it in indirect light. You’re looking for signs of new growth, which usually means roots have formed. Gently tugging on the pup – if it offers resistance, roots have appeared!
The most common issue you’ll encounter is rot. If the pup starts to look mushy, dark, or slimy, sadly, it’s likely succumbing to rot. This usually happens if the callus wasn’t allowed to dry properly or if the soil stayed too wet from the start. Don’t get discouraged if this happens once or twice; it’s a learning curve! Discard any rotted material and start again, remembering those callus and watering tips.
A Little Patience Goes a Long Way
Propagating Bromelia humilis is a wonderfully rewarding journey. It might take a few weeks, or even a couple of months, for your pup to really establish itself and show noticeable growth. The key is to be patient, observe your plant, and trust the process. Enjoy nurturing these little green babies, and soon you’ll have a whole collection of these tropical treasures! Happy planting!
Resource:
https://identify.plantnet.org/k-world-flora/species/Bromelia%20humilis%20Jacq./data