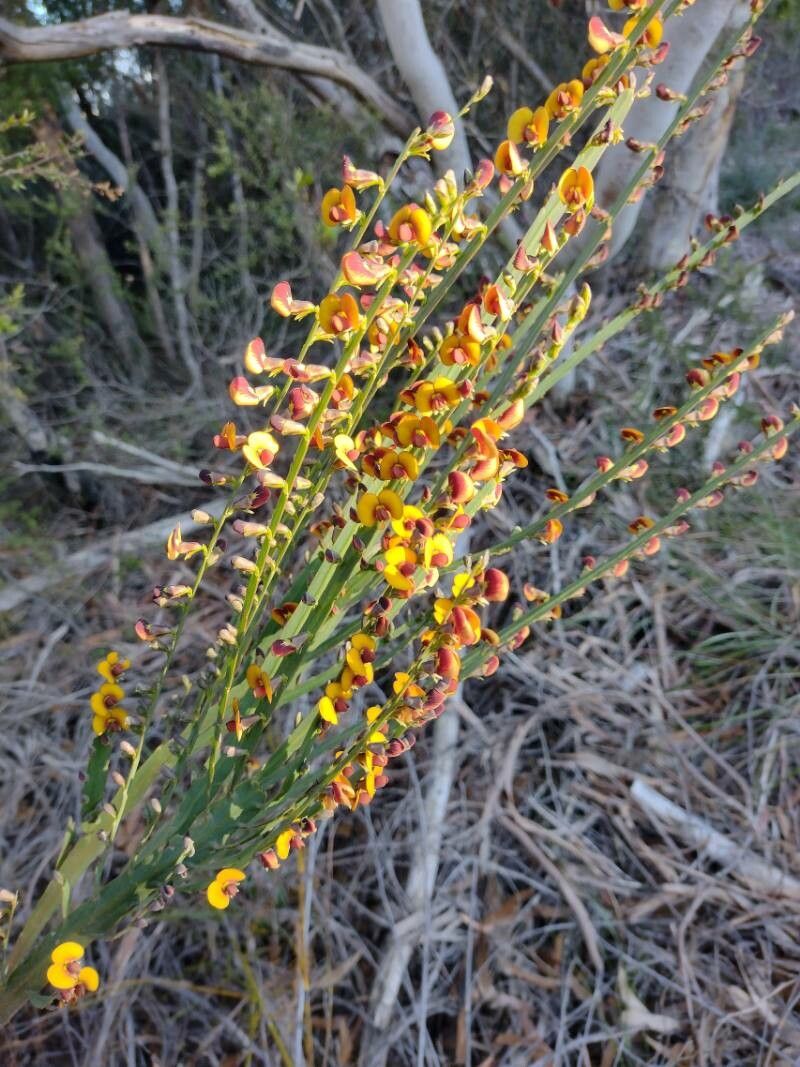
Oh, hello there! Come on in, grab a cuppa. Today, we’re diving into something really special, a plant that captures the wild beauty of our Australian bush: Bossiaea scolopendria. You know, the one with those lovely, flat, leaf-like stems that look so architectural and just drip with charm. It’s a real stunner, especially when it bursts into those cheerful yellow and red pea-like flowers.
Propagating Bossiaea scolopendria is such a rewarding experience. It’s like coaxing a little piece of nature’s magic into your own garden. Now, for beginners, I wouldn’t say it’s the absolute easiest thing in the world, but with a bit of patience and these tips, you’ll be well on your way. It’s more of a “let’s learn together” kind of plant, and that’s half the fun!
The Best Time to Start
Honestly, the sweet spot for propagating Bossiaea scolopendria is when the plant is actively growing. Think late spring or early summer. After its main flowering flush, when it has plenty of energy to put into creating new roots. You can also try in early autumn, but you might find the success rate a little lower as things start to slow down.
Supplies You’ll Need
Before we get our hands dirty, here’s what you’ll want to have ready:
- Sharp pruning shears or a clean craft knife: For taking cuttings.
- Well-draining potting mix: A good blend is about 50% coarse sand and 50% seed-raising mix or perlite. Avoid anything too heavy that will hold excess moisture.
- Small pots or seedling trays: Clean ones, of course!
- Rooting hormone (optional but recommended): This can give your cuttings a real boost. Look for one suitable for softwood or semi-hardwood cuttings.
- A watering can with a fine rose: To water gently without disturbing things.
- Plastic bags or a propagation dome: To create a humid environment for your cuttings.
- Labels and a permanent marker: So you don’t forget what’s what!
Propagation Methods
We’ll focus on the most reliable method for Bossiaea scolopendria: stem cuttings.
- Take Your Cuttings: Find a healthy, vigorous stem on your Bossiaea scolopendria. Using your clean pruning shears or knife, take a cutting that’s about 10-15 cm long. Make the cut just below a leaf node (where a leaf attaches to the stem) – this is where the magic of root formation often happens.
- Prepare the Cuttings: Gently remove any lower leaves from your cutting. You want to expose the nodes where roots will form. If the leaves are large, you can even cut the remaining leaves in half. This reduces water loss as your cutting tries to establish itself.
- Apply Rooting Hormone (If Using): Dip the cut end of the stem into the rooting hormone powder, tap off any excess.
- Plant Your Cuttings: Make a small hole in your prepared well-draining potting mix. Insert the cut end of the Bossiaea cutting into the hole, ensuring the nodes are buried. Firm the mix gently around the stem.
- Create a Humid Environment: Water the mix gently. Then, cover the pots or trays with a clear plastic bag or propagation dome. This creates a mini-greenhouse, keeping the moisture levels high, which is crucial for cuttings.
The “Secret Sauce” (Pro Tips)
Here are a couple of little tricks I’ve picked up over the years that can really help:
- Don’t let the leaves touch the water: If you’re using a method where leaves might dip into water, it’s a recipe for rot. Always aim to keep aerial parts dry unless they are submerged with the intention of rooting. For stem cuttings, this means ensure the leaves are above the soil line.
- Bottom heat makes a difference: If you have a heating mat, placing your propagation tray on it can significantly speed up root development. Not essential, but it’s a real game-changer, especially if your home is on the cooler side.
Aftercare & Troubleshooting
Once your cuttings are planted, keep them in a bright spot, but out of direct, harsh sunlight. The soil should be kept consistently moist but not soggy. If you’ve covered them, air them out for a few minutes each day to prevent fungal issues.
You’ll know they’re rooting when you see new growth appearing. This can take anywhere from 4-8 weeks, sometimes longer. Be patient!
The most common problem you might encounter is rot. If a cutting turns black and mushy, it’s usually a sign of too much moisture and not enough air circulation. Unfortunately, at that point, it’s best to discard it and try again. Make sure your potting mix is indeed free-draining!
A Encouraging Closing
So there you have it! Giving Bossiaea scolopendria a go from cuttings is a lovely way to expand your collection or share this delightful plant. Remember, a little patience goes a long way in the garden. Don’t be discouraged if your first attempt isn’t perfect. Each cutting is a learning opportunity, and the joy of seeing those first roots emerge is truly worth all the effort. Happy propagating!
Resource:
https://identify.plantnet.org/k-world-flora/species/Bossiaea%20scolopendria%20(Andrews)%20Sm./data