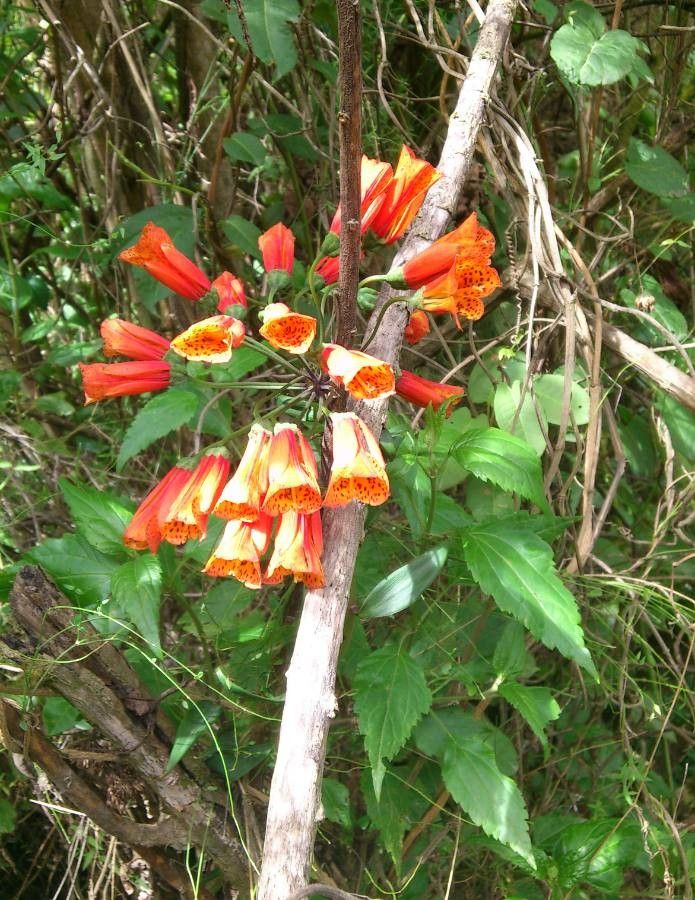
Oh, Bomarea glaucescens! If you’re looking for a vine that truly stops people in their tracks, this is it. With its vibrant, bell-shaped flowers that cascade down, it’s like living jewelry for your garden fence or arbor. And the reward of coaxing a new Bomarea to life from a piece of your existing beauty? Absolutely priceless. Now, to be honest, Bomareas can be a little particular, so while it’s not impossible for a beginner, I’d say it’s a plant that truly shines when you’ve got a bit of propagation experience under your belt. Think of it as a delightful challenge on your gardening journey.
The Best Time to Start
For Bomarea glaucescens, spring is your golden ticket. This is when the plant is really waking up after its winter rest and gearing up for active growth. You’ll find new shoots emerging, and the stems will be full of youthful vigor. It’s the perfect moment to take cuttings, as they’ll be brimming with the energy to root and establish themselves quickly. Trying to propagate when the plant is dormant or stressed just won’t give you the results you’re hoping for.
Supplies You’ll Need
Before we get our hands dirty, let’s gather our tools:
- Sharp pruning shears or a clean knife: For making precise cuts. A dull tool can bruise the stem, which is a no-no.
- Rooting hormone (optional but recommended): A powder or gel that encourages root development.
- Small pots or seed trays: Clean ones, of course!
- A well-draining potting mix: I like to use a blend of perlite, coco coir, and a bit of coir. A standard seedling mix with added perlite works well too.
- Plastic bags or a propagator: To create a humid environment for your cuttings.
- Watering can or spray bottle: For gentle watering.
- Labels and a pen: To keep track of what you’ve planted.
Propagation Methods
Bomarea glaucescens can be a bit fussy, but I’ve had the most success with stem cuttings, particularly from these vigorous spring shoots.
Stem Cuttings:
- Select Your Cutting: Look for a healthy, semi-hardwood stem that’s about 4-6 inches long. Ideally, it should have at least two nodes (those little bumps where leaves emerge).
- Make the Cut: Using your clean shears or knife, make a clean cut just below a node. This is where the magic of root development is most likely to happen.
- Prepare the Cutting: Gently remove any lower leaves, leaving just one or two at the very top. If your cutting is very long, you can even trim the top leaves in half to reduce water loss.
- Apply Rooting Hormone: Dip the cut end into your rooting hormone, tapping off any excess.
- Planting: Fill your small pots with your prepared potting mix. Make a small hole with your finger or a pencil, and insert the cutting deep enough so that at least one node is buried beneath the soil surface. Firm the soil gently around the stem.
- Water Gently: Water the potting mix thoroughly but gently. You want it moist, not waterlogged.
- Create Humidity: Cover the pot with a clear plastic bag, or place it in a propagator. Make sure the leaves aren’t touching the plastic if possible – this can encourage rot.
The “Secret Sauce”
There are a couple of little tricks I’ve learned over the years that really make a difference with trickier propagations like Bomarea:
- Bottom Heat is Your Best Friend: Bomareas love warmth, especially at their base. A small heating mat placed under your pots can dramatically speed up root formation. It mimics that cozy, underground warmth they crave.
- Don’t Be Too Keen with the Water: While humidity is crucial, overwatering is the fastest way to kill a cutting. Let the surface of the soil dry out slightly between waterings. Feel the weight of the pot – a lighter pot means it’s time for a drink.
Aftercare & Troubleshooting
Once your cuttings are planted, keep them in a bright spot but out of direct, harsh sunlight. That plastic bag will create a mini-greenhouse, so check on them regularly. If you see condensation building up heavily, open the bag for a few hours to let some air circulate.
You’ll know your cutting is taking off when you see new leaf growth emerging from the top. This is a good sign that roots are forming below. Gently tugging on the cutting after a few weeks – if there’s resistance, you’ve likely got roots!
Now, what if things go wrong? The most common culprit is rot. If your cutting looks dark, mushy, or just wilts completely and turns black, it’s a sign of too much moisture and not enough air circulation. Sadly, a rotten cutting is usually a goner. The best thing to do is discard it, clean your pot thoroughly, and try again with a fresh cutting, paying closer attention to watering and air flow.
A Encouraging Closing
Propagating plants is a journey of learning and patience. Sometimes they take off beautifully, and sometimes they… well, they teach us something new. Don’t get discouraged if your first few attempts aren’t perfect. Each little Bomarea seedling you nurture from a cutting is a testament to your dedication and growing skill. So, grab those shears, get planted, and enjoy the wonderful process of bringing more of these stunning vines into your life. Happy gardening!
Resource:
https://identify.plantnet.org/k-world-flora/species/Bomarea%20glaucescens%20(Kunth)%20Baker/data