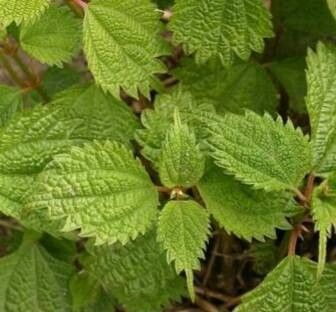
Oh, hello there! I’m so glad you’ve stopped by. We’re going to talk about one of my favorite plants today: Boehmeria virgata. If you haven’t met her yet, imagine a plant with beautiful, lush foliage, often with a delicate, airy habit. She’s a real charmer in the garden, adding texture and interest, and best of all, she’s incredibly rewarding to multiply!
Some folks find propagation a little daunting, but let me tell you, Boehmeria virgata is a wonderfully forgiving subject. I’d say she’s quite beginner-friendly, especially with a few pointers from yours truly. You’ll get the hang of it in no time, and soon you’ll have little baby plants to share with friends or fill up every sunny spot you have.
The Best Time to Start
When it comes to coaxing new life from a plant, timing is everything. For Boehmeria virgata, the late spring to early summer is your golden window. This is when the plant is in its active growth phase, brimming with energy. Cuttings taken now have the best chance of quickly developing roots. Think of it like starting a new journey – you want to begin when you have the most momentum!
Supplies You’ll Need
Gathering your tools beforehand makes the whole process so much smoother. Here’s what you’ll want to have on hand:
- Sharp, clean pruning shears or a sharp knife: A clean cut is crucial to prevent disease.
- Rooting hormone (optional but recommended): This isn’t strictly necessary for Boehmeria virgata, but it gives cuttings a significant boost.
- Well-draining potting mix: A good mix of equal parts peat moss or coir, perlite, and a touch of compost works beautifully. You want something that holds moisture but doesn’t get waterlogged.
- Small pots or seedling trays: Clean containers are a must.
- Plastic bags or a propagation dome: This helps maintain humidity.
- Watering can or spray bottle: For gentle watering.
Propagation Methods
We’ll focus on a couple of tried-and-true methods that work wonders for Boehmeria virgata.
Stem Cuttings
This is my go-to method for this lovely plant.
- Take your cuttings: On a healthy, non-flowering stem from your mature plant, make a clean cut just below a leaf node (where a leaf meets the stem). You want cuttings that are about 4-6 inches long. Remove the lower leaves, leaving just a few at the top.
- Prepare the cutting: Dip the cut end of the stem into your rooting hormone, tapping off any excess.
- Plant the cutting: Fill your small pots with the well-draining potting mix. Make a small hole in the center with your finger or a pencil. Gently insert the cutting into the hole, ensuring the leaf nodes are nestled in the soil. Make sure the leaves at the top aren’t touching the soil. Firm the soil gently around the base.
- Water gently: Give the soil a light watering. You want it moist, not soggy.
- Create a mini-greenhouse: Cover the pot with a plastic bag, propping it up with a skewer or three so it doesn’t touch the leaves. Alternatively, use a propagation dome. Place the pot in a bright location, but out of direct sunlight.
Water propagation can also work, but I find stem cuttings in soil tend to adapt more readily to their permanent homes.
The “Secret Sauce” (Pro Tips)
Now, for a few little nuggets of wisdom that make all the difference.
- Bottom Heat is Your Friend: If you’re a bit impatient (I know I can be!), investing in a small seedling heat mat can dramatically speed up root formation. The warmth encourages the plant to get moving. Place your pots on the mat – it’s like a cozy little spa day for your cuttings!
- Don’t Let Those Leaves Dangle: I mentioned it before, but it bears repeating. If the leaves of your cutting are sitting in standing water or touching damp soil for too long, they’re far more likely to rot than root. Keep them elevated and airy.
- Mist, Don’t Drench: While humidity is key, overwatering can be your worst enemy. A gentle misting every day or two, or whenever the surface soil starts to look dry, is usually sufficient, especially when the cuttings are covered.
Aftercare & Troubleshooting
Once your cuttings show signs of life – usually new leaf growth – that’s a good indication they’ve started to root! You can gently tug on the cutting; if you feel resistance, roots are forming.
Continue to keep the soil consistently moist but not waterlogged. Gradually remove the plastic bag or dome over a few days to acclimate the new plant to the ambient humidity. Once they have a decent root system, you can transplant them into slightly larger pots using the same well-draining mix.
The most common issue you’ll encounter is rot. If a cutting turns black and mushy, it’s usually a sign of too much moisture. Don’t be discouraged! Just clean things up and try again with a fresh cutting, paying close attention to drainage and humidity levels.
Your Growing Success
There you have it! Growing more Boehmeria virgata from cuttings is such a fulfilling endeavor. Be patient with the process, enjoy the small victories, and celebrate each new tiny plant that emerges. Happy gardening, my friends!
Resource:
https://identify.plantnet.org/k-world-flora/species/Boehmeria%20virgata%20(G.Forst.)%20Guill./data