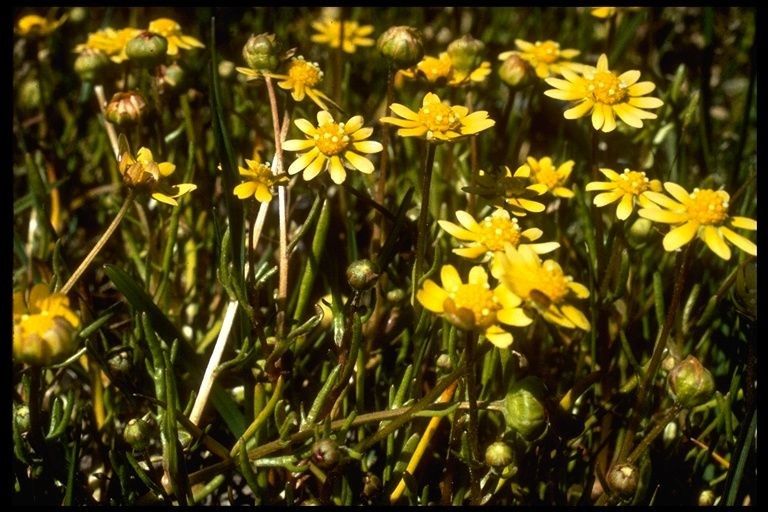
Hello, fellow plant enthusiasts! I’m so excited to chat with you today about a truly special little plant: Blennosperma bakeri, also often called Baker’s Blennosperma. Its delicate, cheerful yellow flowers really brighten up the garden, and once you see them, you’ll understand why people want more than just one! Propagating this beauty is a wonderfully rewarding journey, and I’m here to guide you every step of the way.
Now, for our beginners out there, is Blennosperma bakeri a walk in the park or a bit of a puzzle? I’d say it’s somewhere in the middle – not overly fussy, but it does appreciate a little thoughtful attention. The success you’ll have will definitely make you feel like a seasoned pro!
The Best Time to Start
For the highest chance of success with Blennosperma bakeri, I always recommend working in the spring, as the plant is actively growing after its winter rest. You’ll be looking for young, healthy stems that aren’t flowering yet. These are full of the vibrant energy needed to form new roots.
Supplies You’ll Need
Here’s what you’ll want to have on hand:
- Sharp, clean pruning shears or a sharp knife: For taking your cuttings. Cleanliness is key to preventing disease!
- A well-draining potting mix: I find a blend designed for succulents or a mix of perlite and peat moss (about a 50/50 ratio) works wonders.
- Small pots or seed trays with drainage holes: Enough for all your cuttings.
- Rooting hormone (optional, but helpful): Look for a powder or gel.
- A watering can or spray bottle: For gentle watering.
- Labels and a marker: To keep track of what you’ve planted and when.
- A bright location with indirect light: Where your new plant babies will be safe.
Propagation Methods
There are a couple of reliable ways to get more Blennosperma bakeri plants. Let’s dive into the most common ones.
Stem Cuttings
This is my go-to method for this plant. It’s straightforward and generally yields great results.
- Select and cut: Find a healthy stem that’s about 4-6 inches long. Using your clean shears, make a cut just below a leaf node (where a leaf attaches to the stem). This is where roots are most likely to form.
- Prepare the cutting: Gently remove the lower leaves from the stem, leaving just a few at the top. This helps prevent rot and focuses the plant’s energy on root development.
- Apply rooting hormone (optional): If you’re using rooting hormone, dip the cut end of the stem into the powder or gel. Tap off any excess.
- Plant: Stick the prepared cutting into your pre-moistened potting mix. Make sure the leaf nodes are covered by the soil.
- Water gently: Give the soil a light watering, just enough to settle it around the cutting. Avoid waterlogging.
- Provide a humid environment: You can cover the pot with a clear plastic bag to create a mini-greenhouse effect. Poke a few holes in the bag for air circulation.
Water Propagation (for the impatient gardener!)
Sometimes, I like to watch the magic happen right in front of me. For Blennosperma bakeri, this can also be successful.
- Take cuttings and prepare: Follow steps 1 and 2 above for taking your cuttings and removing lower leaves.
- Place in water: Put the cuttings in a small jar or glass filled with clean water. Make sure the leaf nodes are submerged, but not the leaves themselves.
- Change water regularly: Over the next few weeks, you’ll need to change the water every few days to keep it fresh and prevent bacteria growth.
- Watch for roots: You should start to see tiny white roots appearing from the nodes.
- Plant when ready: Once the roots are about an inch long, carefully plant the cutting into your well-draining potting mix.
The “Secret Sauce” (Pro Tips)
It’s the little things that make a big difference, isn’t it? Here are a couple of tricks I’ve learned over the years:
- Don’t over-love it with water: Blennosperma bakeri likes its soil to dry out a bit between waterings. For cuttings, this means keeping the soil moist, not soggy. Soggy soil is the fastest way to invite rot.
- Think about warmth: New roots are like little babies – they appreciate a bit of gentle warmth to get going. If your home tends to be on the cooler side, consider placing your pots on a heat mat designed for seedlings. It really speeds up the rooting process.
- Patience is a virtue, and scouting is key: When taking cuttings, look for stems that are firm and have a good green color. Avoid anything that looks leggy or is already showing signs of stress. The healthier your starting material, the healthier your new plant will be.
Aftercare & Troubleshooting
So, you’ve got roots! Hooray! Continue to keep the soil lightly moist as your new plant establishes itself. Once you see new leaf growth appearing, that’s a sure sign it’s happy and growing strong. You can gradually reduce the humidity if you used the plastic bag method.
Now, let’s talk about what can go wrong. The most common issue you’ll encounter is rot. If a cutting turns black and mushy, it’s usually a sign of too much moisture or not enough air circulation. If this happens, remove the affected cutting immediately to prevent it from spreading. Overwatering is often the culprit, so adjust your watering schedule.
A Encouraging Closing
Propagating Blennosperma bakeri is a journey of patience and observation. Don’t be discouraged if you have a few casualties along the way – it happens to all of us! Each attempt teaches you something new. Enjoy the process of nurturing these tiny beginnings into thriving new plants. Happy gardening!
Resource:
https://identify.plantnet.org/k-world-flora/species/Blennosperma%20bakeri%20Heiser/data