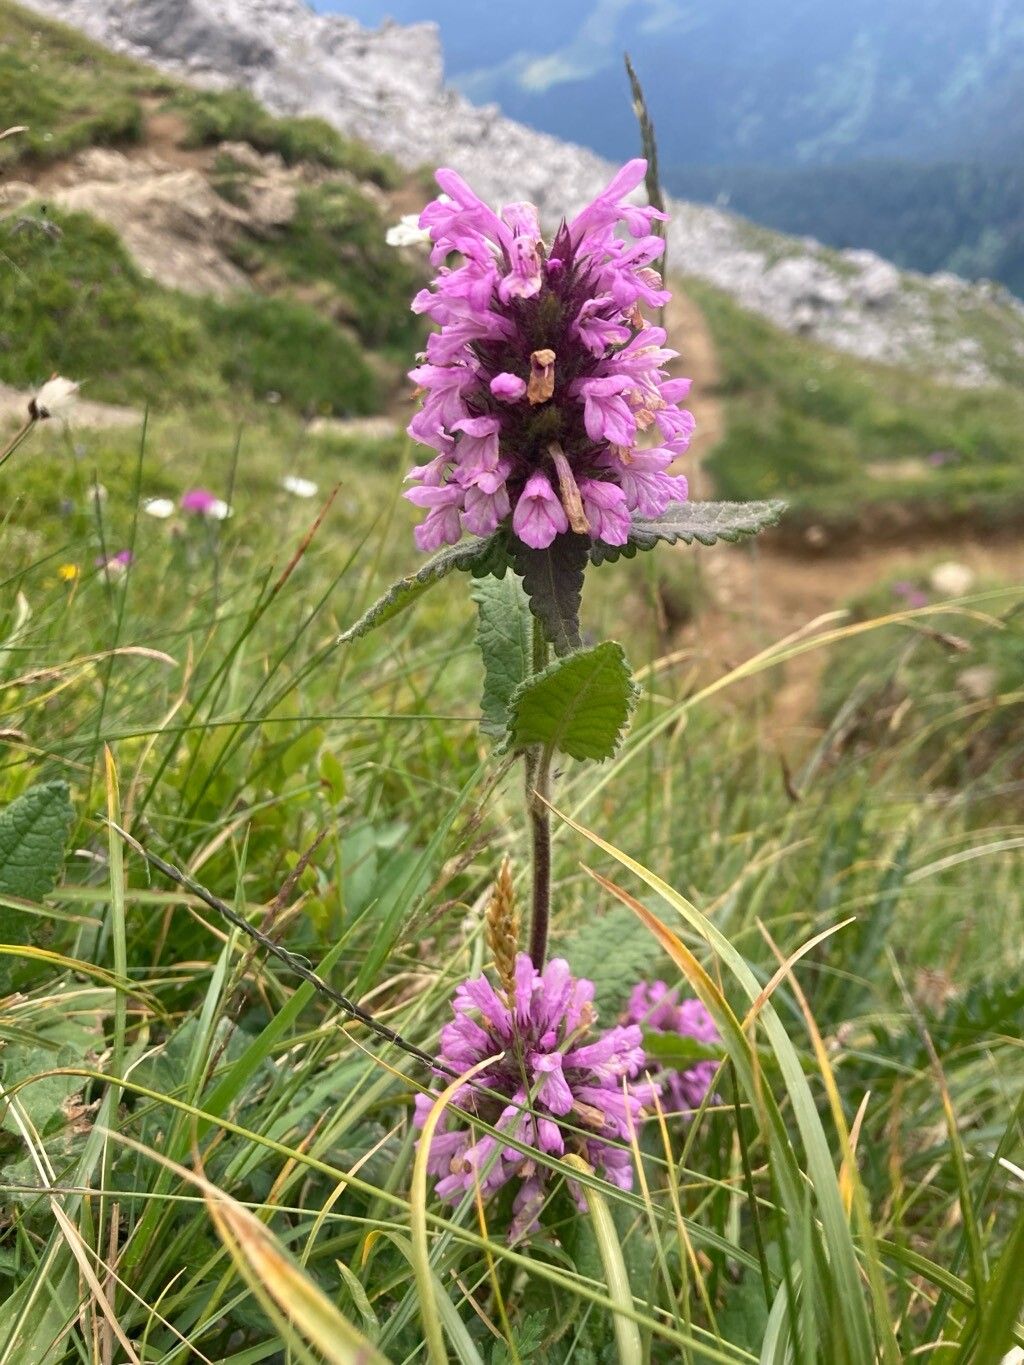
You know, sometimes the most unassuming plants are the real gems in the garden. Betonica hirsuta, with its lovely little, often fuzzy, flower spikes and neat foliage, is one of those. It brings this wonderful understated charm, and honestly, there’s something incredibly satisfying about watching a tiny cutting transform into a full-fledged plant. It might sound a bit daunting, but I’ve found Betonica hirsuta to be surprisingly cooperative when it comes to propagation, making it a great candidate even for those of you just dipping your toes into the world of multiplying your plants.
The Best Time to Start
For the highest success rate with Betonica hirsuta, I always lean towards spring. This is when the plant is actively growing and has plenty of energy stored up. You’re looking for young, healthy stems that haven’t yet flowered. If you miss the spring window, a late summer or early autumn propagation can also work, but you’ll want to ensure those new plants have a good chance to establish before winter sets in.
Supplies You’ll Need
Here’s a simple rundown of what you’ll want to have on hand:
- Sharp pruning shears or a clean, sharp knife: For making those crucial clean cuts.
- A good quality potting mix: Something well-draining is key. I often use a mix of peat moss, perlite, and a bit of compost.
- Small pots or trays: Seedling pots or even clean yogurt cups with drainage holes work perfectly.
- Rooting hormone (optional but helpful): This can give your cuttings that extra boost. Gel or powder forms are fine.
- A watering can with a fine rose: For gentle watering.
- Plastic bags or a propagator: To create a humid environment.
Propagation Methods
I find Betonica hirsuta is most easily propagated through stem cuttings. It’s straightforward and usually yields great results.
- Take the Cuttings: In spring, select healthy, non-flowering stems. Using your clean shears or knife, make a cut just below a leaf node (where a leaf meets the stem). Aim for cuttings that are about 3-4 inches long. Remove the lower leaves, leaving just a couple at the very top.
- Prepare for Rooting: If you’re using rooting hormone, dip the cut end of the stem into it. You don’t need a thick coating, just a light dusting.
- Plant Your Cuttings: Fill your small pots or trays with your prepared potting mix. Make a small hole in the center of the soil with your finger or a pencil. Gently insert the cut end of the stem into the hole, ensuring the leaf node where you removed the leaves is buried in the soil.
- Water Gently: Water the soil thoroughly but gently, ensuring it’s moist but not waterlogged.
- Create Humidity: This is where the plastic bag or propagator comes in. Cover the pot loosely with a plastic bag (propping it up with a stick or two so it doesn’t touch the leaves, if possible) or place it in a propagator. This helps maintain the humidity the cuttings need to develop roots.
- Placement is Key: Place the pots in a bright spot, but out of direct sunlight. A windowsill that gets bright, indirect light is perfect.
The “Secret Sauce”
Now, for a couple of tricks I’ve learned over the years that can really make a difference:
- Don’t be afraid of a slightly airy mix. Betonica hirsuta, like many plants, really dislikes sitting in soggy soil. Adding extra perlite or even a bit of sharp sand to your potting mix for cuttings can be a game-changer, preventing that dreaded rot before roots even have a chance to form.
- Bottom heat is your friend! If you have an old seedling mat, popping your pots onto it can significantly speed up the rooting process. It encourages root development from below, much like the warmth of the soil in spring. Just make sure the heat isn’t excessive, lukewarm is ideal.
Aftercare & Troubleshooting
Once you see signs of new growth, like tiny leaves emerging from the top of the cutting, that’s a good indication that roots have formed. Gently tug on the cutting; if there’s resistance, you’ve got roots! Remove the plastic bag or open the propagator vents gradually to harden off your new plants. Continue to keep the soil consistently moist but not soggy.
The most common issue you might run into is rot. If your cuttings turn mushy, black, or smell foul, they’ve likely succumbed to rot. This is usually a sign of overwatering or poor drainage. Don’t be discouraged if a few don’t make it; it’s all part of the learning process! Just remove the affected cuttings and check your watering and soil mix.
Happy Propagating!
Remember, patience is a gardener’s greatest virtue. Propagation is a journey, and sometimes those little cuttings take their sweet time. Enjoy the process of nurturing these new lives, and soon you’ll have more of these charming Betonica hirsuta plants to add to your garden or share with fellow plant lovers. Happy growing!
Resource:
https://identify.plantnet.org/k-world-flora/species/Betonica%20hirsuta%20L./data