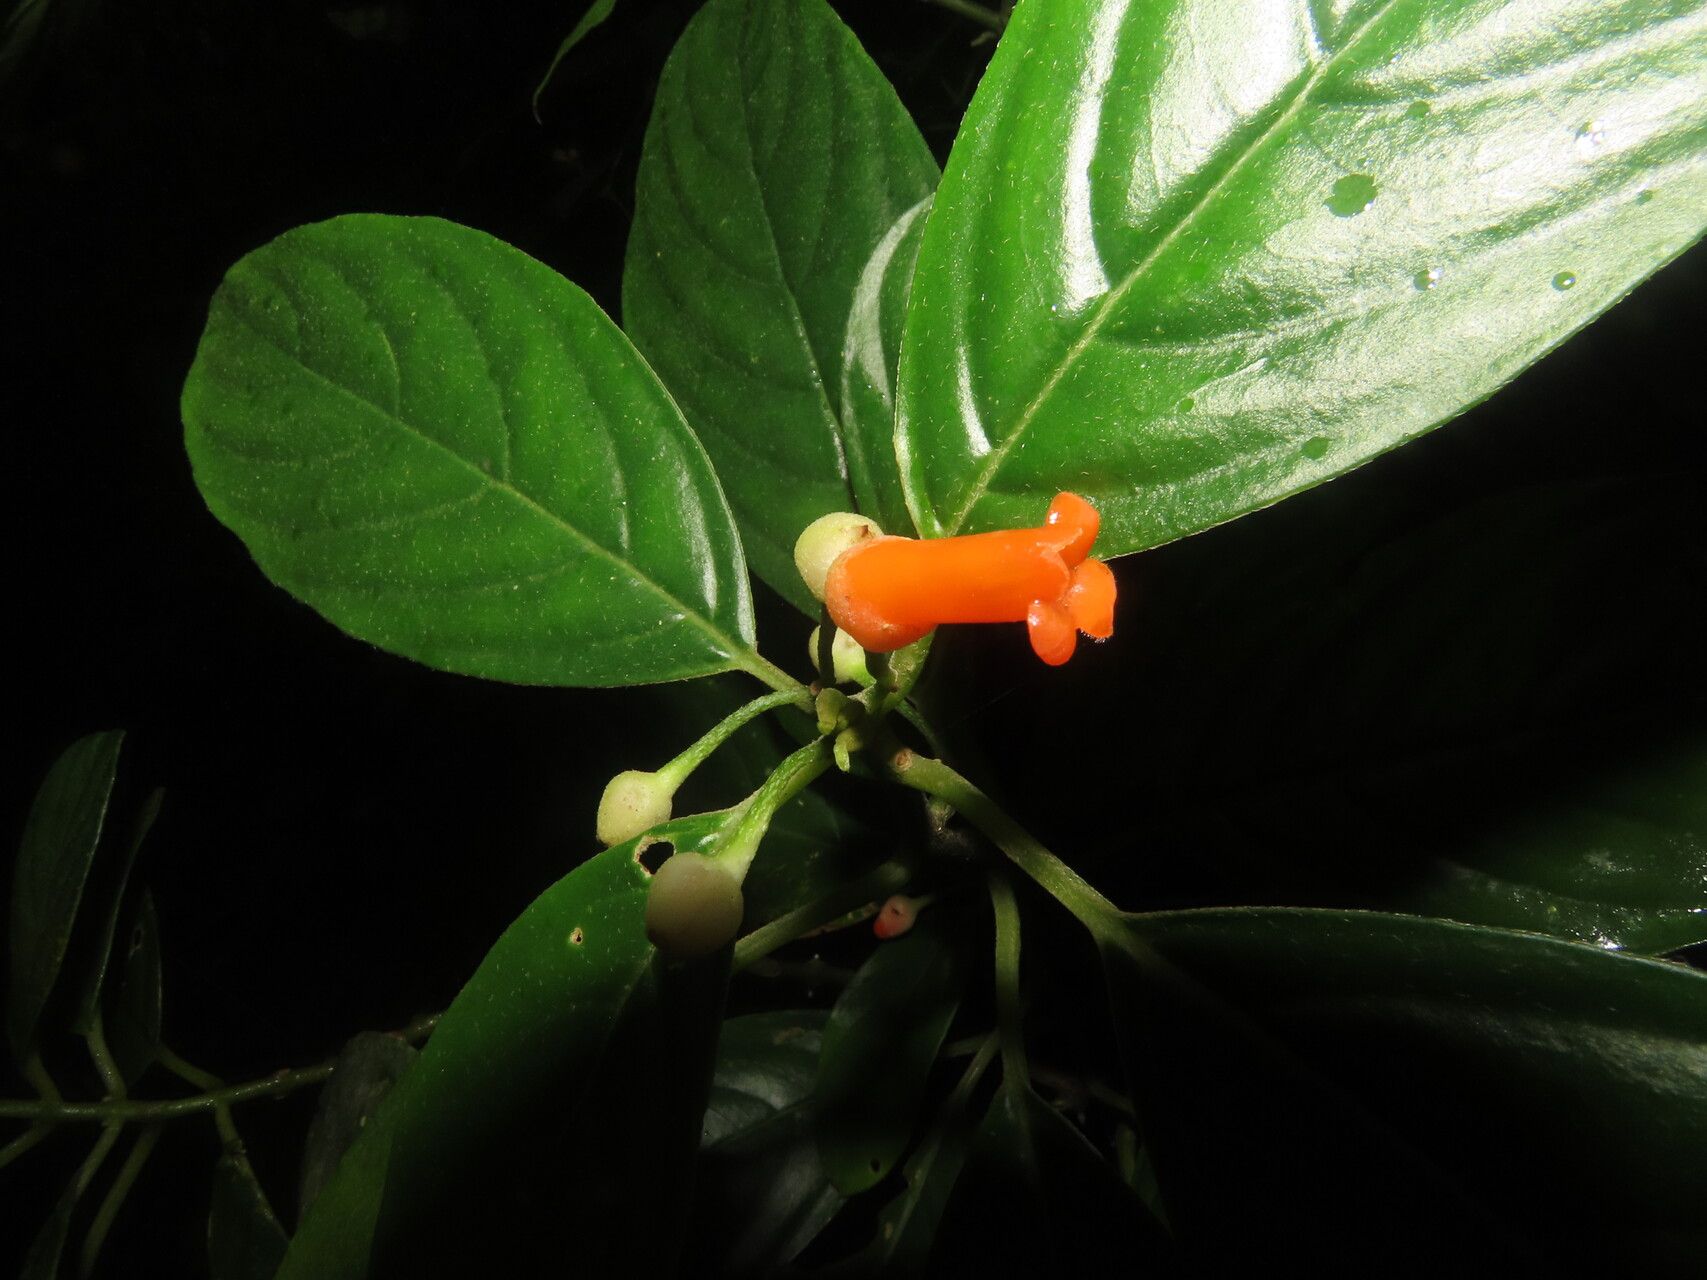
Hey there, fellow plant lovers! If you’ve ever admired the vibrant, often beautifully patterned leaves of a Besleria triflora gracing someone’s hothouse or a botanical garden, you’re not alone. These tropical beauties bring such an exotic touch to any collection. And guess what? Propagating them is a wonderfully rewarding way to fill your home with more of that lush, tropical vibe without breaking the bank. Now, I won’t sugarcoat it – Beslerias can be a tad more particular than your average pothos. They thrive in specific conditions, and while not impossible for beginners, a little extra care goes a long way. But trust me, the satisfaction of watching a tiny cutting transform into a flourishing new plant is absolutely worth it.
The Best Time to Start
For the highest chance of success with your Besleria triflora propagation, late spring through early summer is your golden window. This is when the plant is naturally in its most active growth phase. You’ll find it’s easier to get happy, vigorous cuttings then, and they’re more likely to root quickly. Aim for pieces of stem that have new growth emerging but are not yet woody.
Supplies You’ll Need
Gathering your supplies beforehand makes the whole process so much smoother. Here’s what I usually have on hand:
- Sharp, clean pruning shears or a sharp knife: For making clean cuts. This is crucial to prevent disease.
- Potting mix: A well-draining, airy mix is key. I love a blend of peat moss or coir, perlite, and a bit of orchid bark. You can also buy a good quality seedling or propagation mix.
- Small pots or seedling trays: With drainage holes, of course!
- Rooting hormone (optional but recommended): A powder or gel form helps speed things up and encourages stronger root development.
- Clear plastic bag or propagator: To create a humid environment.
- Watering can with a fine rose: For gentle watering.
- Small label and pen: To mark your cuttings (trust me, you’ll thank yourself later!).
Propagation Methods
Beslerias are most commonly and effectively propagated from stem cuttings. It’s straightforward once you get the hang of it.
- Take Your Cuttings: Using your sharp pruning shears, select a healthy stem on your mature Besleria triflora. Cut a section about 4-6 inches long, making sure each cutting has at least two to three leaf nodes (the points where leaves emerge from the stem). If your leaf nodes are very close together, a cutting with more nodes is even better. Remove the lower leaves, leaving only the top two to four leaves on the cutting. If the remaining leaves are very large, you can cut them in half horizontally to reduce water loss.
- Apply Rooting Hormone (Optional): Dip the cut end of the stem into your rooting hormone powder or gel. Gently tap off any excess. This step really gives your cutting a boost.
- Plant Your Cuttings: Fill your small pots or trays with your prepared well-draining potting mix. Make a hole in the center with your finger or a pencil. Insert the cut end of the stem into the hole, ensuring that at least one leaf node is below the surface of the soil. Gently firm the soil around the stem to secure it.
- Create a Humid Environment: Water the soil gently until it’s evenly moist but not waterlogged. Then, cover the pot with a clear plastic bag or place it inside a propagator. Poke a few small holes in the bag for ventilation, or open your propagator lid slightly. This creates the high humidity your Besleria cuttings desperately need.
- Provide the Right Conditions: Place your cuttings in a warm spot with bright, indirect light. Avoid direct sunlight, which can scorch the delicate leaves and seedlings. If you have a heat mat, placing the pots on bottom heat can significantly speed up root formation.
The “Secret Sauce” (Pro Tips)
Here are a couple of things I’ve learned over the years that make a big difference:
- Don’t let the leaves touch the water (if using water propagation): While Beslerias can be rooted in water, I find that stem cuttings in a slightly damp, humid mix are far more successful. If you do choose water, keep the leaves well above the water level. Rot is a nasty business, and leaves sitting in water are a prime culprit.
- Patience is key, especially with bottom heat: While bottom heat is wonderful, it can sometimes trick you into thinking roots are forming faster than they are. Give your cuttings a gentle tug after about 4-6 weeks. If you feel resistance, you’ve got roots! Don’t be discouraged if it takes longer; some plants are just more deliberate.
Aftercare & Troubleshooting
Once you see signs of new growth, like tiny leaves unfurling or new shoots emerging from the leaf axils, you know your cuttings are on their way! This is when you can gradually acclimate them to lower humidity. Start by removing the plastic bag for a few hours a day, slowly increasing the duration. Keep the soil consistently moist, but again, avoid soggy conditions.
The most common sign of failure is wilting that doesn’t recover or soft, mushy stems. This usually indicates rot, often from too much moisture and not enough ventilation. If you see this, unfortunately, that particular cutting is likely lost. The best way to combat this is to ensure excellent drainage, proper watering techniques, and good air circulation once they are no longer covered.
A Encouraging Closing
Propagating Besleria triflora is a journey, and like any good journey, there will be moments of anticipation and maybe a few hiccups. But the joy of nurturing a new life from a small sprig is truly something special. Be patient, observe your cuttings, and remember that even experienced gardeners lose a cutting now and then. Just keep trying, and enjoy the process of bringing more of these stunning plants into your world. Happy propagating!
Resource:
https://identify.plantnet.org/k-world-flora/species/Besleria%20triflora%20(Oerst.)%20Hanst./data