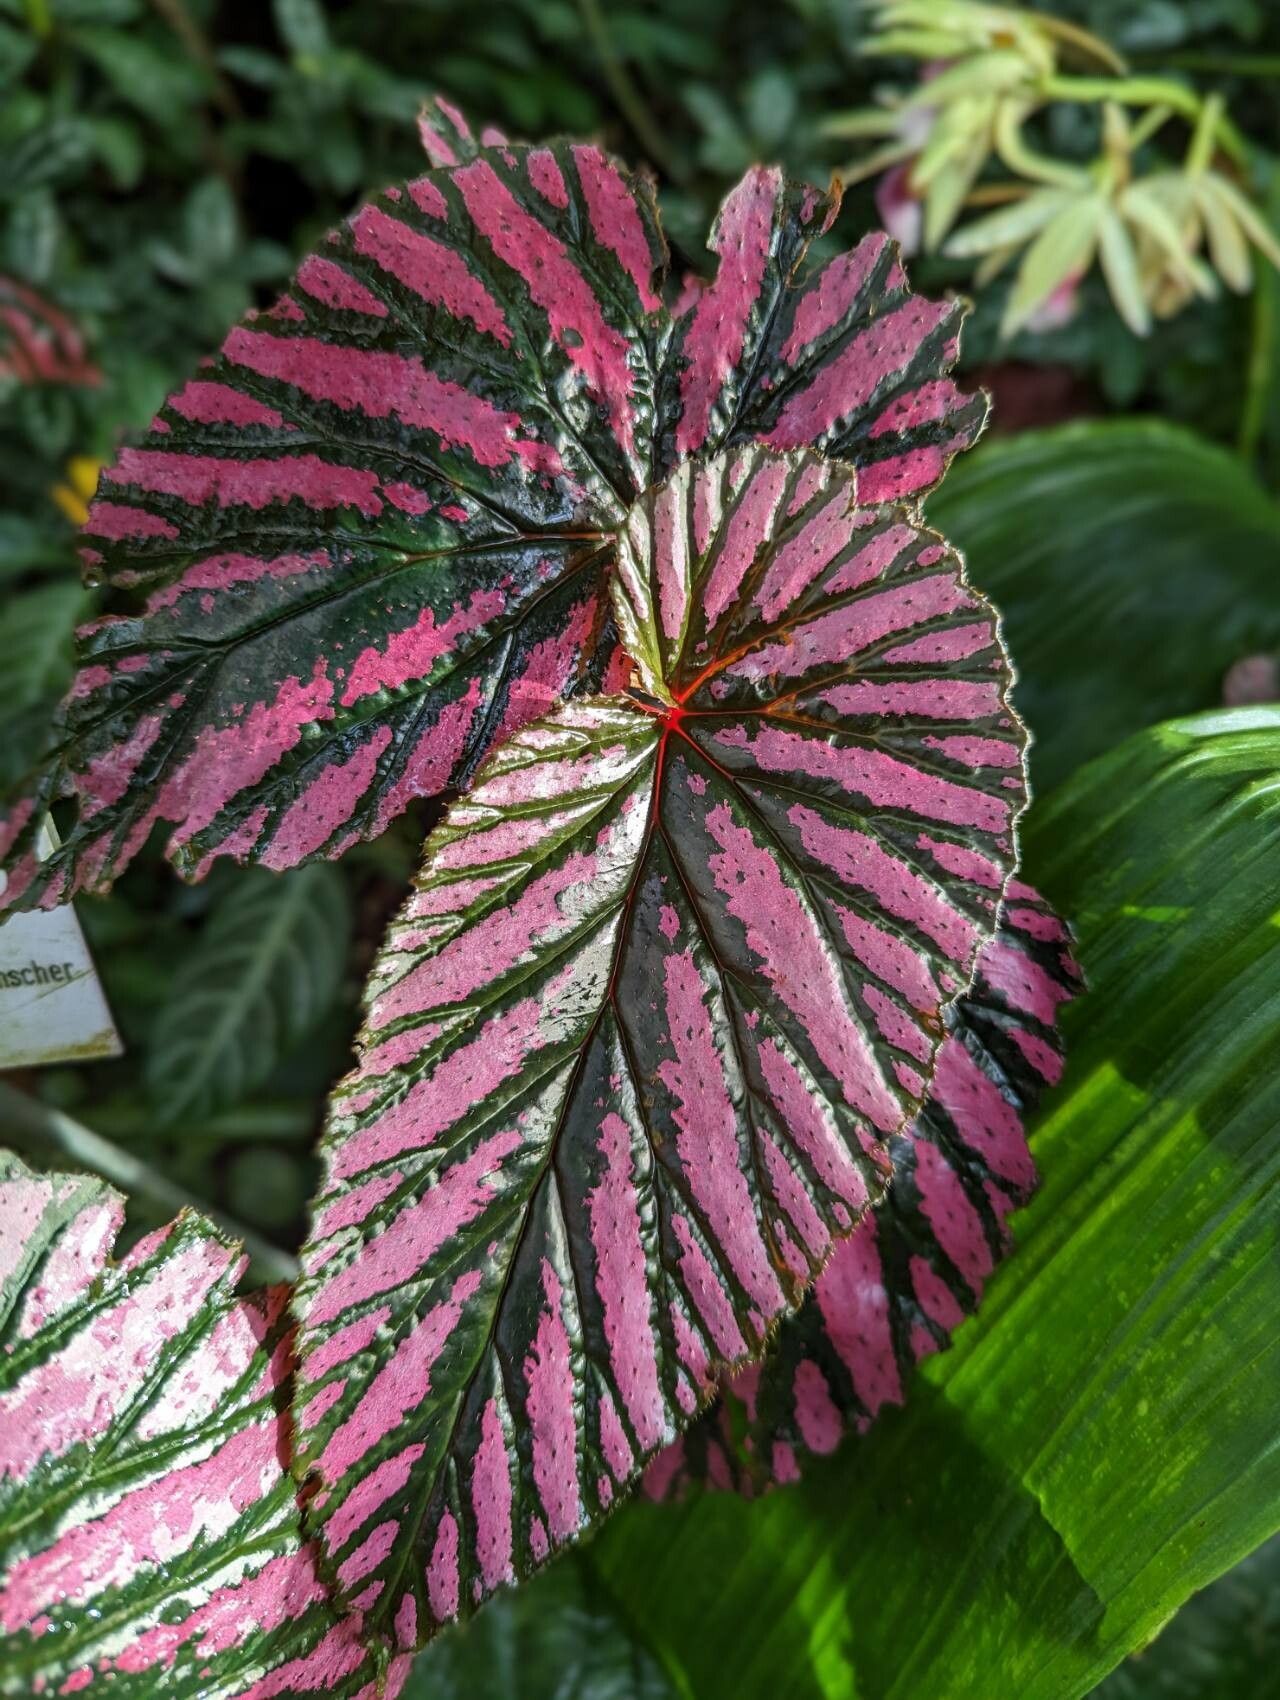
Hello, fellow plant enthusiasts! If you’re anything like me, you’ve probably fallen head over heels for the striking beauty of Begonia brevirimosa. Seriously, those bold splashes of color and fascinating textures are just chef’s kiss, aren’t they? The good news is, you don’t need to keep staring longingly at just one! Propagating this gem is incredibly rewarding. It allows you to multiply your collection and share the joy with friends. Now, I won’t lie, Begonia brevirimosa can be a little particular, so it might not be the absolute easiest plant for a complete beginner. But with a little care and attention, you’ll be a pro in no time!
The Best Time to Start
For the highest chance of success, I always reach for my pruning shears in the late spring or early summer. This is when the plant is actively growing and has a good amount of energy stored up. You’ll see new shoots and leaves emerging, and that’s your cue! Starting during this vibrant growth phase means your cuttings will have the best shot at rooting quickly.
Supplies You’ll Need
Before we dive in, let’s gather our tools. Having everything ready makes the process so much smoother:
- Sharp Pruning Shears or a Clean Knife: You want a clean cut to prevent disease.
- Propagation Potting Mix: I like a well-draining, airy mix. A blend of peat moss, perlite, and a bit of orchid bark is fantastic. Some people use coco coir too. The key is preventing waterlogged roots.
- Rooting Hormone (Optional but Recommended): Especially for begonias, this can give your cuttings a noticeable boost. Look for a powdered or gel form.
- Small Pots or Propagation Trays: Clean, small containers are perfect for individual cuttings.
- Plastic Bags or a Clear Cloche: To maintain humidity around your cuttings.
- Water: For water propagation or misting.
- Spray Bottle: For misting.
Propagation Methods
Begonia brevirimosa can be propagated in a couple of ways, and I find stem cuttings to be the most consistent.
Stem Cuttings
- Select Your Cutting: Look for a healthy stem with at least two to three leaves. Ideally, the stem should be firm but not woody. Avoid any old, leggy growth.
- Make the Cut: Using your sharp shears or knife, make a clean cut just below a leaf node. A leaf node is where a leaf attaches to the stem. This is where new roots will emerge.
- Prepare the Cutting: Gently remove the lower leaf or two, exposing the nodes. If your remaining leaves are very large, you can cut them in half horizontally. This reduces water loss through transpiration.
- Apply Rooting Hormone (if using): Dip the cut end of the stem into your rooting hormone, tapping off any excess.
- Plant Your Cuttings: Fill your small pots with your propagation mix. Make a small hole with your finger or a pencil and carefully insert the cutting, ensuring the nodes are below the surface of the soil. Gently firm the soil around the stem.
- Water Gently: Water the soil lightly. You don’t want to saturate it, just make it nicely moist.
Water Propagation (A Bit More Delicate for Brevirimosa)
While I prefer soil for brevirimosa, some enjoy the water method.
- Prepare Your Cutting: Follow steps 1-3 from stem cuttings.
- Place in Water: Put your cutting in a small jar or glass of clean water. Ensure the leaf nodes are submerged, but try to keep the leaves themselves out of the water.
- Change Water Regularly: Replace the water every few days to keep it fresh and prevent rot.
- Root Development: You should see tiny white roots emerging from the nodes. Once the roots are about an inch long, it’s time to carefully transfer them to soil.
The “Secret Sauce” (Pro Tips)
Here are a few things I’ve learned over the years that really make a difference with these fussy beauties:
- Humidity is Key: Begonia brevirimosa absolutely loves humidity. Once your cuttings are planted, put them inside a plastic bag or cover them with a clear cloche. This creates a mini-greenhouse. Just make sure to open it daily for a few minutes to allow for air circulation and prevent mold.
- Bottom Heat is Your Friend: If you have a heat mat designed for plant propagation, place your pots on it. This gentle bottom warmth signals to the plant that it’s time to grow and root, significantly speeding up the process.
- Don’t Rush the Transfer: When propagating in soil, be patient. Don’t pull on the cutting to check for roots! Instead, look for signs of new growth – a tiny new leaf emerging is a good indication that roots have formed.
Aftercare & Troubleshooting
Once you see signs of new growth, congratulations! This means roots are developing nicely.
- Gradual Acclimation: If your cuttings were in a plastic bag, slowly start to acclimate them to your home’s ambient humidity. Open the bag for longer periods each day before removing it entirely.
- Regular Watering: Continue to keep the soil consistently moist but never soggy. Water when the top inch of soil starts to feel dry.
- Bright, Indirect Light: Place your new plants in a spot that receives bright, indirect light. Direct sun will scorch their delicate leaves.
Now, what if things go wrong? The most common issue is rot. If you notice your cutting turning mushy and black, it’s likely due to too much moisture and not enough air circulation. You might need to start again, ensuring your soil is airy and you’re not overwatering. If the leaves start to yellow and drop without any signs of rot, it could be a lack of humidity or insufficient light.
A Little Patience Goes a Long Way
Propagating can feel like a gamble sometimes, but with Begonia brevirimosa, it’s a gamble with pretty good odds! Be patient, observe your plants, and don’t be discouraged if you have a few failures along the way. Each attempt is a learning experience. Soon enough, you’ll have a whole troop of these beauties to admire and share. Happy propagating!
Resource:
https://identify.plantnet.org/k-world-flora/species/Begonia%20brevirimosa%20Irmsch./data