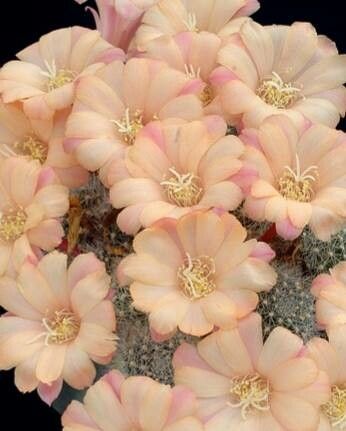
Oh, hello there! Grab a mug of your favorite brew, and let’s talk about a little gem that brings so much joy to my garden: Aylostera albiflora. If you’ve ever admired those delicate, starry white flowers gracing this enchanting cactus, you’re not alone. Propagating them is a wonderfully rewarding way to multiply that beauty, and I’m thrilled to share my tried-and-true methods with you.
For beginners, I’d say Aylostera albiflora is moderately easy to propagate. It’s not quite as hands-off as some of the more vigorous succulents, but with a little attention, you’ll be well on your way to a little army of these beauties. The satisfaction of watching a tiny cutting unfurl new growth is truly special.
The Best Time to Start
The prime time for propagating Aylostera albiflora is during its active growing season. Think late spring through summer. This is when the plant is full of energy and has the best chance of establishing roots quickly. You’ll also have the most success taking cuttings from healthy, mature stems that are already producing flowers or developing offsets.
Supplies You’ll Need
Before we dive in, let’s gather our tools. You won’t need anything too fancy, but having the right bits and bobs will make the process much smoother:
- Sharp, clean pruning shears or a sharp knife: For making clean cuts.
- Well-draining potting mix: A cactus/succulent mix is perfect. I often mix in perlite or pumice for extra aeration.
- Small pots or seed trays: For housing your new propagations.
- Rooting hormone (optional but recommended): This little helper can give your cuttings a significant boost.
- Dibber or pencil: For making holes to place your cuttings.
- Spray bottle: For gentle watering.
- Gravel or perlite (optional): For top dressing to help with drainage and prevent rot.
Propagation Methods
Aylostera albiflora is wonderfully versatile, but I find a couple of methods yield the best results.
Method 1: Stem Cuttings
This is my go-to for quickly increasing my plant numbers.
- Select a healthy stem: Look for a mature stem that’s at least 2-3 inches long. Gently twist or carefully cut it from the main plant, making sure your cut is clean.
- Allow to callus: This is crucial! Before planting, let the cut end of the stem dry out and form a callus for a few days to a week. You can lay it on a paper towel in a bright, dry spot. This prevents rot.
- Apply rooting hormone (optional): Once callused, dip the cut end into rooting hormone if you’re using it.
- Plant the cutting: Fill your small pots with your well-draining mix. Make a small hole with a pencil or dibber. Gently insert the callused end of the cutting into the soil. You want it to be snug but not packed too tightly.
- Water lightly: Mist the soil gently with your spray bottle. Avoid soaking it.
Method 2: Offsets (Baby Plants)
Aylostera albiflora often produces little baby plants, called offsets, at its base. These are like miniature versions of the parent plant and usually have their own tiny root system.
- Identify offsets: Look for small plants growing around the base of your mature cactus.
- Gently detach: You can often gently twist these offsets away from the parent plant. If they’re a bit stubborn, use your clean knife to carefully cut them free, ensuring you get a bit of root if possible.
- Let them callus: Just like with stem cuttings, it’s a good idea to let the cut end callus over for a day or two, especially if you had to cut it.
- Plant the offset: Plant them in their own small pots with well-draining soil, just as you would a stem cutting. Water lightly.
The “Secret Sauce” (Pro Tips)
Here are a few little tricks I’ve picked up along the way that really seem to make a difference:
- Don’t overwater early on: This is the biggest killer of new cuttings. They have no roots yet, so they don’t need much moisture. A light misting every few days is usually plenty until you see signs of roots.
- Provide gentle warmth: Aylostera albiflora loves a little warmth to encourage root development. Placing your pots on a heat mat if you have one, or even just in a warm spot in your home, can significantly speed up the process.
- Patience is key for flower buds: If you propagate from a stem that has a flower bud, it’s best to remove it before planting. The plant needs to focus all its energy on growing roots, not blooming. You’ll get flowers soon enough once it’s established!
Aftercare & Troubleshooting
Once your cuttings are planted, place them in a bright spot that gets indirect sunlight. Direct sun can scorch tender new growth. Keep the soil lightly moist, but never soggy.
You’ll know your Aylostera albiflora is rooting when you see new growth emerging from the tip or base. This can take anywhere from a few weeks to a couple of months. Gently tugging on a cutting – if you feel resistance, that’s a good sign!
The most common issue you might encounter is rot. This usually happens from overwatering. If you see your cutting turning mushy or dark and soft, it’s likely rotting. Unfortunately, once rot sets in, it’s hard to save. The best approach is to prevent it by following those watering tips!
A Gentle Encouragement
Propagating Aylostera albiflora is a wonderful journey of patience and observation. Don’t be discouraged if a cutting or two doesn’t make it – every gardener has those moments! Celebrate the successes, learn from the challenges, and enjoy the thrill of nurturing new life. Happy propagating!
Resource: