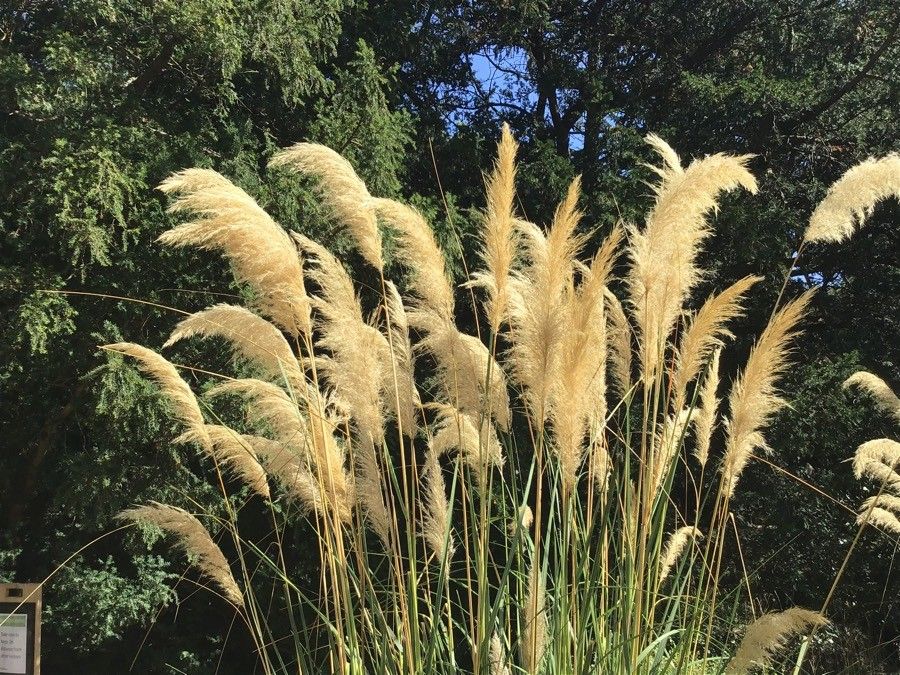
Oh, Austroderia fulvida! You’ve picked a real beauty. Those feathery plumes, swaying gently in the breeze, bring such a sense of movement and elegance to any garden. And the best part? It’s surprisingly rewarding to grow more of these beauties yourself. If you’re a beginner, don’t shy away from this one. I find it to be quite forgiving, especially with a little know-how.
The Best Time to Start
For me, springtime is the sweet spot for propagating Austroderia fulvida. When the plant is actively putting on new growth, it has more vigor to dedicate to forming roots. Aim for just after the last frost, when things are warming up. You’ll find your cuttings are much more eager to get started then.
Supplies You’ll Need
Here’s what I usually gather before I begin:
- Sharp pruning shears or a clean knife: For making clean cuts.
- Rooting hormone (powder or gel): Though not always strictly necessary, it definitely gives your cuttings a boost.
- A well-draining potting mix: I like a 50/50 blend of peat or coir and perlite or coarse sand.
- Small pots or trays: Clean ones are key to preventing disease.
- Plastic bags or a propagator: To create a humid environment.
- Watering can or spray bottle: For gentle watering.
- Gravel or small stones (optional): For water propagation.
Propagation Methods
Let’s get our hands dirty! The most reliable way I’ve found to propagate Austroderia fulvida is through stem cuttings.
- Take Your Cuttings: Select healthy, non-flowering stems from your established plant. Look for stems that are about 4-6 inches long. Using your clean shears or knife, make a clean cut just below a leaf node. A node is where a leaf attaches to the stem – this is where roots are most likely to form.
- Prepare the Cuttings: Gently remove the leaves from the bottom half of the cutting. This prevents them from rotting when they’re in the soil. If your cutting is long, you can even cut the remaining leaves in half lengthwise to reduce water loss.
- Apply Rooting Hormone: Dip the cut end of the stem into your rooting hormone, tapping off any excess. This step is like giving your cutting a little encouragement.
- Plant Your Cuttings: Fill your clean pots with your well-draining mix. Make a hole in the center of the soil with your finger or a pencil. Insert the cut end of the stem into the hole, ensuring the leaf nodes are buried. Gently firm the soil around the cutting. You can plant several cuttings in one pot, just give them a little space.
- Create Humidity: Water the soil gently. Then, cover the pot with a plastic bag, creating a mini-greenhouse. You can use stakes to keep the bag from touching the leaves. Alternatively, place your pots in a propagator.
For a more experimental (but still effective!) approach, you can try water propagation:
- Prepare the Cutting: Follow steps 1 and 2 above.
- Place in Water: Fill a clean jar or vase with water. Place the cuttings in the water, making sure that all the leaves are well above the water line. You don’t want any foliage submerged.
- Monitor and Change Water: Place the jar in bright, indirect light. Change the water every few days to keep it fresh and prevent bacterial growth. You should start to see little white roots forming within a few weeks.
The “Secret Sauce” (Pro Tips)
Here are a few things I’ve learned over the years that can make a real difference:
- Don’t Overwater: This is probably the most common mistake. Cuttings sitting in soggy soil are practically begging for rot. Keep the soil consistently moist, but not waterlogged. If you’re using the plastic bag method, you’ll find the humidity inside does a lot of the watering work.
- Consider Bottom Heat: Austroderia fulvida loves a bit of warmth from below. Placing your pots on a propagation mat or even on top of a warm appliance (like a modem or Wi-Fi router, if it’s not too hot!) can significantly speed up root development. It mimics the coziness of spring.
- Patience with Plumes: If you happen to take cuttings from a plant that has developed a flower spike, don’t despair! While it’s best to avoid these, if you do have one, you can try planting the entire basal shoot where the flower stalk emerges. Sometimes, these adventurous bits will root too!
Aftercare & Troubleshooting
Once you see those little roots poking through the drainage holes (or after a few weeks in water, and you notice good root growth), it’s time for their next step.
- Transplanting: If you propagated in water, carefully transplant your rooted cuttings into small pots filled with your well-draining mix. If you propagated directly in soil, you can transplant them when they have a good root system and are showing new growth.
- Gradual Acclimatization: Slowly remove the plastic covering over a few days to let them get used to normal humidity.
- Gentle Watering: Continue to water gently. Avoid letting them dry out completely, but also don’t drown them.
- Signs of Trouble: The biggest culprit is rot. This usually looks like mushy, black stems at the soil line, or the entire cutting wilting and turning yellow. If you see this, unfortunately, that cutting is likely lost. Ensure your soil is well-draining and you’re not overwatering. Another sign is wilting that doesn’t improve even after watering, which could mean the roots haven’t formed properly.
A Little Encouragement
Propagating plants is a journey, and sometimes it doesn’t work out the first time. Don’t get discouraged! Each attempt is a learning experience. Enjoy the process of nurturing these tiny beginnings, and you’ll soon be rewarded with more of those stunning Austroderia fulvida specimens to grace your garden. Happy planting!
Resource: