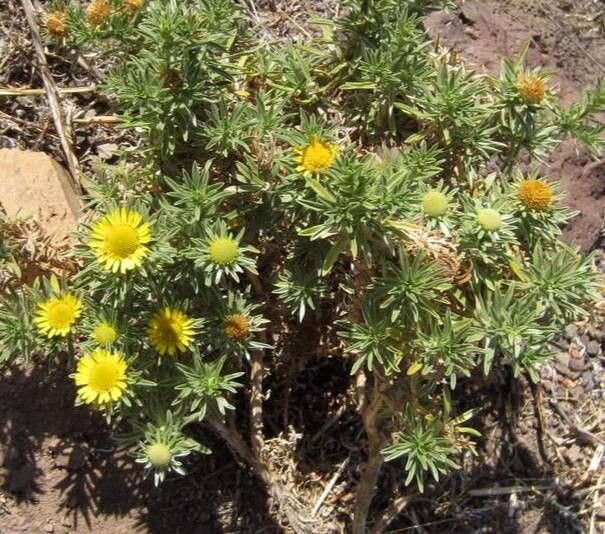
Hello there, fellow plant lovers! I’m so excited to chat with you today about a little gem that truly brightens up my garden: Asteriscus graveolens, or as many of us affectionately call it, the Golden Buttons flower. Its cheerful, sunny yellow blooms are like perpetual little bursts of joy, and it’s a fantastic plant for attracting pollinators. If you’ve ever admired its vibrant display and thought, “I wish I had more of those!”, you’re in luck. Propagating Asteriscus graveolens is a wonderfully rewarding process, and I’m happy to say, it’s quite manageable, even for those just starting their gardening journey.
The Best Time to Start
For the highest success rates with Asteriscus graveolens, I find that the sweet spot is late spring to early summer. This is when the plant is actively growing and has plenty of healthy, pliable stems to work with. Alternatively, if you’re thinking about division, early spring, just as new growth is emerging, is your best bet. Waiting until the plant is well-established and showing robust vigor is key.
Supplies You’ll Need
Gathering your supplies beforehand makes the whole process a breeze. Here’s what I usually have on hand:
- Sharp pruning shears or a clean, sharp knife: For making clean cuts that heal well.
- Rooting hormone powder or gel: While not strictly necessary, it can significantly boost your success rate.
- Small pots or seedling trays: Clean ones are a must to prevent disease.
- A well-draining potting mix: I like to use a blend of coarse sand, perlite, and a good quality seed-starting mix. Something that doesn’t hold too much moisture is crucial.
- A watering can with a fine rosehead or a spray bottle: For gentle hydration.
- Plastic bags or propagators: To create a humid environment for cuttings.
- Labels and a marker: To keep track of what you’ve planted and when.
- Optional: Heating mat: Particularly useful if you’re working in a cooler environment.
Propagation Methods
Let’s get our hands dirty! Asteriscus graveolens is quite happy to be propagated from stem cuttings or by dividing established plants.
Stem Cuttings:
- Select your stems: Look for healthy, non-flowering stems that are about 3-5 inches long. Young, supple stems are best, so avoid anything that looks woody.
- Make the cut: Using your clean shears or knife, take a cutting just below a leaf node. This is where new roots are most likely to form.
- Prepare the cutting: Remove the lower leaves from the stem, leaving just a few at the top. This prevents them from rotting in the soil or water. If your cutting is very long, you can even cut the top leaves in half to reduce water loss.
- Apply rooting hormone: Dip the cut end of the stem into your rooting hormone. Tap off any excess.
- Planting the cuttings: Fill your small pots or trays with your prepared potting mix. Make a small hole with your finger or a pencil. Gently insert the cut end of the stem into the hole, ensuring the rooting hormone stays in place. Firm the soil gently around the stem.
- Water and cover: Water the soil gently until it’s moist but not soggy. Then, cover the pot with a plastic bag or place it in a propagator. This creates the humid microclimate cuttings need.
Division (for established plants):
- Unearth the plant: In early spring, carefully dig up your Asteriscus graveolens plant.
- Assess the root ball: Gently shake off excess soil. You’ll see individual crowns or clumps of stems arising from the root system.
- Separate the divisions: Using your hands or a clean spade, carefully pull or slice the root ball into smaller sections, ensuring each division has at least a few healthy stems and a good portion of roots.
- Replant: Immediately replant the divisions in their new homes, whether that’s back in the garden or in new pots. Water them in well.
The “Secret Sauce” (Pro Tips)
Here are a few little tricks I’ve picked up over the years that can make a big difference:
- Don’t let the leaves touch the soil in the pot. When preparing your cuttings, strip off enough leaves so that none of the remaining foliage is buried. This is a simple step that can prevent a lot of fungal issues.
- Bottom heat is your friend! If you’re working with stem cuttings, especially if your house is on the cooler side, placing your pots on a heated propagator mat will significantly speed up root development. It mimics the warmth of summer soil.
- Patience is truly a virtue, especially with cuttings. Sometimes, you might think a cutting has failed when it’s just taking its sweet time to establish roots. Don’t be too quick to discard them!
Aftercare & Troubleshooting
Once your cuttings have happily rooted (you might see new growth or gentle resistance when you tug lightly on a stem), it’s time for a little extra TLC.
- Gradually reduce humidity: As roots develop, start opening the plastic bag or propagator vents a little each day to acclimate your new plants to normal air.
- Watering: Continue to water consistently, keeping the soil moist but not waterlogged. Allow the top inch of soil to dry out slightly between waterings.
- Light: Place your new plants in a bright location, but avoid direct, scorching sunlight for the first week or two. Once they’re established, they’ll soak up the sun.
- Signs of rot: The most common culprit of failure is overwatering, which leads to root rot. If your cuttings look mushy, black, or are falling over, it’s likely rot. This is why good drainage is so important! If you catch it early, you might be able to save a cutting by removing the rotten parts and repotting in fresh, dry soil, but often it’s a sign that the cutting is lost.
A Gentle Encouragement
Propagating plants is a wonderful way to connect with nature and multiply the beauty in your gardening space. Don’t be discouraged if your first attempt isn’t a perfect success. Every gardener has had cuttings that didn’t make it – we’ve all been there! Just keep trying, enjoy the process of nurturing these tiny new lives, and soon you’ll have a whole garden of cheerful Golden Buttons to enjoy. Happy propagating!
Resource:
https://identify.plantnet.org/k-world-flora/species/Asteriscus%20graveolens%20(Forssk.)%20Less./data