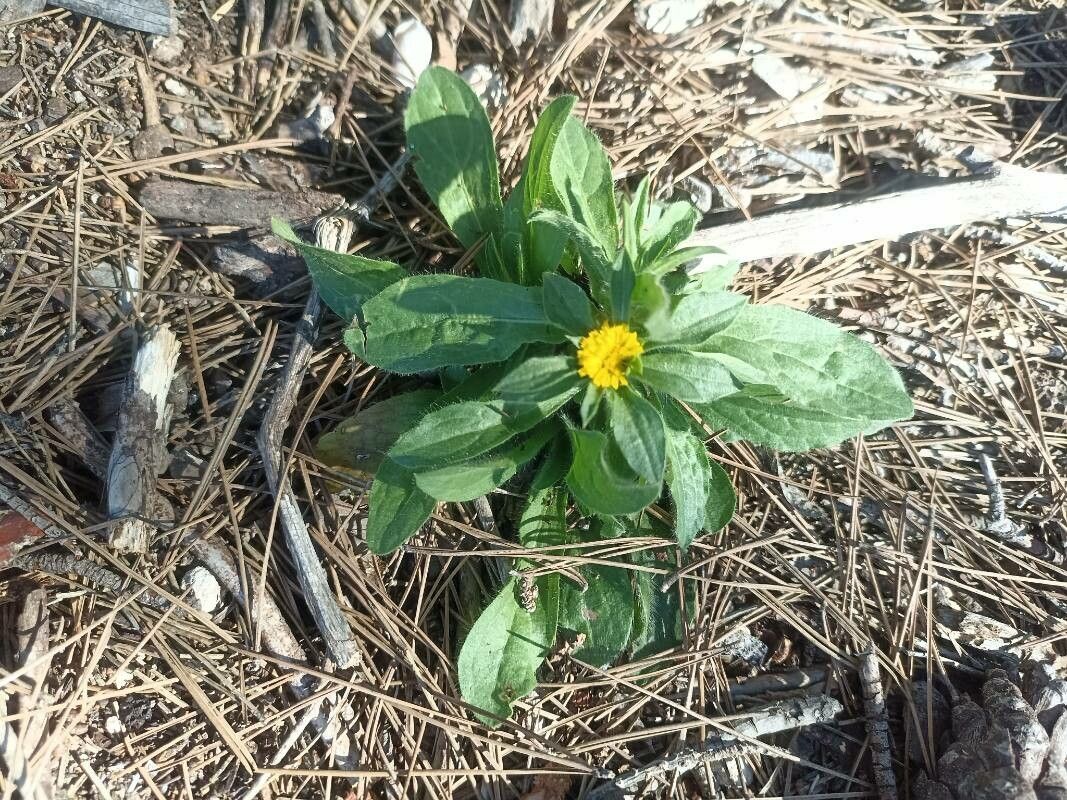
Hello fellow plant lovers! Today, we’re diving into the wonderful world of Asteriscus aquaticus, often called Sea Aster or Golden Buttons. This cheerful little plant, with its bright, daisy-like yellow flowers, is a real sun-worshipper and brings a burst of sunshine to any garden or pot. It’s a fantastic choice if you’re looking to expand your collection without breaking the bank. I’ve found propagating it to be a real joy, and I’m happy to share how you can do it too. For beginners, I’d say it’s moderately easy – a little patience and the right approach will see you through beautifully.
The Best Time to Start
The sweet spot for propagating Asteriscus aquaticus is generally late spring to early summer. This is when the plant is actively growing and has plenty of healthy, new stems to work with. Waiting for vigorous growth ensures your cuttings have a good head start.
Supplies You’ll Need
Here’s what you’ll want to gather before you get started:
- Sharp, clean pruning shears or a sterile knife: Essential for clean cuts that heal quickly.
- Potting mix: A well-draining mix is key. I like to use a blend of equal parts peat moss or coco coir and perlite or coarse sand.
- Small pots or propagation trays: Whatever you have on hand will work, as long as they have drainage holes.
- Rooting hormone (optional but recommended): This gives your cuttings a little boost. Look for a powder or gel specifically for stem cuttings.
- Water: For watering and, if you choose, water propagation.
- Clear plastic bag or propagator lid: To create a humid environment for your cuttings.
- Labels: To keep track of what you’ve planted and when!
Propagation Methods
Let’s get our hands dirty! I usually find stem cuttings to be the most reliable method for Asteriscus aquaticus.
Stem Cuttings
- Select Your Stems: Look for healthy, non-flowering pencil-thick stems at least 4-6 inches long. They should be from new growth, not the woody old stems.
- Take Your Cuttings: Using your clean shears or knife, make a straight cut just below a leaf node. A leaf node is where a leaf attaches to the stem, and it’s where those helpful root-forming cells live. Take a few cuttings – not all of them will make it.
- Prepare the Cuttings: Gently remove the lower leaves, leaving just a few at the very top. This prevents them from rotting in the soil and encourages the plant to focus its energy on rooting.
- Apply Rooting Hormone (Optional): Dip the cut end of each stem into your rooting hormone. Tap off any excess.
- Potting Up: Fill your small pots or trays with your moistened, well-draining potting mix.
- Plant Your Cuttings: Make a small hole in the center of the pot with a pencil or your finger. Insert the cut end of the stem, ensuring the leaf nodes are covered by the soil. Gently press the soil around the stem to secure it. You can often fit 2-3 cuttings per small pot.
- Create Humidity: Water gently to settle the soil. Then, cover the pots with a clear plastic bag or propagator lid. Prop it up with a stick or two so the leaves don’t touch the plastic. This creates a mini greenhouse.
- Placement: Place the pots in a bright spot, but out of direct, harsh sunlight. A windowsill is often perfect.
Water Propagation (Less Reliable for Asteriscus, but worth a shot!)
If you’re feeling adventurous, you can try water propagation, though I find it’s a bit trickier with Asteriscus aquaticus.
- Follow steps 1-3 above.
- Place the prepared cuttings in a jar or glass of water. Crucially, ensure none of the leaves are submerged. They will rot if they touch the water.
- Place in bright, indirect light. Change the water every few days to keep it fresh.
- Be patient! You’re looking for tiny white roots to emerge from the nodes. Once they’re about an inch long, you can try potting them up as described above.
The “Secret Sauce” (Pro Tips)
Here are a couple of things I’ve learned over the years that really make a difference:
- Bottom Heat is Your Friend: If you have access to a heat mat, place your pots on it. This gentle warmth from below encourages the roots to form much faster. It’s like a cozy blanket for your cuttings.
- Don’t Hover Too Much: While you want to maintain humidity, air circulation is also important. Once roots start to form (you might see new leaf growth), gradually start removing the plastic cover for a few hours each day to help the cuttings acclimatize.
Aftercare & Troubleshooting
Once you start seeing new growth on your cuttings, that’s a great sign that roots have formed!
- Gradual Acclimation: Continue to gradually remove the humidity cover over a week or so.
- Watering: Water when the top inch of soil feels dry. Don’t overwater! It’s better to err on the side of slightly too dry than too wet.
- Light: Move your new little plants to a spot with more light, but still avoid scorching sun until they are well-established.
Common Signs of Failure:
- Yellowing leaves: This can be too much water or not enough light.
- Black, mushy stems: This is usually rot, often caused by overwatering or lack of air circulation. Unfortunately, once this happens, it’s hard to save the cutting.
- Wilting: This can happen if the cutting isn’t rooted yet and drying out too quickly, or if it needs a good watering.
Happy Rooting!
Growing new plants from cuttings is one of the most rewarding aspects of gardening. It’s a chance to witness new life emerge and to multiply your favorite plants for free! Be patient with your Asteriscus aquaticus cuttings. Some will take off like rockets, while others might be a little slower. Enjoy the process, learn from each batch, and before you know it, you’ll have a whole new collection of these sunny little charmers! Happy gardening!
Resource:
https://identify.plantnet.org/k-world-flora/species/Asteriscus%20aquaticus%20(L.)%20Less./data