Hello there, fellow garden enthusiasts! I’m so excited to chat with you today about a plant that has truly captured my heart and my garden beds over the years: Asparagus horridus.
Flourishing with the Spiny Wonder
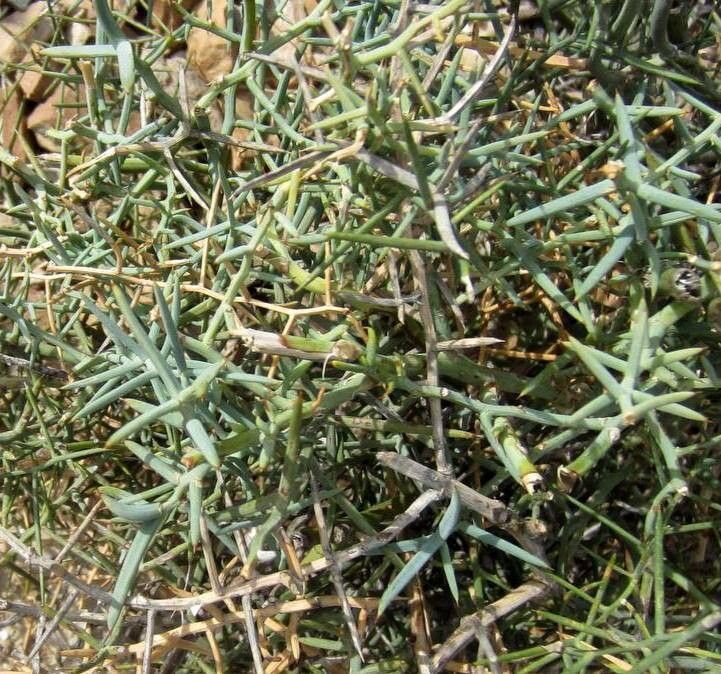
Now, the name “horridus” might sound a bit… well, daunting, but don’t let it fool you! This plant, often called the African Asparagus or Thorny Asparagus Fern, is a stunner. Its delicate, lacy foliage cascades beautifully, creating a lush, almost ethereal effect. It’s a tough cookie, too, handling heat and a bit of neglect with grace. Propagating Asparagus horridus is a deeply satisfying way to fill your home or garden with this beauty, and I think most gardeners, even those just starting out, will find it quite manageable with a little guidance.
When Does the Magic Happen?
For the best chance at success with propagating Asparagus horridus, I always reach for my gardening gloves in late spring or early summer. This is when the plant is in its most vigorous growth phase. New shoots are plump and full of life, meaning they’re packed with the energy needed to develop roots. Starting then gives them the whole growing season to establish themselves before cooler weather arrives.
What You’ll Need for Your Propagation Project
Gathering your supplies beforehand makes the whole process much smoother. Here’s my go-to list:
- Sterile Pruning Shears or Sharp Knife: Clean tools are crucial to prevent disease.
- Potting Mix: A well-draining mix is a must. I like to use a blend of equal parts peat moss, perlite, and coco coir.
- Small Pots or Seed Trays: Ensure they have drainage holes.
- Rooting Hormone (powder or gel): While not strictly essential for Asparagus, it can give your cuttings a nice boost.
- Plastic Bags or Domes: To create a humid environment for your cuttings.
- Labels and a Marker: To keep track of what you’ve planted and when.
- Watering Can with a Fine Rose: For gentle watering.
Bringing New Life: Propagation Methods
There are a couple of ways you can go about propagating Asparagus horridus, and both are pretty straightforward once you get the hang of them.
Method 1: Stem Cuttings – My Favorite Approach
This is my preferred method because it’s efficient and I usually get a great strike rate with it.
- Select Your Cuttings: Look for healthy, non-flowering stems that are about 4-6 inches long. Gently twist or cut them from the parent plant, making sure to get a clean break. Remove any lower leaves that would fall below the soil line.
- Prepare the Cutting: If you’re using rooting hormone, dip the cut end of the stem into it, tapping off any excess.
- Plant Your Cuttings: Fill your pots with your prepared potting mix. Make a small hole in the center of the soil with your finger or a pencil. Gently insert the cut end of the stem into the hole and firm the soil around it.
- Water Gently: Water the pot thoroughly but gently. You want the soil to be moist, not waterlogged.
- Create Humidity: Cover the pot with a plastic bag, propped up with a stake or two so it doesn’t touch the foliage, or use a clear plastic dome. This traps moisture around the cutting, which is key to success.
Method 2: Division – A Quick Win
If your plant has become a bit crowded, division is a fantastic way to create new plants and give your mother plant a little refresh.
- Gently Remove the Plant: Carefully ease the entire plant out of its pot or dig it up from the garden.
- Inspect the Root Ball: You’ll see that the root system is often a dense tangle. Look for natural divisions where you can see separate crowns or distinct clusters of stems originating from the roots.
- Separate the Divisions: Using your hands or a clean, sharp knife, carefully pull or cut the plant into smaller sections. Each division should have at least a few healthy stems and a good amount of root attached.
- Pot Up Your New Plants: Pot each division into its own small pot filled with your well-draining potting mix. Water them in well.
The “Secret Sauce” – My Insider Tips
Over the years, I’ve learned a few little tricks that seem to make all the difference.
- Don’t Overwater the Cuttings: This is a big one! While they need moisture, Asparagus horridus cuttings are very susceptible to rot if they stay too soggy. Think of it as providing a nice, consistent drink, not a swim.
- Embrace Bottom Heat: If you have a heating mat designed for propagation, using it can significantly speed up root development. The gentle warmth from below encourages those roots to wake up and grow.
- Watch for the Green Glow: The best indicator that your cutting is taking is often a subtle change in the foliage. You might see new, bright green growth emerging, or the existing stems will look plump and vibrant, not wilted and sad.
Aftercare and What to Watch For
Once your cuttings show signs of rooting – that new growth I mentioned, or if you gently tug and feel resistance – it’s time to transition them.
Continue to keep them in their humid environment for another week or two, gradually acclimatizing them to lower humidity by opening the bag or dome a little each day. Until they are well-established and you see consistent new growth, water them when the top inch of soil feels dry.
Troubleshooting: The most common problem you’ll encounter is rot. If a cutting turns mushy, yellow, and falls apart, it was likely too wet or the cutting wasn’t healthy to begin with. Don’t be discouraged! It happens. Just discard the rotted cutting and try again with fresh material. Sometimes, a cutting might just fail to root; that’s also part of the process.
Patience is a Gardener’s Best Friend
Propagating plants is a journey, and with Asparagus horridus, it’s one filled with delicate beauty and rewarding results. Be patient with your new little greenery, provide them with the right conditions, and don’t be afraid to experiment. Soon enough, you’ll have a whole collection of these spiny wonders to enjoy. Happy propagating!
Resource:
https://identify.plantnet.org/k-world-flora/species/Asparagus%20horridus%20L./data