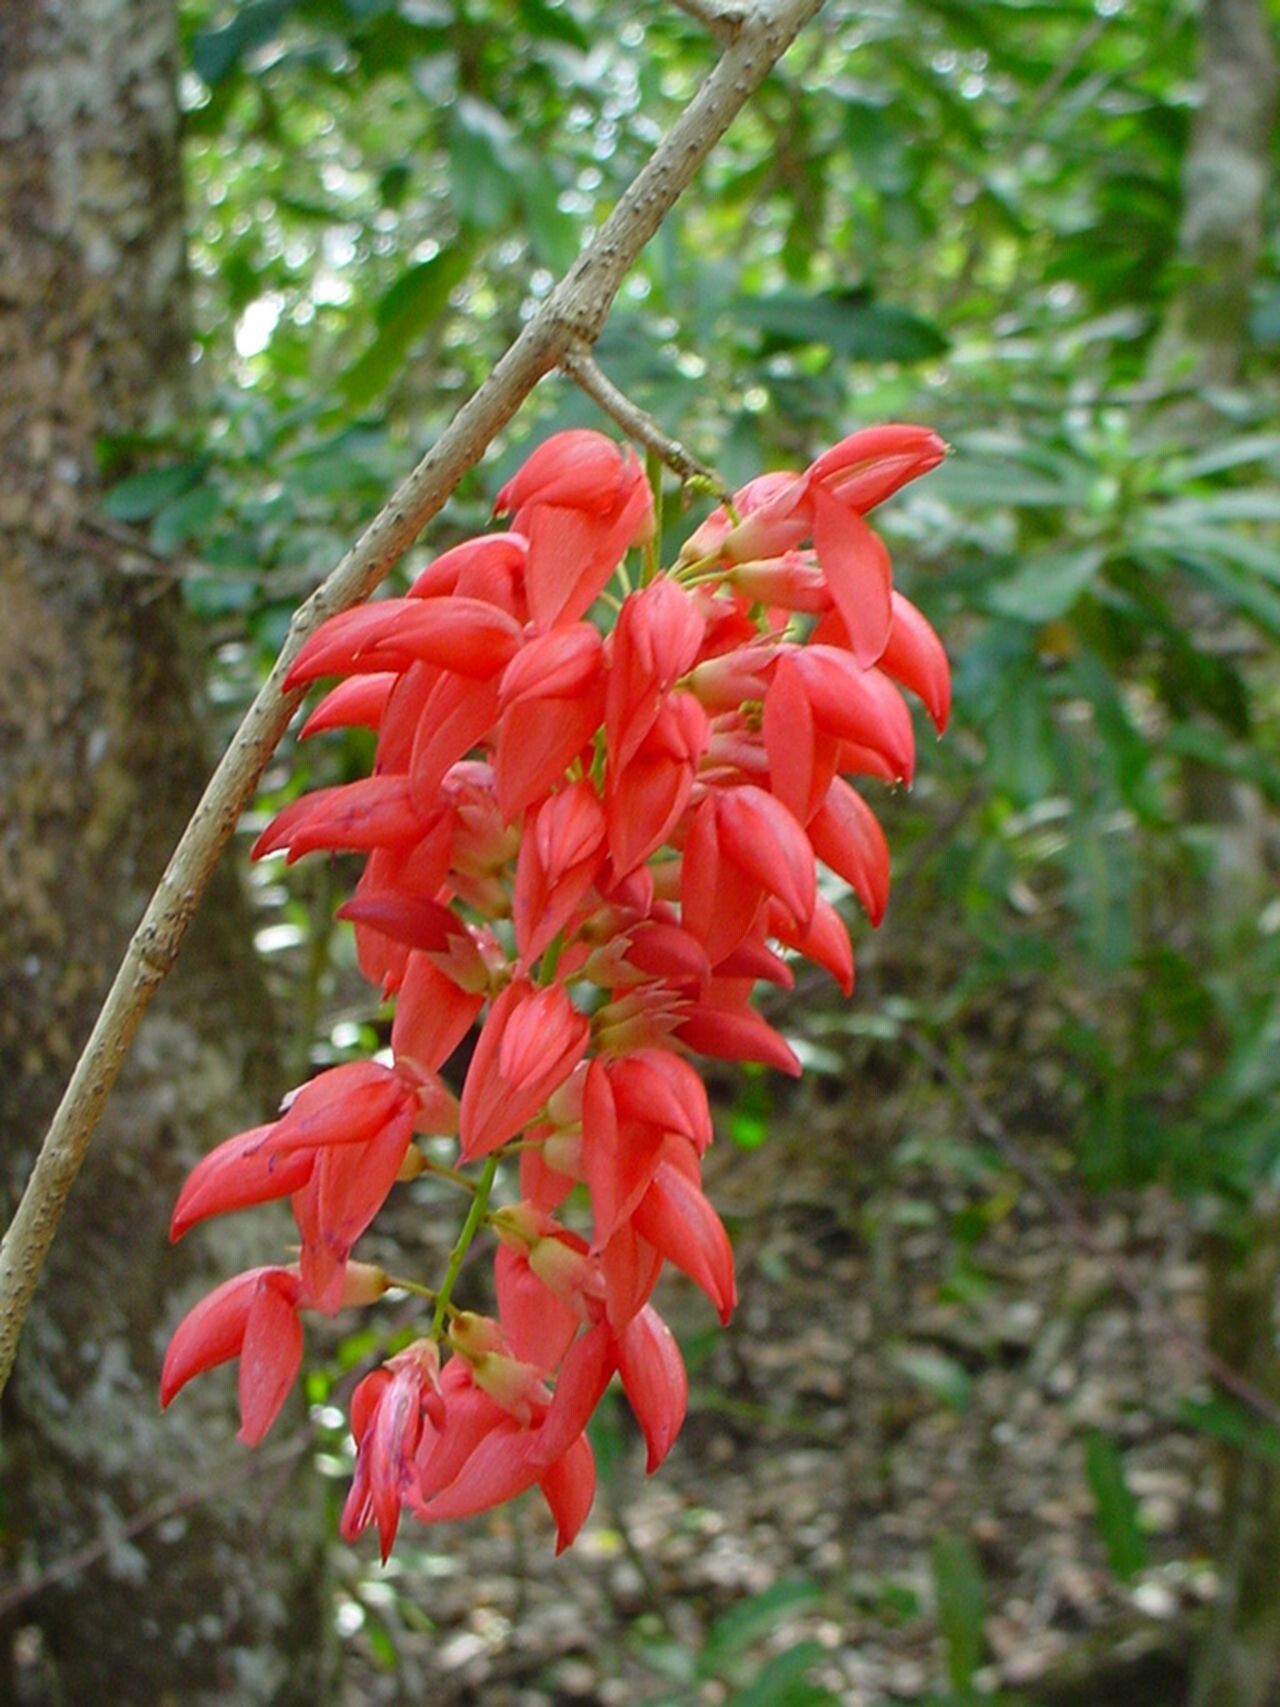
Hey there, fellow plant lovers! I’m so excited to talk to you today about a real gem in the plant world: Arthroclianthus macrobotryosus. If you’ve ever laid eyes on this beauty, you know why it’s captivating. Its lush foliage and stunning blooms are like a burst of sunshine in any space. And the best part? Bringing more of these beauties into your life through propagation is incredibly rewarding. For those just starting their green-thumb journey, I’d say Arthroclianthus macrobotryosus falls into the “intermediate” category. It’s not as foolproof as a pothos, but with a little attention, you’ll be well on your way to success!
The Best Time to Start
Timing is everything when it comes to plant propagation! For Arthroclianthus macrobotryosus, the absolute sweet spot is late spring or early summer. This is when the plant is in its most vigorous growth phase. You’ll find it’s producing plenty of healthy new shoots, which are perfect for taking cuttings. Starting during this active growth period gives your new plantlets the best chance to establish themselves before the cooler, less active months arrive.
Supplies You’ll Need
Before we dive into the fun part, let’s get our toolkit ready. Having the right supplies makes all the difference.
- Sharp, clean pruning shears or a sharp knife: This is crucial for making clean cuts that heal well.
- A good quality potting mix: I like to use a well-draining mix. You can buy one specifically for houseplants, or make your own by combining equal parts peat moss, perlite, and a little bit of compost.
- Small pots or containers: Terracotta pots are great as they breathe, but any small plastic pots with drainage holes will work.
- Rooting hormone (optional but recommended): This can give your cuttings a helping hand in developing roots. Look for a powder or gel, preferably with IBA (indole-3-butyric acid).
- A spray bottle: For keeping things nicely misted.
- Plastic bags or a clear plastic dome: To create a humid environment for your cuttings.
- A dibber or pencil: To make holes for planting cuttings.
- A small trowel or spoon: For scooping soil.
Propagation Methods
Now, let’s get our hands dirty! Arthroclianthus macrobotryosus is typically propagated most successfully from stem cuttings.
1. Taking Stem Cuttings (The Most Reliable Method)
- Selection is Key: Choose a healthy, non-flowering stem from your mature plant. Look for a stem that is firm and has plenty of healthy leaves.
- Make the Cut: Using your sharp, clean pruning shears or knife, make a cut just below a leaf node (where a leaf attaches to the stem). Aim for cuttings that are about 4-6 inches long.
- Prepare the Cutting: Gently remove the lower leaves from the cutting, leaving just a couple of leaves at the top. This prevents them from rotting when buried in the soil. You might also want to trim any very large leaves in half to reduce water loss.
- Apply Rooting Hormone (Optional): Dip the cut end of the stem into your rooting hormone powder or gel. Tap off any excess.
- Planting the Cuttings: Fill your small pots with your well-draining potting mix. Use your dibber or pencil to make a hole in the center of the soil. Carefully insert the cut end of the stem into the hole. Gently firm the soil around the base of the cutting.
- Provide Humidity: Mist the soil and the cutting lightly with your spray bottle. Then, cover the pot with a clear plastic bag or place it under a clear plastic dome. This creates a mini-greenhouse effect, which is essential for preventing the cuttings from drying out. Make sure the leaves are not touching the inside of the plastic.
- Placement is Important: Place the pot in a bright spot, but out of direct sunlight. Too much sun will scorch your delicate cuttings. A warm location is best.
2. Water Propagation (A More Visible Option)
This method is a bit more visible, which can be fun if you like watching the root development!
- Follow Steps 1-3 above: Select, cut, and prepare your stem cuttings as you would for soil propagation.
- Place in Water: Instead of planting in soil, place the prepared cuttings in a clean jar or glass filled with room-temperature water. Make sure the leaf nodes where you removed the leaves are submerged, but crucially, don’t let any leaves sit in the water. This is a common mistake that leads to rot.
- Change the Water Regularly: Change the water every few days to keep it fresh and prevent bacteria buildup.
- Wait for Roots: You should start to see tiny roots forming from the nodes within a few weeks. Once the roots are about an inch long, you can transplant them into soil using the method described above.
The “Secret Sauce” (Pro Tips)
Here are a few little tricks I’ve picked up over the years that can really boost your propagation success.
- Bottom Heat is Your Friend: Arthroclianthus macrobotryosus absolutely loves warmth. If you have a seedling heat mat, placing your pots on it will significantly speed up root development. It mimics the warm soil they’d encounter in their natural habitat during the growing season.
- Don’t Rush the Potting Up: When you’re checking for roots on your soil cuttings, try to resist the urge to tug on them impatiently. Instead, give the potting mix a gentle tug. If you feel resistance, it’s a good sign that roots have formed and anchored the plant.
- The “Dormant” Cutting Trick: Sometimes, a cutting that looks a bit sad and floppy will surprise you. Don’t discard it too quickly! If it’s still firm and not mushy, it might just be conserving energy. Keep it in its humid environment, and patience might just pay off with eventual rooting.
Aftercare & Troubleshooting
Once your cuttings have successfully developed roots, it’s time to give them a bit more focused care.
- Acclimatization: Your new plantlet will have lived in a high-humidity environment. Gradually reduce the humidity by slowly opening the plastic bag or dome over a week or two. This helps it adjust to normal room conditions.
- Watering: Water your new plant thoroughly when the top inch of soil feels dry. Avoid letting it sit in soggy soil, which can lead to root rot.
- Light: Continue to provide bright, indirect light. As the plant grows stronger, you can gradually introduce it to slightly more direct morning sun.
- Common Issues: The most frequent problem you’ll encounter is rot. If a cutting turns mushy and black, it’s likely due to too much moisture and not enough air circulation, or starting with a less-than-ideal cutting. If you see rot starting, you might need to discard the affected cutting and disinfect your tools before trying again. Yellowing leaves that are still firm can sometimes indicate insufficient light, while wilting can be a sign of dehydration.
A Little Patience Goes a Long Way
Propagating plants is such a wonderful way to connect with nature and expand your own personal jungle. It’s a process that teaches you patience, observation, and a whole lot of love for green things. Don’t be discouraged if your first attempt isn’t a resounding success. Each plant, and each cutting, is a learning experience. So, grab those shears, get your hands dirty, and enjoy the magical journey of bringing new Arthroclianthus macrobotryosus plants into the world! Happy gardening!
Resource:
https://identify.plantnet.org/k-world-flora/species/Arthroclianthus%20macrobotryosus%20Hochr./data