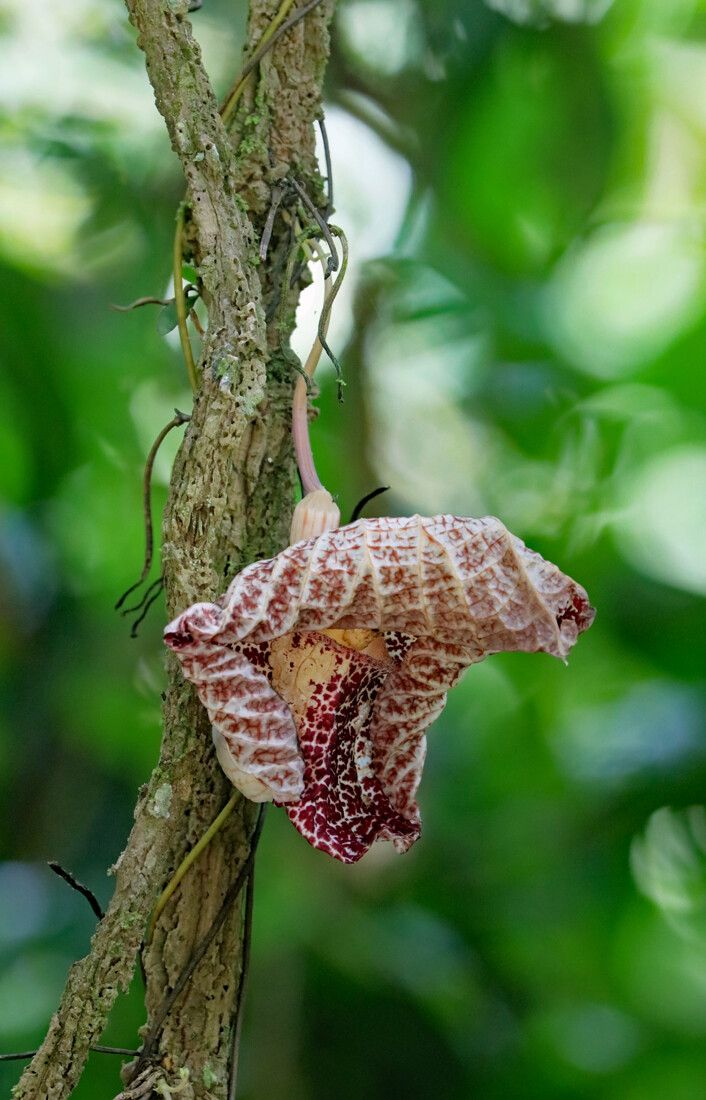
Hello, fellow plant lovers! I’m so excited to chat with you today about a truly captivating vine: Aristolochia goudotii. If you’ve ever seen this beauty gracing a garden fence or climbing a trellis, you’ll know its appeal. The unusual, trumpet-shaped flowers are a botanical wonder, and its vigorous growth makes it a fantastic choice for creating a green oasis. Propagating Aristolochia goudotii is a wonderful way to share its magic or simply expand your own collection. Now, while it’s not the absolute easiest plant for a complete novice to start from scratch, with a little guidance, you’ll find it quite manageable.
The Best Time to Start
For the highest success rates, I always recommend propagating Aristolochia goudotii from stem cuttings in the late spring or early summer. This is when the plant is actively growing and has plenty of energy to put into developing new roots. You’re looking for stems that are firm and have developed a bit, but aren’t yet woody. Think of it as taking cuttings from the current season’s growth.
Supplies You’ll Need
Here’s what you should gather before you get started:
- Sharp, clean pruning shears or a razor blade: Essential for making clean cuts that heal well.
- Rooting hormone powder or gel: While not strictly mandatory for all plants, it gives Aristolochia goudotii a real boost.
- A well-draining potting mix: I like a blend of peat moss, perlite, and a little bit of coarse sand. You can also find commercial seed-starting mixes that work beautifully.
- Small pots or seedling trays: Make sure they have drainage holes!
- A plastic bag or humidity dome: To keep the cuttings moist.
- A spray bottle with water: For misting.
- Optional: A heat mat: This can significantly speed up root development.
Propagation Methods
Let’s get our hands dirty! I tend to favor the stem cutting method for Aristolochia goudotii because it’s reliable and produces strong new plants.
Stem Cuttings
- Select Your Cuttings: Find a healthy, non-flowering stem from your mature plant. Aim for cuttings that are about 4-6 inches long.
- Make the Cut: Using your clean shears or razor, make a cut just below a leaf node. A leaf node is where a leaf attaches to the stem, and it’s where root development is most likely to occur.
- Prepare the Cutting: Gently remove the lower leaves, leaving just a couple at the very top. This reduces water loss and prevents leaves from rotting in the soil. If your cutting has any flowers or buds, pinch them off.
- Apply Rooting Hormone: Dip the cut end of the stem into your rooting hormone. Tap off any excess.
- Plant the Cuttings: Fill your small pots or trays with your prepared potting mix. Make a small hole with your finger or a pencil, then insert the cutting. Gently firm the soil around the base.
- Create a Humid Environment: Water the soil lightly. Then, cover the pots with a plastic bag or a humidity dome. This traps moisture, which is crucial for cuttings to root. Ensure the plastic doesn’t touch the leaves. You can use stakes to prop it up if needed.
- Provide the Right Conditions: Place the pots in a warm location with bright, indirect light. Avoid direct sun, as it can scorch the delicate cuttings. If you have a heat mat, place the pots on it.
Water Propagation (Use with Caution!)
While I generally recommend soil for Aristolochia goudotii, you can try water propagation for a few cuttings.
- Prepare Cuttings: Follow steps 1-3 from the stem cutting method.
- Place in Water: Place the prepared cuttings in a clean jar or glass filled with room-temperature water.
- Change Water Regularly: Change the water every 2-3 days to keep it fresh and prevent bacterial growth.
- Monitor Root Development: Roots should start to appear within a few weeks.
- Transition to Soil: Once the roots are about an inch long, it’s time to transition them to soil following the planting steps above. Be gentle, as water roots can be fragile.
The “Secret Sauce” (Pro Tips)
Here are a couple of things I’ve learned over the years that really make a difference:
- Bottom Heat is Your Friend: Seriously, if you can spring for a small heat mat, do it! Aristolochia goudotii absolutely loves warmth from below. It encourages root formation much faster than ambient room temperature alone. You’ll see results in weeks, not months.
- Don’t Drown Your Cuttings: While they need humidity, soggy soil is the enemy. When you water, water until it just begins to drain from the bottom. If you see water collecting in the saucer, dump it out. Overwatering leads to rot, and that’s a fast track to losing your cutting.
Aftercare & Troubleshooting
Once you start to see new leaf growth on your cuttings, that’s a fantastic sign that roots are forming! You can gently tug on a cutting to feel for resistance – if it holds firm, it’s rooted.
- Acclimatize: Gradually remove the plastic bag or humidity dome over a week or so. Start by taking it off for a few hours each day, then longer, to get the new plant used to the regular humidity levels.
- Water as Needed: Water when the top inch of soil feels dry. Continue to provide bright, indirect light.
- Repotting: Once the new plant is established and has filled its initial pot, you can transplant it into a larger container with fresh potting mix.
The most common problem you’ll encounter is rot. If you see your stem cutting turning mushy and black, especially at the base, it’s likely due to too much moisture. Unfortunately, this is usually the end of that particular cutting. If you’re struggling, re-evaluate your watering habits and ensure good air circulation.
A Little Patience Goes a Long Way
Propagating plants is a journey, and Aristolochia goudotii is no exception. Be patient with your new cuttings. Some will take off immediately, while others might take their sweet time. Enjoy the process of nurturing these new beginnings, and soon you’ll have the joy of watching your own Aristolochia goudotii vines flourish! Happy gardening!
Resource:
https://identify.plantnet.org/k-world-flora/species/Aristolochia%20goudotii%20Duch./data