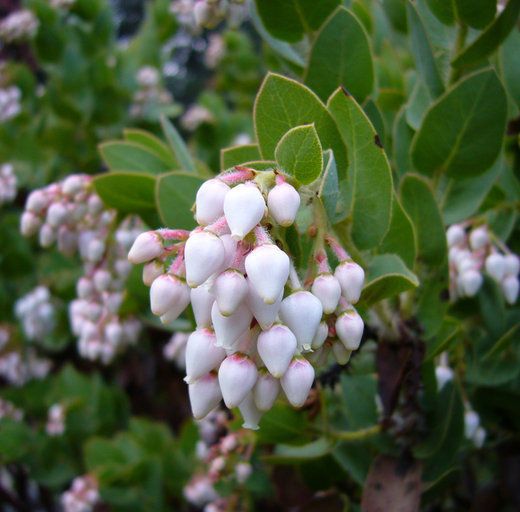
Hello there, fellow garden enthusiasts! I’m so delighted to share some thoughts on a plant that has truly captured my heart – the beautiful Arctostaphylos refugioensis, or Refugio Manzanita. Its glossy, evergreen leaves and delicate pinkish-white flowers are a delight, especially in a climate that can sometimes feel a bit bleak. Propagating this gem is a truly rewarding endeavor. Now, as for beginners, I’d say it’s a bit of a moderate challenge. It’s not a “stick it in the ground and forget it” situation, but with a little care and attention, you’ll be rewarded with new plants to share or enjoy yourself.
The Best Time to Start
For the highest success rate with Arctostaphylos refugioensis, I’ve found that late spring to early summer is your window. This is when the plant is actively growing, and the new stems are firm but not yet woody. You’ll be looking for what we call “semi-hardwood” cuttings – that perfect stage before things get too tough.
Supplies You’ll Need
Before we get our hands dirty, let’s gather our trusty tools. Think of this as setting up your little propagation station:
- Sharp, clean pruning shears or a sharp knife: Essential for making clean cuts.
- Rooting hormone: A little boost can make a world of difference. I prefer a powder form.
- Well-draining potting mix: A special blend is key. I like to mix equal parts perlite and peat moss, or you can use a specialized succulent or cactus mix.
- Small pots or trays: Clean pots are a must to prevent disease.
- Plastic bags or a propagation dome: To create a humid environment.
- Labels and a permanent marker: Because trust me, you’ll forget what you planted where!
- Optional: Bottom heat mat: This can significantly speed up root development.
Propagation Methods
We’ll focus on the most reliable method for Arctostaphylos refugioensis: stem cuttings. It’s tried and true!
-
Take Your Cuttings: On a mild, overcast day or in the early morning, select healthy, non-flowering shoots from your mature plant. Look for stems that are flexible but not soft and floppy. Using your clean shears, make a clean cut just below a leaf node (where a leaf attaches to the stem). You’re aiming for cuttings that are about 4-6 inches long. Remove the lower leaves from the stem, leaving just a few at the top.
-
Prepare the Cuttings: Gently dip the cut end of each cutting into water, then into your rooting hormone powder. Tap off any excess. The moisture helps the powder adhere.
-
Plant Your Cuttings: Fill your small pots or trays with your well-draining potting mix. Make a shallow hole in the center of the mix using a pencil or your finger. Carefully insert the prepared end of your cutting into the hole, ensuring the root hormone is covered. Gently firm the mix around the base of the cutting.
-
Create Humidity: Water the potting mix lightly. Then, cover the pots with a clear plastic bag, tying it loosely at the bottom to create a mini greenhouse, or place them under a propagation dome. This maintains high humidity, which is crucial for preventing the cuttings from drying out before they can form roots.
-
Provide Ideal Conditions: Place your pots in a bright spot with indirect sunlight. Avoid direct sun, as this can scorch the delicate cuttings. If you have a bottom heat mat, now’s the time to use it! A consistent temperature of around 70-75°F (21-24°C) is ideal.
The “Secret Sauce” (Pro Tips)
Now, for those little tricks that make a big difference:
- Don’t let the leaves touch the water: If you’ve ever tried water propagation, you know this. But even in soil, if you’re misting, be mindful that the lower leaves sitting directly on damp soil can encourage rot. Keep those lower stems clear.
- Bottom heat is your friend: I can’t stress this enough. For woody plants like manzanitas, warmth from below is a game-changer. It encourages root development much faster than top or ambient heat alone. You’ll see results much sooner!
- Fresh cuttings are key: Don’t try to take cuttings from a plant that’s stressed or looking a bit unhappy. Choose a vibrant, healthy specimen.
Aftercare & Troubleshooting
Once your cuttings are nestled in their new home, patience is key. You’re looking for signs of new growth – tiny leaves emerging at the top or a gentle tug resistance when you carefully try to pull on a cutting (don’t pull too hard!). This usually takes anywhere from 4-8 weeks, sometimes longer depending on conditions.
When you see those roots forming, it’s time to gradually acclimate your new plants to less humid conditions. You can start by opening the plastic bag for a few hours a day. Once they seem robust, you can remove the cover entirely. Then, it’s time to transplant them into slightly larger pots with a good quality, well-draining potting mix.
The most common sign of failure is wilting and blackening, often followed by mushiness. This is usually a sign of root rot, which is almost always caused by overwatering or a poorly draining soil mix. If you see this, sadly, it’s time to discard the cutting and start again, making sure your soil is much drier and your drainage is excellent.
A Encouraging Closing
Propagating Arctostaphylos refugioensis is a journey, and like any good journey, it’s about the process. Don’t be discouraged if your first attempt isn’t a roaring success. Each try teaches you something new. So, gather your supplies, embrace a little bit of horticultural experimentation, and enjoy the satisfaction of nurturing new life. Happy propagating, my friends!
Resource:
https://identify.plantnet.org/k-world-flora/species/Arctostaphylos%20refugioensis%20Gankin/data