Oh, hello there, fellow plant enthusiast! Pull up a chair, let’s chat about one of my absolute favorite California natives: Arctostaphylos obispoensis, or the Obispo Manzanita.
Why Propagate This Beauty?
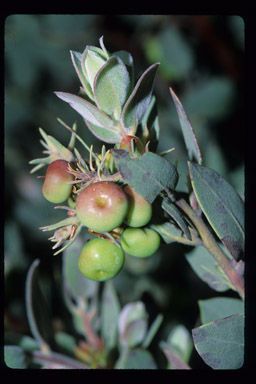
Honestly, there’s something incredibly satisfying about growing a plant from a tiny cutting or seed. With the Obispo Manzanita, it’s even more special. This shrub is just stunning with its smooth, reddish bark, delicate pink bells in spring, and beautiful evergreen foliage. Propagating it means you can share this charm with friends, fill up your garden, or simply enjoy the thrill of bringing new life into the world. Now, for beginners, I’d say the Obispo Manzanita is a moderately challenging plant to propagate. It’s not impossible at all, but it does require a little bit of patience and understanding of its needs. Think of it as a rewarding puzzle!
When Should You Get Started?
My favorite time to take stem cuttings of the Obispo Manzanita is from late spring through early summer. This is when the plant has finished its spring bloom and is starting to put on new, semi-hardened growth. You’re looking for stems that are flexible but not quite woody. If you wait too long, the growth will become too hard and woody, making it much harder to root.
What You’ll Need for Success
Gathering your supplies before you start makes the whole process so much smoother. Here’s what I always have on hand:
- Sharp Pruning Shears or a Knife: Clean cuts are crucial for clean rooting.
- Rooting Hormone: A good rooting powder can really give your cuttings a boost. Look for one formulated for woody ornamentals.
- Well-Draining Potting Mix: A blend of perlite, coarse sand, and peat moss or coco coir works wonders. About a 50/50 mix of perlite and peat is a great starting point.
- Small Pots or Trays: Clean pots are a must to prevent disease. Small ones are perfect for cuttings.
- Plastic Bag or Dome: To create a humid environment for your cuttings.
- Watering Can with a Fine Rose: Gentle watering is key.
- Optional: Bottom Heat Mat: If you’re propagating in a cooler environment, this can be a game-changer.
Let’s Get Rooting! (Stem Cuttings)
This is my go-to method for the Obispo Manzanita. It’s really quite straightforward once you get the hang of it.
- Take Your Cuttings: Head out to your plant in late spring or early summer. Look for those semi-hardened stems I mentioned. You want pieces about 4-6 inches long. Make a clean cut just below a leaf node (where a leaf attaches to the stem). Remove the lower leaves, leaving about 2-3 leaves at the top.
- Prepare the Cuttings: Dip the cut end of each cutting into your rooting hormone, tapping off any excess. This is like giving them a little energy drink to encourage root development.
- Plant Your Cuttings: Fill your clean pots with your well-draining potting mix. Make a hole with a pencil or your finger, and gently insert the prepared cutting. Firm the soil gently around the base.
- Create a Humid Environment: Water them in lightly. Then, cover the pots with a plastic bag or a clear dome. This traps moisture, which is vital for the cuttings to stay hydrated before they can develop roots. If you’re using a plastic bag, prop it up with a couple of sticks so it doesn’t touch the leaves.
The “Secret Sauce”: My Insider Tips
While the basic steps are important, a few little tricks have really upped my success rate with these woody beauties.
- Keep Those Leaves Dry: When you water your cuttings, do not let the leaves sit in water. If they’re covered by a bag, ensure the condensation drips back onto the soil, not onto the foliage. Wet leaves are a fast track to rot.
- Bottom Heat is Your Friend: If you have a bottom heat mat, use it! A consistent temperature of around 70-75°F (21-24°C) really encourages root initiation. It’s like giving your cuttings a cozy, warm bed to grow in.
- Patience is a Virtue (and a Necessity): Manzanitas can be slow to root. Don’t be tempted to yank them out to check for roots too soon! I usually give them a good 10-12 weeks, sometimes longer, before I even think about gently tugging on one to see if it’s taken.
Aftercare and What to Watch For
Once you see new leaf growth, that’s a great sign! It means your cutting is likely forming roots.
- Acclimatize Gradually: When your cuttings start to look robust, slowly start to acclimatize them to drier air. This means gradually opening up that plastic bag or dome over a week or two.
- Gentle Watering: Continue to water them when the top inch of soil feels dry. Avoid overwatering – it’s the biggest killer.
- Troubleshooting: The most common issue is rot. If you see a cutting turning black and mushy, it’s best to remove it to prevent it from spreading. This usually means the environment was too wet or not enough air circulation. If a cutting just looks sad and wilts without any rot, it might not have rooted, and that’s okay. We just try again!
Go Forth and Grow!
So there you have it – a little peek into the world of propagating your own Obispo Manzanita. It takes a bit of practice, and some cuttings might not make it, but celebrate every success! The joy of nurturing these plants from a tiny piece of stem into a beautiful specimen is truly unparalleled. Don’t be discouraged if your first attempt isn’t perfect. Just keep trying, enjoy the process, and soon you’ll have a garden full of these lovely natives. Happy gardening!
Resource:
https://identify.plantnet.org/k-world-flora/species/Arctostaphylos%20obispoensis%20Eastw./data