Hello there, fellow garden enthusiasts! Grab a mug of your favorite brew, and let’s chat about a fascinating native plant that’s often overlooked: Apocynum cannabinum, or as it’s more commonly known, Indian Hemp or Dogbane.
Now, I know what you might be thinking – “Dogbane? That sounds a bit… uninviting.” But trust me, this plant is a real beauty in the right setting. Its delicate clusters of white, bell-shaped flowers are a magnet for pollinators, and its sturdy stature can add wonderful structure to a wild garden or naturalized area. Plus, it’s a tough cookie, thriving in a variety of conditions. Propagating it yourself is incredibly rewarding, giving you more of this ecological treasure for your own patch or to share with garden-loving friends. For beginners, I’d say Dogbane is moderately easy to propagate. It’s not as foolproof as say, a geranium cutting, but with a little attention, you’ll do wonderfully.
The Best Time to Start
My favorite time to begin propagating Apocynum cannabinum is in late spring to early summer. This is when the plant is actively growing and has plenty of fresh, pliable stems. Taking cuttings during this period gives them the best chance to root quickly and establish themselves before the cooler weather arrives. You can also divide established clumps in early spring, just as new growth begins to emerge.
Supplies You’ll Need
Gathering your tools beforehand makes the whole process smoother. Here’s what I like to have on hand:
- Sharp pruning shears or hobby knife: For clean cuts that heal well. Sterilize them with rubbing alcohol before you begin!
- Rooting hormone (optional but helpful): A powder or gel that encourages root development.
- Small pots or trays: With drainage holes, of course.
- Well-draining potting mix: A blend of perlite, peat moss, and a bit of compost works wonders. You could also use a cactus/succulent mix.
- Watering can with a fine rose: For gentle watering.
- Plastic bags or a propagator: To create a humid environment.
- Labeling stakes: So you don’t forget what you planted where!
- For division: A spade or garden fork.
Propagation Methods
Apocynum cannabinum is quite versatile, and I’ve had success with a couple of different methods.
1. Stem Cuttings (My Preferred Method!)
This is how I usually expand my collection.
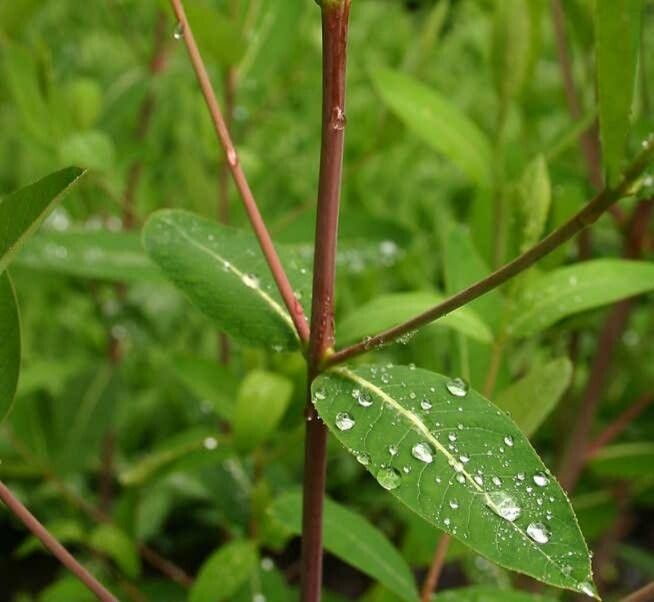
- Select your stems: Look for healthy, new growth. Choose stems that are about 4-6 inches long and still a bit flexible – not woody, but not floppy either.
- Make the cut: Using your clean shears, make a clean cut just below a leaf node. This is where roots are most likely to form. Remove the lower leaves, leaving just a couple at the top.
- Dip in rooting hormone: If you’re using it, dip the cut end into the rooting hormone, tapping off any excess.
- Pot them up: Fill your small pots with your prepared potting mix. Make a hole with your finger or a pencil in the center of the soil.
- Insert the cutting: Gently place the cutting into the hole, ensuring the leaf nodes you removed are buried in the soil.
- Firm the soil: Lightly firm the soil around the cutting to ensure good contact.
- Water gently: Water thoroughly until you see water draining from the bottom of the pot.
- Create humidity: Pop a clear plastic bag over the pot, or place the pots in a propagator. This keeps the humidity high, which is crucial for cuttings to root.
2. Division of Established Clumps
If you already have a mature Dogbane, this is a simple way to get more plants.
- Timing is key: Do this in early spring as soon as you see new shoots emerging.
- Prepare the soil: Water the area around the plant the day before you plan to divide. This makes it easier to dig.
- Expose the roots: Carefully dig around the base of the plant with a spade or garden fork. Gently lift the entire clump out of the ground.
- Separate the sections: You can often untangle the roots with your hands. If they are tightly bound, use your spade or a sharp knife to cut the root ball into sections. Ensure each section has a good portion of roots and at least one or two healthy shoots.
- Replant: Dig new holes in your desired location, or in pots filled with good soil, and replant the divisions.
- Water well: Water them in thoroughly, and keep them consistently moist for the first few weeks.
The “Secret Sauce” (Pro Tips)
Here are a few things I’ve learned over the years that really make a difference:
- When doing water propagation (which I find less reliable for this plant, but it’s an option), don’t let the leaves touch the water. They will rot and can take the whole cutting down with them. Keep only the stem submerged.
- For stem cuttings, especially if you’re doing them when it’s a bit cooler or you want to speed things up, bottom heat is your friend. Placing your pots on a warming mat designed for propagation can significantly encourage root development.
- Patience is paramount. Don’t be tempted to pull up your cuttings too soon to check for roots. Give them a good month, maybe even six weeks, before gently tugging to see if there’s resistance, indicating roots are forming.
Aftercare & Troubleshooting
Once you see signs of root development – usually new leaf growth or resistance when you gently tug – it’s time to transition them.
- Acclimatize: Gradually remove the plastic bag or propagator over a few days. This helps the young plants adjust to lower humidity.
- Watering: Keep the soil consistently moist, but not waterlogged. Water when the top inch of soil feels dry.
- Light: Place them in a spot with bright, indirect light. Avoid harsh, direct sun until they are stronger.
- Repotting: Once your cuttings are a few inches tall and have a good root system (you might see roots coming out the drainage holes), you can transplant them into slightly larger pots or directly into their final garden location if the weather is suitable.
Troubleshooting? The most common issue is rot, usually caused by overwatering or poor drainage. If you see your cuttings turning mushy or developing black spots, it’s usually a sign of too much moisture. Ensure your soil is well-draining and your pots have good drainage holes. If rot sets in, sadly, it’s often best to discard the affected cutting and adjust your watering. Another issue can be wilting; this is often a sign they need more humidity, so pop that bag back on!
A Encouraging Closing
Propagating plants is a journey, and Dogbane is a wonderful one to embark on. Be patient with your new green babies, offer them good care, and celebrate every little success. There’s a unique joy in nurturing a plant from a small cutting into a thriving part of your garden. Happy propagating!
Resource:
https://identify.plantnet.org/k-world-flora/species/Apocynum%20cannabinum%20L./data