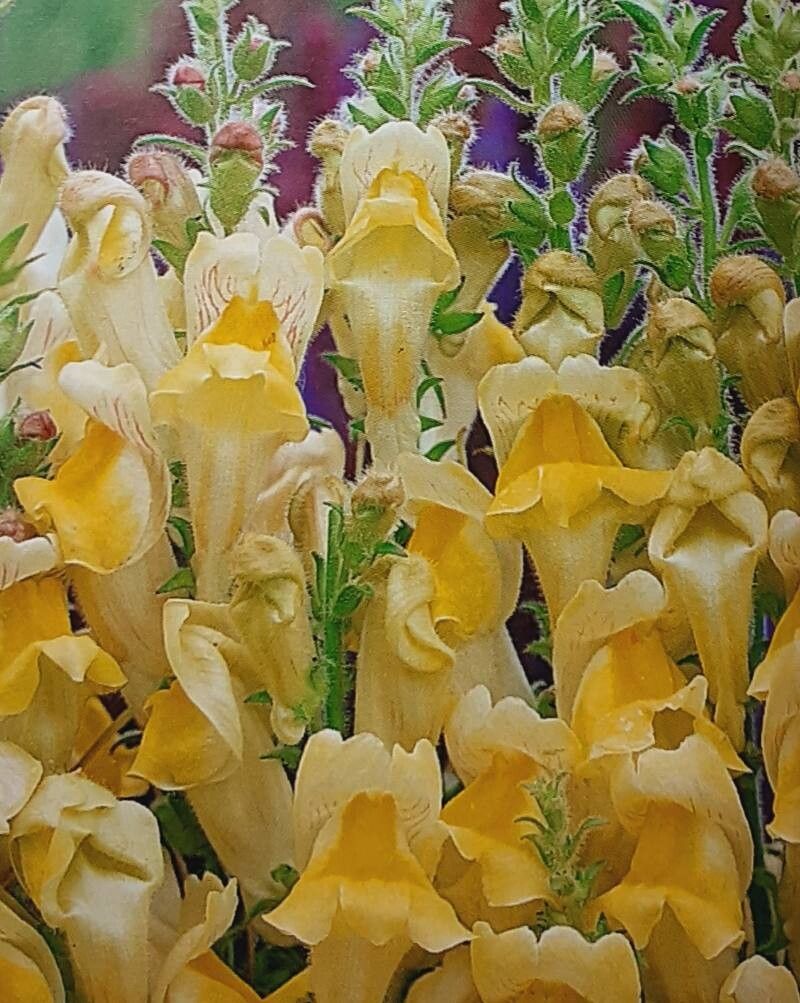
Oh, hello there, fellow plant lover! Today, we’re going to talk about a real gem: Antirrhinum braun-blanquetii, often called the dwarf snapdragon. If you’ve ever seen these charming little plants with their delicate, colorful blooms cascading over the edges of a pot or a rock garden, you know exactly why they steal our hearts. They bring such a whimsical touch! Plus, propagating them yourself? That’s where the real fun begins. It feels like unlocking a little bit of gardening magic, and I’m here to guide you through it. Don’t worry, this isn’t a plant that will have you pulling your hair out; it’s quite forgiving, even for those just dipping their toes into the propagation waters.
The Best Time to Start
For the highest success rate with Antirrhinum braun-blanquetii, I’ve found that the late spring to early summer is absolutely ideal. Think of it as your young plant finishing its spring growth spurt and being brimming with healthy, vigorous energy. This is the perfect time to take cuttings. Waiting until the plant has really established itself after flowering is also a good bet. You want material that’s full of life, not struggling or stressed.
Supplies You’ll Need
Here’s what we’ll gather for our propagation adventure:
- Sharp, clean pruning shears or a razor blade: For making clean cuts.
- A well-draining potting mix: I love a mix of equal parts seed starting mix and perlite or horticultural sand. This ensures good aeration.
- Small pots or trays: Clean ones, of course! Anything from 2-4 inch pots will do.
- Rooting hormone (optional but recommended): A gentle, powdered hormone can give your cuttings a boost.
- A watering can or spray bottle: For gentle moisture.
- Plastic bags or a propagating dome: To create a humid environment.
- Labels and a pen: To keep track of what you’ve propagated!
Propagation Methods
Let’s get down to business with the most common and successful methods for our dwarf snapdragons.
Stem Cuttings
This is my go-to method for Antirrhinum braun-blanquetii.
- Take your cuttings: When your plant is actively growing, look for healthy, non-flowering stems. Using your sharp shears, take cuttings that are about 3-4 inches long.
- Prepare the cuttings: Gently remove the lower leaves from the bottom half of the cutting. You want a clean stem to insert into the soil. If the leaves are large, you can even cut the remaining leaves in half to reduce water loss.
- Apply rooting hormone (if using): Dip the cut end of the stem into your rooting hormone, tapping off any excess.
- Pot them up: Fill your small pots with your prepared, moistened potting mix. Make a little hole in the center of the mix with your finger or a pencil.
- Insert the cuttings: Gently push the prepared end of each cutting into the hole, ensuring the nodes where the leaves were removed are below the soil surface. Firm the soil gently around the stem.
- Create humidity: Water the pot lightly. Then, cover the pot with a plastic bag (forming a mini-greenhouse by propping it up with stakes or skewers) or place it under a propagating dome. Ensure the leaves don’t touch the sides of the bag, as this can encourage rot.
- Place them in bright, indirect light: Find a warm spot that gets plenty of light but is out of direct, scorching sun.
Water Propagation
This method is a bit more visible, which I enjoy!
- Select and take cuttings: Similar to stem cuttings, choose healthy, non-flowering stems about 3-4 inches long.
- Remove lower leaves: Just like before, take off all the leaves that would sit below the water line.
- Place in water: Fill a clean jar or glass with water and place the cuttings in it. Make sure no leaves are submerged.
- Find a bright spot: Put your jar in a location with bright, indirect light.
- Change the water regularly: Every few days, change the water to keep it fresh and prevent bacterial growth.
The “Secret Sauce” (Pro Tips)
Now, for a few little tricks I’ve picked up over the years that can make a big difference:
- Bottom Heat is Your Friend: Antirrhinum braun-blanquetii roots much faster with a little warmth from below. A propagating mat or even placing your pots on top of a moderately warm appliance (like a cable box that’s on) can really speed things up. It encourages those roots to form with gusto!
- Don’t Be Afraid to Sterilize: I can’t stress enough how important cleanliness is. Not just your tools, but your pots too. A quick wash with hot, soapy water and a rinse with diluted bleach or hydrogen peroxide can prevent fungal diseases that love to attack tender cuttings.
- Patience with the Bloom: When taking cuttings, it’s tempting to snag those stems with flower buds. Resist! You want the plant’s energy directed into root development, not flower production. Wait until the stem has finished blooming and a new flush of growth appears.
Aftercare & Troubleshooting
Once you start seeing those little white roots peeking out from the drainage holes (or new leafy growth appearing on your water cuttings), it’s time for a little extra care.
For cuttings rooted in soil: Gradually introduce them to less humidity. Once they have a good root system, you can remove the plastic bag or dome for a few hours each day, eventually leaving it off entirely. Continue to keep the soil consistently moist but not waterlogged. You can begin to fertilize with a very dilute liquid feed once new growth is evident.
For water cuttings: Gently transplant them into pots of your well-draining potting mix as soon as the roots are about an inch long. Treat them as you would potted cuttings.
Troubleshooting:
- Wilting and Browning Leaves: This usually means the cutting is too dry or it’s getting too much direct sun. Increase humidity and move it to a shadier spot.
- Mushy Stems or Black Base: This is a classic sign of rot, often caused by too much moisture and not enough air circulation. You might need to discard the affected cutting and ensure your soil is airy and drainage is excellent. If it’s just one affected side, you can try trimming away the rot and letting the cutting callous over again before repotting (if you’re feeling brave!).
A Encouraging Closing
So there you have it! Propagating Antirrhinum braun-blanquetii is a truly rewarding experience. It’s a chance to multiply the beauty you already enjoy and share it with friends (or just fill your own garden even more!). Remember to be patient; nature has its own rhythm. Don’t get discouraged if a few don’t take. Every cutting is a learning opportunity. Now go forth and grow! Happy gardening!
Resource:
https://identify.plantnet.org/k-world-flora/species/Antirrhinum%20braun-blanquetii%20Rothm./data