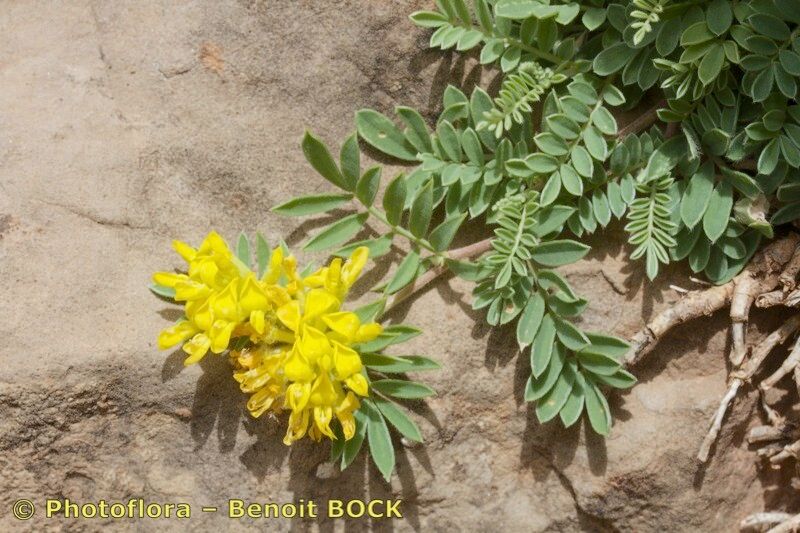
Hey there, fellow garden enthusiasts! Today, we’re diving into the wonderful world of Anthyllis polycephala, a plant that’s truly a joy to have gracing our landscapes. You know, those charming clusters of fluffy flowers, often a delicate yellow or white, tucked amongst silvery-green foliage? They just have a way of bringing a touch of wild beauty to even the most manicured garden.
Propagating Anthyllis polycephala is one of those gardening endeavors that feels incredibly rewarding. There’s a real magic in taking a piece of a parent plant and helping it grow into something entirely new. For those of you just starting out, don’t fret! While some plants can be a bit finicky, I find Anthyllis polycephala to be a pretty forgiving plant, making it a great candidate for your first propagation project.
The Best Time to Start
Generally, the time you’ll have the most success is late spring or early summer. This is when the plant is actively growing, and those young, slightly woody stems are perfect for taking. Wait until the flowers have mostly faded, but before the plant starts to look tired or stressed by the heat of midsummer. This active growth phase means your cuttings have plenty of energy to put into developing roots.
Supplies You’ll Need
To get your Anthyllis polycephala propagation off to a good start, here’s what I always gather:
- Sterilized pruning shears or a sharp knife: Clean tools are crucial to prevent diseases.
- Rooting hormone (optional but recommended): This can give your cuttings a helpful boost. Look for one formulated for stem cuttings.
- Small pots or a propagation tray: Choose containers with drainage holes.
- Well-draining potting mix: A mix of equal parts perlite or coarse sand and seed-starting mix works wonders. You want good aeration!
- Labels and a marker: Don’t forget to label your cuttings so you know what’s what!
- A plastic bag or propagation dome: To maintain humidity.
Propagation Methods
Most gardeners find that taking stem cuttings is the most straightforward and successful way to propagate Anthyllis polycephala.
- Select your cutting: Choose a healthy, non-flowering stem that is semi-woody, meaning it’s not brand new and soft, but also not old and quite hard. You’re looking for a stem that snaps cleanly when bent, rather than just flopping over.
- Make the cut: Using your sterilized shears or knife, take a cutting about 4-6 inches long. Make the cut just below a leaf node (where a leaf attaches to the stem).
- Prepare the cutting: Gently remove the lower leaves from the cutting, leaving just a few at the top. This prevents them from rotting when buried. If your cutting is very long, you can even chop the remaining leaves in half to reduce water loss.
- Apply rooting hormone (if using): Dip the cut end of the stem into your rooting hormone, tapping off any excess.
- Plant your cutting: Make a small hole in your prepared potting mix (this prevents the rooting hormone or the stem from being scraped off). Insert the cut end of your Anthyllis cutting into the hole and firm the soil gently around it.
- Water gently: Water the soil thoroughly but be careful not to dislodge the cutting.
- Create a mini-greenhouse: Cover the pot or tray with a plastic bag or a propagation dome. This will keep the humidity high, which is vital for cuttings to root.
The “Secret Sauce”
Now, for a couple of little tricks that have served me well over the years:
- Avoid the dreaded waterlogged leaves: When you water, make sure no leaves are touching the surface of the soil. If they are, they’ll quickly rot. It’s a small detail, but it makes a big difference.
- Give them a warm foundation: If you have the option, placing your propagation tray on a heat mat can significantly speed up root development. The gentle warmth encourages the plant to send out roots from the bottom. It’s like giving them a cozy little foot bath!
Aftercare & Troubleshooting
Once your cuttings are planted, place them in a bright spot but out of direct sunlight. You want good light to encourage growth, but harsh sun will scorch those tender leaves and dry out your cuttings too quickly.
Keep the soil consistently moist but not soggy. The “greenhouse” method helps with this. You can gently lift the bag or dome every few days to allow for some air circulation and check on the moisture level.
You’ll know your cuttings have rooted when you see new leaf growth or feel a gentle resistance when you tug on the cutting. This usually takes several weeks, so be patient! Once they’ve established a good root system, you can gradually acclimate them to normal room conditions before transplanting them into individual pots.
The most common problem you might encounter is rot. This is usually a sign of too much moisture and not enough air circulation, or using soil that doesn’t drain well. If you see a cutting turning black and mushy, sadly, it’s likely time to discard it. Don’t be discouraged; just try again with fresh cuttings and make sure your watering and drainage are good.
A Encouraging Closing
Gardening is a journey, and propagation is a beautiful part of that. Be patient with your Anthyllis polycephala cuttings, give them the right conditions, and enjoy the process of watching them grow. Soon you’ll have new plants to share or to fill your garden with even more of that delightful floral charm. Happy growing!
Resource:
https://identify.plantnet.org/k-world-flora/species/Anthyllis%20polycephala%20Desf./data