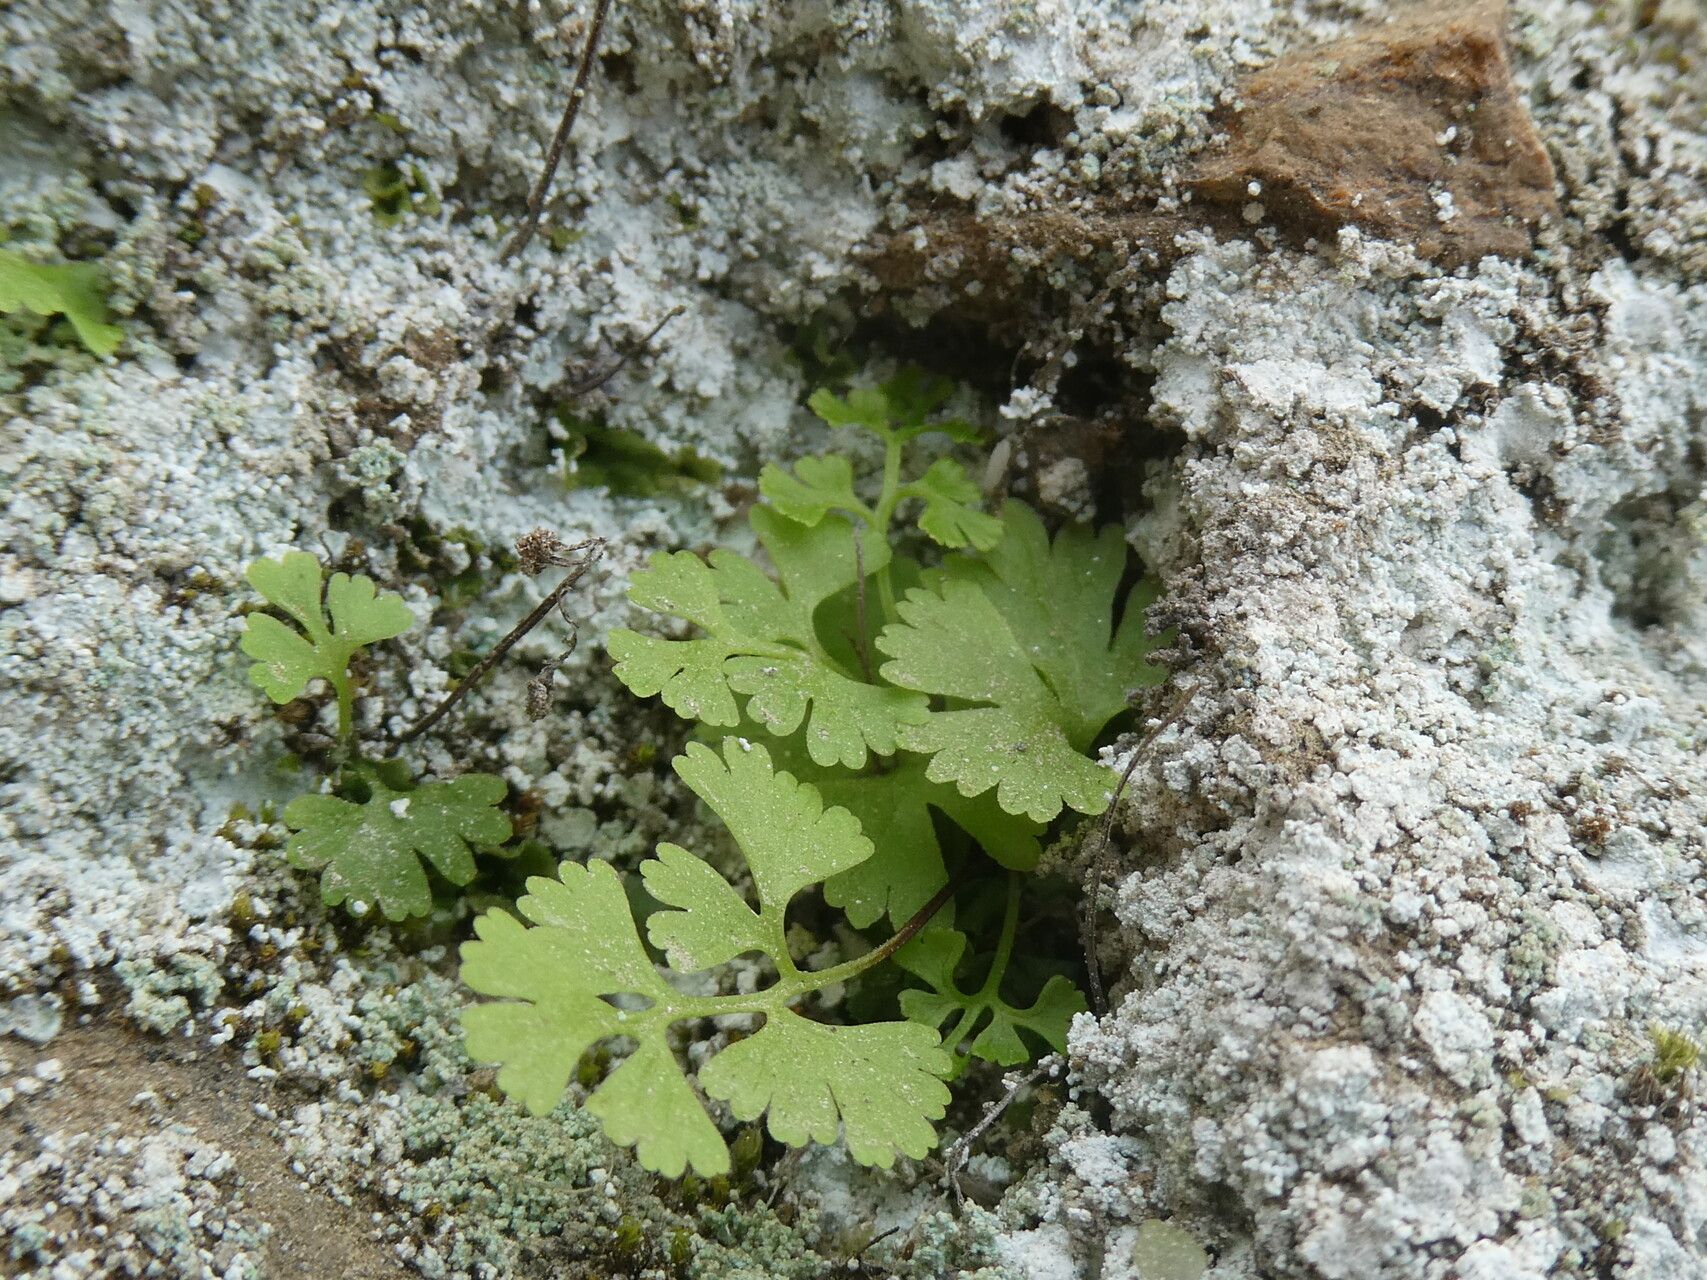
Hello fellow plant lovers! If you’re looking for a fern that’s a little bit special, a little bit delicate, and utterly charming, then let me introduce you to Anogramma leptophylla. Often called the “slender comfrey fern” or “annual parsley fern,” this little beauty is a sight to behold, especially with its bright green, parsley-like fronds. Propagating it has become a favorite little project of mine, and I’m so excited to share how I do it with you. It’s not the easiest plant to start from scratch, but with a little patience and the right approach, it’s absolutely doable and incredibly rewarding to see those tiny new plants emerge.
The Best Time to Start
For Anogramma leptophylla, the sweet spot for propagation is usually in late spring or early summer. This is when the parent plant is typically in its most active growth phase, meaning it has plenty of energy to put into producing new shoots or spores. Trying to propagate when the plant is stressed or dormant is just asking for disappointment, so timing is key!
Supplies You’ll Need
Gathering your supplies beforehand makes the whole process much smoother. Here’s what I find essential for propagating Anogramma leptophylla:
- Sterile potting mix: A light, airy mix is crucial. I often use a blend of peat moss or coco coir with perlite or vermiculite.
- Sharp, sterile knife or razor blade: For clean cuts when taking cuttings.
- Small pots or trays: With drainage holes, of course!
- Plastic bags or a propagator lid: To maintain high humidity.
- Water: Preferably distilled or rainwater for misting and watering.
- A spray bottle: For gentle misting.
- (Optional) Rooting hormone: While not always strictly necessary for this fern, it can give an extra boost.
Propagation Methods
Anogramma leptophylla can be a bit particular, but I’ve had the most success with division and, when I’m feeling ambitious, working with its spores.
Division: Sharing the Love
This is my preferred method because it’s quite straightforward, and you get established plantlets right away.
- Gently excavate: Carefully lift your Anogramma leptophylla from its pot. You want to disturb the roots as little as possible.
- Inspect the root ball: Look for natural separation points where new plantlets are forming. You’ll often see distinct clumps attached to the main root system.
- Separate with care: Using your sterile knife or even just your fingers, gently tease apart these sections. If there are roots attached to the new division, that’s perfect!
- Potting up: Plant each division into its own small pot filled with your sterile, moist potting mix.
- Create a humid haven: Immediately cover the pots with a clear plastic bag or place them in a propagator. This is vital to prevent the delicate new divisions from drying out.
Spores: The Tiny Seed of Hope (Requires a bit more patience!)
This method is fascinating, but it’s a slower process and requires a keen eye. On the back of mature fronds, you’ll see tiny brown dots – these are the spores.
- Collect mature fronds: Snip off a frond that has well-developed, brown spore cases (sporangia).
- Dry and collect: Place the frond on a piece of white paper in a dry, airy spot for a day or two. The sporangia will dry out and split, releasing the tiny spores. You’ll see a dust-like powder on the paper.
- Sow the spores: Sterilize a shallow tray and fill it with your damp, sterile potting mix. Gently sprinkle the collected spores over the surface. You don’t need to bury them.
- Cover and wait: Lightly mist the surface and cover the tray with a lid or plastic wrap. Keep it in a bright spot, but out of direct sunlight.
- The magic unfolds: This is where patience is king. It can take several weeks to months for the spores to germinate and form tiny green structures called prothalli. Once these are established, tiny fernlets will begin to emerge from them.
The “Secret Sauce” (Pro Tips)
Here are a couple of things I’ve learned through trial and error that really make a difference:
- Don’t over-pot: When dividing, resist the urge to put a tiny new plant into a massive pot. They need to feel a little snug in the beginning to encourage root growth. Overwatering is a much bigger risk in a large pot for a small plant.
- Bottom heat is your friend: Especially for spore propagation, a gentle warmth from a seedling heat mat can significantly speed up germination. It mimics the conditions that encourage growth in nature.
Aftercare & Troubleshooting
Once your divisions have settled in or your sporelings are starting to grow, the key is to maintain consistent moisture and high humidity. Keep that plastic covering on or humidity dome in place, opening it for brief periods daily to allow for air circulation – this helps prevent fungal issues. As the new plants grow stronger and develop more leaves, you can gradually acclimatize them to slightly lower humidity by opening the cover for longer periods.
The most common culprit for failure is rot. If your cuttings or divisions look mushy and brown, it’s usually a sign of too much moisture combined with poor air circulation. If you see this, try to remove the affected parts immediately and ensure the soil isn’t waterlogged. Wilting can also occur if the humidity drops too suddenly, so be gentle with acclimatization.
Bringing new life into your garden, whether from a tiny spore or a divided clump, is such a wonderful feeling. Don’t be discouraged if not every attempt is a roaring success. Each plant, each propagator, and each season brings its own lessons. Just keep observing, keep tending, and most importantly, keep enjoying the beauty that grows under your care. Happy propagating!
Resource:
https://identify.plantnet.org/k-world-flora/species/Anogramma%20leptophylla%20(L.)%20Link/data