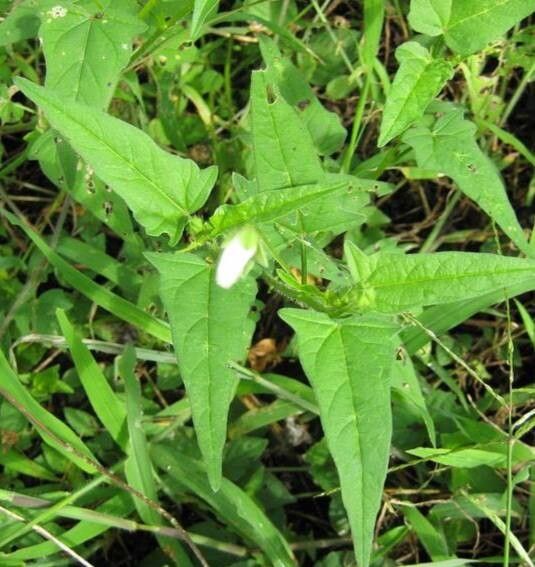
Oh, hello there! Come on in, pull up a chair. I’ve got a fresh pot of coffee brewing. Today, I want to talk to you about a real gem: Anoda acerifolia. If you haven’t met this beauty yet, imagine delicate, mallow-like flowers in vibrant shades of pink and purple, gracing your garden with a long blooming season. It’s a little burst of sunshine, and the wonderful thing is, it’s surprisingly easy to share!
The Rewarding World of Sharing Your Anoda
For me, propagating plants like Anoda acerifolia is one of the most satisfying parts of gardening. It’s about extending the life and beauty of plants you love, and there’s a real thrill in watching a tiny cutting transform into a thriving plant. For beginners, I’d say Anoda acerifolia is a quite forgiving plant to propagate, making it a fantastic choice to dip your toes into the world of plant multiplication.
The Best Time to Start
When it comes to timing, late spring to early summer is usually your sweet spot for propagating Anoda acerifolia. After the plant has had a good chance to get going in the warmer weather, you’ll find it’s full of vibrant energy, making it more receptive to taking root. Actively growing tips from this period will give you the best chance of success.
Supplies You’ll Need
Gathering your tools ahead of time makes everything run so much smoother. Here’s what I recommend:
- Sharp, clean pruning shears or a sharp knife: For clean cuts that heal well.
- Small pots or trays: About 4-inch pots are usually perfect. Make sure they have drainage holes!
- Well-draining potting mix: A mix of equal parts peat moss or coco coir and perlite works wonders. You want it to hold some moisture but not get soggy.
- Rooting hormone (optional but helpful): I often use a powdered hormone for cuttings.
- Plastic bags or a propagator: To create a humid environment.
- Watering can or spray bottle: For gentle watering.
Propagation Methods: Stem Cuttings are Your Friend!
For Anoda acerifolia, I find the stem cutting method to be the most reliable and straightforward.
- Take Your Cuttings: On a healthy, non-flowering stem, make a clean cut about 4-6 inches down from the tip. Aim to take cuttings in the morning when the plant is most hydrated. Remove any lower leaves, leaving just a few at the top. If your stem has flower buds, gently pinch them off; we want the plant’s energy going into roots, not blooms.
- Prepare the Cutting: If you’re using rooting hormone, dip the cut end of the stem into the powder, tapping off any excess.
- Plant Your Cuttings: Fill your pots with your pre-moistened potting mix. Make a small hole in the center of the soil with your finger or a pencil. Gently insert the cut end of your Anoda acerifolia cutting into the hole, and firm the soil around it.
- Create Humidity: Water the soil gently. Then, cover the pot with a clear plastic bag or place it inside a propagator. This traps moisture around the leaves and encourages rooting. If you’re using a bag, you can poke a few small holes in it to allow a bit of air circulation.
- Find the Right Spot: Place your pots in a bright spot, but out of direct, scorching sunlight. A windowsill that gets indirect light is ideal.
The “Secret Sauce” (Pro Tips)
There are a few little tricks I’ve picked up over the years that really seem to boost success with cuttings:
- Bottom Heat is Your Best Friend: If you have a seedling heat mat, placing your pots on it can be a game-changer. This gentle warmth encourages root development from below, speeding up the process significantly.
- Don’t Let the Leaves Touch the Water (if water propagating): While I prefer soil propagation for Anoda, if you do try water, always ensure the leaves of your cutting are above the water line. Any submerged leaves will rot, which is exactly what you don’t want.
- A Little Air Circulation Helps: Even in a humid environment, it’s a good idea to lift the plastic bag or open the propagator vents for a few minutes each day. This prevents mold and encourages stronger growth.
Aftercare & Troubleshooting
You’ll know your Anoda acerifolia cuttings are rooting when you see new growth emerging from the top – a sure sign of life! This usually takes anywhere from 2 to 4 weeks, sometimes a bit longer.
Once you see good roots and new leaves, it’s time to gradually acclimate your new plant to drier air. Start by removing the plastic bag for longer periods each day. When you feel confident, you can remove it entirely. Water your new plant when the top inch of soil feels dry. Keep it in that bright, indirect light.
The most common problem you might encounter is rot, often seen as a mushy, black stem at the soil line. This is usually a sign of too much moisture and not enough air circulation. If you see this, sadly, that cutting is likely lost, but don’t be discouraged! It’s a good learning experience about adjusting your watering or airflow.
Happy Planting, My Friend!
So there you have it – propagating Anoda acerifolia is a wonderful way to fill your garden (and your heart!) with more of this lovely plant. Be patient with your cuttings; they know what they’re doing. Enjoy the process, and before you know it, you’ll be sharing these beauties with friends and family. Happy gardening!
Resource:
https://identify.plantnet.org/k-world-flora/species/Anoda%20acerifolia%20Cav./data