Hello there, fellow garden enthusiasts! I’m so delighted you’re here to chat about a plant that truly captures my heart: Anemonastrum elongatum, often called the Japanese Anemone or Windflower. These elegant beauties, with their delicate, papery blooms, can bring such a graceful touch to any garden border, especially as summer fades into autumn. And the joy of creating more of them from your existing, cherished plants? Utterly rewarding!
For many gardeners, propagating Anemonastrum elongatum is a delightful endeavor. While it’s not the absolute easiest plant for a complete beginner, it’s certainly achievable with a little patience and care. I’ve seen countless people find success, and I have no doubt you will too!
The Best Time to Start
The absolute sweet spot for getting your hands dirty with Anemonastrum elongatum propagation is early spring. Think about when your plants are just starting to wake up from their winter slumber, pushing out fresh new growth. This is when they have the most energy to dedicate to rooting themselves. Waiting until the heat of summer can stress them, and doing it too late in the fall might not give new divisions or cuttings enough time to establish before winter.
Supplies You’ll Need
Gathering your tools beforehand makes the whole process so much smoother. Here’s what I recommend having on hand:
- Sharp Pruning Shears or a Clean Knife: For making clean cuts.
- Rooting Hormone (Optional but helpful): Especially for cuttings, it can give them a good boost. Look for one containing IBA.
- Well-Draining Potting Mix: A good quality all-purpose potting mix with added perlite or coarse sand works wonders.
- Small Pots or Trays: For your new little propagations. Make sure they have drainage holes!
- Labels and a Pen: To keep track of what you’ve planted and when.
- Watering Can or Mister: For gentle watering.
- Gloves (Optional): If you prefer to keep your hands clean.
Propagation Methods
There are a couple of reliable ways to get more Anemonastrum elongatum plants. My favorites are division and stem cuttings.
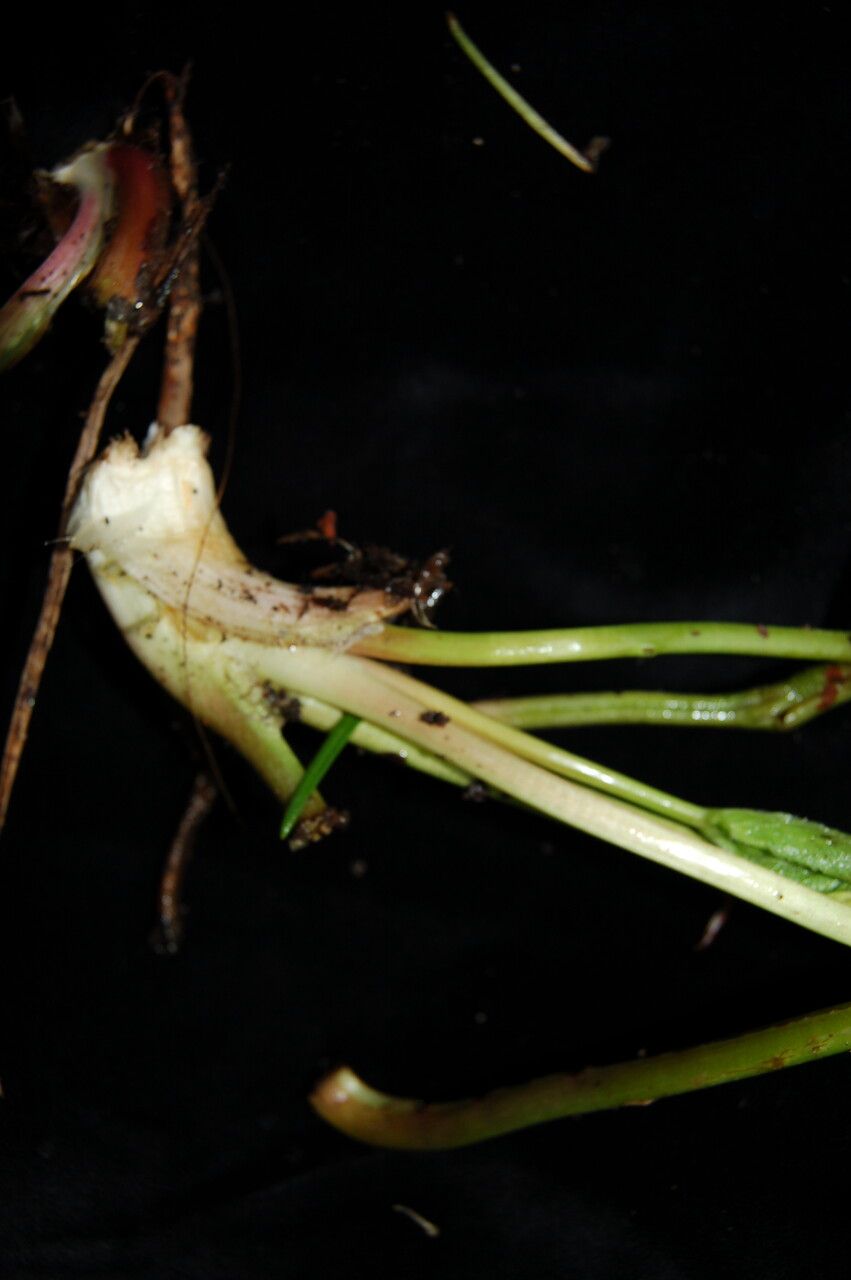
1. Division (The “You Can’t Go Wrong” Method)
This is how I usually start, especially if I have a mature clump that’s looking a bit crowded.
- Gently dig up your plant. Using a garden fork or trowel, carefully loosen the soil around the base of the plant. Lift the entire clump out of the ground.
- Examine the root ball. You’ll see it’s a mass of fleshy roots and emerging shoots. Resist the urge to tug aggressively!
- Separate the divisions. You can often gently pull sections apart with your hands. If it’s stubborn, use your clean pruning shears or knife to cut through the root mass, ensuring each division has a healthy portion of roots and at least one or two growing points (shoots).
- Replant immediately. Place your new divisions into their prepared pots or back into the garden. Make sure the crown (where the stems meet the roots) is at or slightly above soil level. Water them in well.
2. Stem Cuttings (A Little More Fingertip-Tingling)
This method is great if you have healthy stems already growing.
- Take cuttings in the spring. Look for non-flowering stems that are about 4-6 inches long.
- Make the cut. Using your sharp shears, make a clean cut just below a leaf node (that little bump where a leaf emerges from the stem).
- Prepare the cutting. Remove the lower leaves from the cutting, leaving just a couple at the very top. If you’re using rooting hormone, dip the cut end into it.
- Plant the cutting. Insert the prepared end into a pot filled with your well-draining mix. You want at least one leaf node to be buried in the soil.
- Water gently. Mist the soil lightly and keep it consistently moist, but not waterlogged.
- Provide humidity. Cuttings love a humid environment. You can create this by covering the pot with a clear plastic bag (supported so it doesn’t touch the leaves) or placing it in a small propagator.
The “Secret Sauce” (Pro Tips)
Here are a couple of things I’ve learned over the years that really make a difference:
- Don’t be afraid of the roots! When dividing, a few broken roots are okay. The plant is resilient. The key is to make sure each piece has some roots and a growing point.
- Bottom heat is your friend. If you’re doing stem cuttings, placing your pots on a heated propagator mat can significantly speed up root development. It mimics the warmth of the soil in spring and encourages those roots to form much more quickly.
Aftercare & Troubleshooting
Once your divisions or cuttings have started to grow or you see little signs of rooting (like tiny new leaves), it’s time for aftercare.
- Watering: Keep the soil consistently moist but never soggy. Young plants are more vulnerable to drying out, so check them regularly. As they grow, you can gradually decrease the frequency of watering.
- Light: Give them bright, indirect light. Avoid harsh, direct sun, which can scorch delicate new growth.
- Feeding: Once you see good new growth, you can start feeding them with a diluted liquid fertilizer every few weeks.
The most common sign of failure is rot. This usually happens from overwatering. If you see stems turning mushy or blackening, or cuttings wilting and going soft, it’s likely too much moisture is the culprit. Make sure your pots drain well and adjust your watering schedule.
A Little Patience Goes a Long Way
Propagating plants is a bit like waiting for a good cup of coffee to brew – it takes a little time, but the result is so worth it. Don’t get discouraged if things don’t take off overnight. Observe your little propagations, adjust your care as needed, and enjoy the quiet satisfaction of nurturing new life in your garden. Happy propagating!
Resource:
https://identify.plantnet.org/k-world-flora/species/Anemonastrum%20elongatum%20(D.Don)%20Holub/data