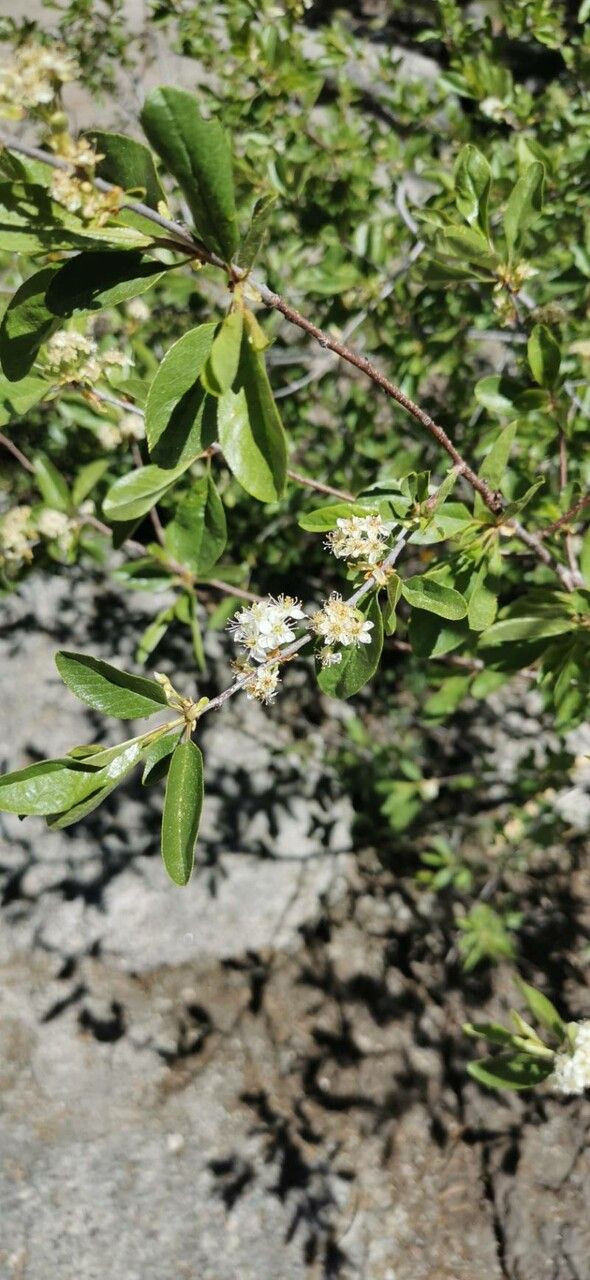
Oh, Amelanchier pallida, also known as Pale Serviceberry! If you’ve ever enjoyed the delicate white spring blossoms of this lovely shrub, followed by those sweet, edible berries, you know exactly why I adore it. And even better? It’s surprisingly easy to propagate, making it a fantastic project for anyone looking to expand their garden or share this beauty with friends. I’ve been growing and sharing Serviceberries for years, and I can tell you, starting your own from cuttings is incredibly rewarding. Beginners, don’t shy away from this one – you’ve got this!
The Best Time to Start
For Amelanchier pallida, I find the late spring to early summer is your sweet spot. This is when the plant is actively growing, and you can take softwood cuttings. These are younger, more flexible stems that root much more readily than older, woody ones. Think of it as snagging a bit of that vibrant growth energy.
Supplies You’ll Need
Here’s what you’ll want to have on hand before you get started:
- Sharp pruning shears or a clean, sharp knife: For making clean cuts.
- Rooting hormone: A powder or gel specifically for cuttings. It really gives them a boost!
- Small pots or propagation trays: To house your cuttings.
- Well-draining potting mix: I like a blend of equal parts peat moss, perlite, and a bit of compost.
- A plastic bag or propagation dome: To create a humid environment.
- A spray bottle: For misting.
- Labels and a marker: Trust me, you’ll thank yourself later!
Propagation Methods
Let’s get our hands dirty! The most successful method for Amelanchier pallida is stem cuttings.
- Select Your Cuttings: Head out in late spring or early summer. Look for young, healthy shoots that are flexible but not too floppy. They should be about 4-6 inches long.
- Make the Cut: Using your clean shears or knife, make a clean cut just below a leaf node. This is the swollen part of the stem where a leaf grows. This is where the magic happens for root development.
- Prepare the Cutting: Gently remove the leaves from the bottom half of the cutting. You want to expose those lower nodes. Leave just one or two leaves at the very top to help with photosynthesis, but pinch off any that are too large.
- Apply Rooting Hormone: Dip the cut end of your prepared cutting into the rooting hormone. Tap off any excess. This stuff isn’t magic, but it really helps give your cuttings a fighting chance.
- Plant Your Cuttings: Fill your pots or trays with your well-draining mix. Make a small hole in the center with your finger or a pencil. Gently insert the hormone-coated end of the cutting, pushing it down so the lower leaf nodes are covered by the soil. Firm the soil gently around the base.
- Water Gently: Give your newly planted cuttings a light watering. You want the soil to be moist but not waterlogged. A gentle spray from your bottle is usually best.
- Create Humidity: This is crucial! Cover the pots with a clear plastic bag or a propagation dome. This creates a mini-greenhouse, keeping the humidity high and preventing the cuttings from drying out. Make sure the leaves aren’t touching the plastic if possible.
- Find a Spot: Place your cuttings in a bright spot that gets indirect light. Avoid direct sun, which can scorch young cuttings.
The “Secret Sauce” (Pro Tips)
After all these years, I’ve picked up a few tricks. Here are two that make a real difference:
- Bottom Heat is Your Friend: If you can, place your pots on a gentle heating mat. Rooting cuttings often happens more reliably, and faster, when the soil is kept slightly warm. It’s like giving them a cozy, nurturing environment.
- Don’t Over-Maintian: Resist the urge to constantly check! Once you’ve set up the humidity, only lift the cover briefly to mist if the soil seems to be drying out, or to check for rot. Too much disturbance can stress the cuttings.
Aftercare & Troubleshooting
Be patient! You’re looking for signs of new growth, which usually starts with a few tiny leaves appearing at the top. This is your cue that roots are forming. Once you see this, you can start gradually hardening them off by removing the plastic cover for longer periods each day over a week or two. Then, you can treat them like a young plant, keeping them consistently watered and in bright, indirect light.
If your cuttings start to wilt and go limp, or if you notice black or mushy stems, that’s usually a sign of rot. This often happens when the soil is too wet or there isn’t enough air circulation. Unfortunately, these cuttings are likely lost, but don’t get discouraged! You can always try again.
A Encouraging Closing
Growing your own Amelanchier pallida is a journey, and like any good garden project, it requires a little patience and a lot of love. The satisfaction of seeing those tiny shoots develop into rooted plants ready for their own spot in the garden is truly wonderful. So, gather your supplies, find a quiet moment, and enjoy the process of bringing new life into being. Happy propagating!
Resource:
https://identify.plantnet.org/k-world-flora/species/Amelanchier%20pallida%20Greene/data