Hello there, fellow plant enthusiast! It’s so lovely to have you here in my little corner of the garden world. I’ve been digging in the dirt and nurturing green things for about two decades now, and I’m always thrilled to share what I’ve learned. Today, we’re diving into the wonderful world of Aloe conifera.
Introducing the Marvelous Aloe conifera
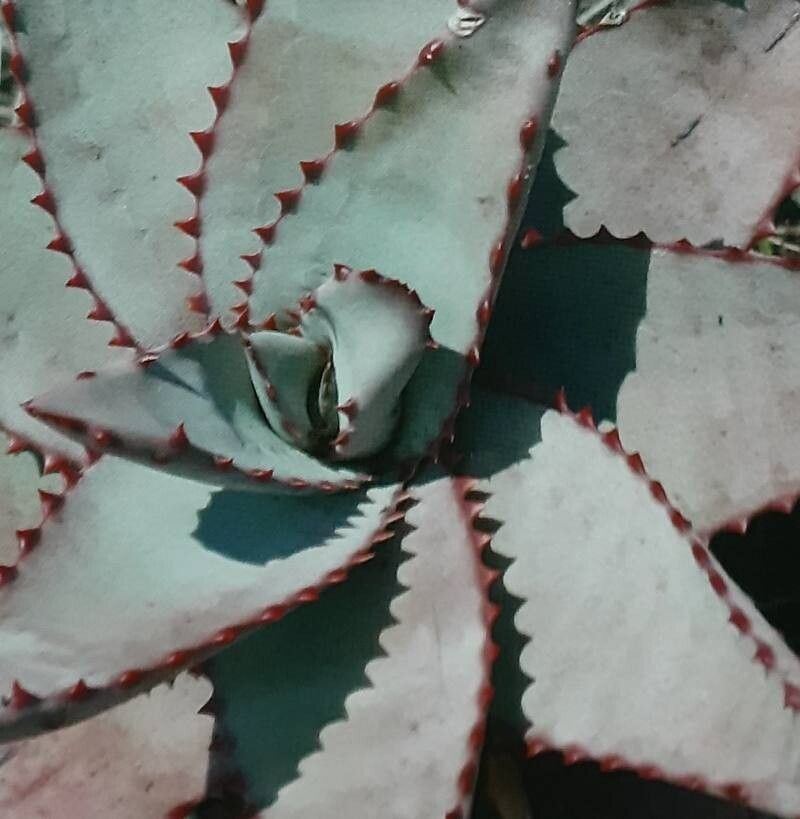
Isn’t Aloe conifera just stunning? With its distinctive, almost cone-shaped rosette of leaves, it brings a touch of architectural elegance to any succulent collection. I find it incredibly rewarding to see a tiny pup or cutting transform into a thriving, mature plant. It’s a fantastic way to expand your collection without spending a fortune, and honestly, the feeling of successfully coaxing new life from a piece of an existing plant is pure magic. For beginners, I’d say Aloe conifera is moderately easy to propagate. It’s not as hands-off as some other succulents, but with a little attention, you’ll be successful.
The Best Time to Start
When it comes to giving your new Aloe babies the best chance, think spring and early summer. This is when your main plant is likely in its most active growth phase, pulling up all that good energy. You’ll find it easier to get clean cuts and the warm temperatures help those cuttings root faster. Avoid propagating during the cooler, dormant months if you can.
Supplies You’ll Need
Gathering your tools beforehand makes the whole process so much smoother. Here’s what I always have on hand:
- Sharp, clean pruning shears or a knife: For making nice, clean cuts.
- A well-draining potting mix: I swear by a cactus or succulent mix, often with extra perlite or pumice added for even better drainage.
- Small pots or trays: Terracotta pots are my go-to; they breathe well.
- Rooting hormone (optional, but helpful): Not strictly necessary for Aloe, but it can give cuttings a boost.
- A watering can or spray bottle: For a gentle touch.
- Gloves (optional): Aloe sap can be a bit sticky.
Propagation Methods
Aloe conifera is a bit of a multi-tasker when it comes to propagation! Here are the two methods that work best for me.
Method 1: Offsets (Pups) – The Easiest Route
This is the absolute simplest way to propagate Aloe conifera. These lovely plants naturally produce little babies, called offsets or pups, around their base.
- Locate the pups: Gently remove your mature Aloe from its pot, or carefully dig around the base to expose the offsets.
- Separate carefully: Using your clean shears or knife, make a clean cut to separate a pup from the mother plant. Try to get a bit of its own root system if possible. If it doesn’t have much of a root system yet, don’t worry!
- Callus over: This is crucial! Let the cut end of the pup sit in a dry, cool spot out of direct sunlight for 2-3 days (or even longer for larger offsets) until a dry, papery callus forms over the cut surface. This prevents rot.
- Potting Up: Once callused, plant the offset in a small pot filled with your well-draining succulent mix. Plant it just deep enough so it stands up on its own.
- Water sparingly: Wait about a week after potting to water. Then, water lightly, just enough to moisten the soil. Avoid overwatering!
Method 2: Leaf Cuttings – A Little More Patience
While offsets are the usual suspects, you can try leaf cuttings with Aloe conifera. It’s less common and can be trickier, but I’ve had success!
- Select a healthy leaf: Choose a mature, healthy leaf from the mother plant.
- Make the cut: Using your sharp, clean knife, make a clean cut as close to the base of the leaf as possible.
- Callus, callus, callus! Just like with offsets, let the cut edge of the leaf callus over for at least 3-5 days, or even up to a week, until it’s completely dry and sealed.
- Planting: You can either lay the callused leaf cutting on top of the soil in a pot of succulent mix, or insert its callused end about a quarter-inch into the soil.
- Mist lightly: Lightly mist the soil surface every few days, just to keep it barely moist. We don’t want soggy leaves! Keep it in bright, indirect light.
The “Secret Sauce” (Pro Tips)
Now, for a couple of things I’ve learned that really make a difference:
- Don’t let leaves touch the water: If you’re trying leaf cuttings and get ambitious about giving them a drink, make sure the cut end isn’t submerged in water. It’s a recipe for rot. A light misting is far better.
- Bottom heat is your friend: For both pups and leaf cuttings, especially if you’re propagating early in spring or later in fall, placing your pots on a gentle heat mat can significantly speed up root development. Just a low setting is all you need.
Aftercare & Troubleshooting
Once you see signs of new growth or roots (you might gently tug on a cutting, and feel resistance), you can begin to treat your new Aloe like a miniature version of the adult. Gradually increase watering when roots are established, but always let the soil dry out completely between waterings.
The biggest enemy here is rot. If your cutting turns mushy, yellow, and just looks… sad and damp, it’s likely rot from too much moisture. If you catch it early, you might be able to cut off the rotten part and let the remaining healthy section callus over again. Black or brown, mushy stems are a clear sign something has gone wrong.
A Gentle Encouragement
Propagating plants, especially something as beautiful as Aloe conifera, is a journey of patience and observation. Don’t get discouraged if your first attempt isn’t perfect. Every plant is a little different, and the satisfaction of watching a new life emerge is truly worth the effort. Happy propagating, and enjoy the green magic unfolding in your hands!
Resource:
https://identify.plantnet.org/k-world-flora/species/Aloe%20conifera%20H.Perrier/data