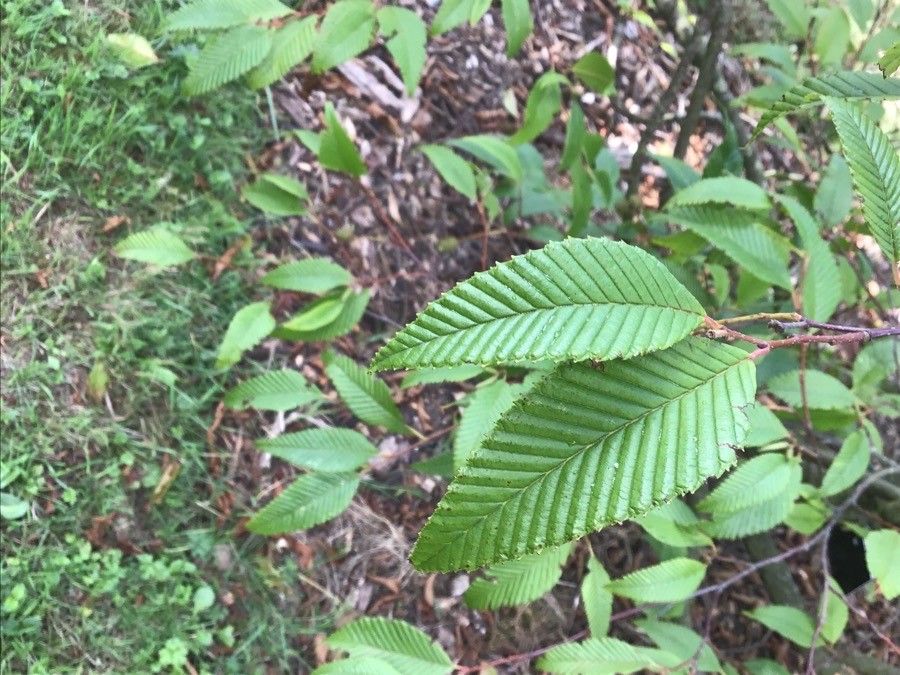
Oh, hello there! I’m so glad you’ve stopped by. Today, we’re going to chat about a truly lovely tree: the Alnus pendula, or Japanese Wonder Tree as some folks call it. Its graceful, weeping branches and pretty catkins make it a real stunner in any garden. And the best part? Successfully propagating it yourself is incredibly rewarding. Now, I’ll be honest, it’s not quite as foolproof as taking a cutting from a common ivy, but with a little care and attention, even beginners can get wonderfully satisfying results. Think of it as a fun little challenge with a beautiful payoff!
The Best Time to Start
For Alnus pendula, I’ve found the late spring to early summer is your golden window. This is when the plant is in its active growth phase, and the new shoots are still a bit flexible, making them ideal for taking cuttings. Waiting until the wood has started to firm up, but hasn’t turned completely woody, is key. Too early, and the cuttings might be too soft and prone to rot. Too late, and they’ll be much harder to root.
Supplies You’ll Need
Here’s what I always have on hand when I set out to propagate these beauties:
- Sharp, clean pruning shears or a knife: For clean cuts that heal well.
- Rooting hormone powder or gel: This is a game-changer and significantly boosts your success rate.
- A well-draining potting mix: I like a blend of equal parts peat moss or coco coir and perlite or coarse sand. You want good aeration.
- Small pots or propagation trays: Clean them thoroughly!
- A watering can with a fine rose or a mister: For gentle watering.
- Plastic bags or a propagation dome: To create a humid environment.
- Labels and a marker: So you don’t forget what you planted where!
- Optional: Bottom heat source (like a seedling heat mat): This can really speed things up.
Propagation Methods
We’ll focus on the most reliable method for Alnus pendula: stem cuttings.
- Taking the Cuttings: On a mild day, select healthy, vigorous stems from your mature Alnus pendula. Look for shoots that are about pencil thickness and have grown this season. You want them to be somewhat firm but not woody all the way through. Using your sharp shears, cut lengths of 4 to 6 inches. Make your cut just below a leaf node (where a leaf attaches to the stem). This node is where the magic happens – it’s rich in growth hormones.
- Preparing the Cuttings: Gently remove the leaves from the bottom half of each cutting. If the remaining leaves are very large, you can cut them in half horizontally. This reduces water loss without sacrificing too much of the plant’s ability to photosynthesize.
- Applying Rooting Hormone: Dip the cut end of each stem into your rooting hormone, following the product’s instructions. Tap off any excess. This steps is crucial for encouraging root development.
- Planting the Cuttings: Fill your pots or trays with your prepared, moistened potting mix. Make a small hole in the center of the soil with a pencil or your finger. Insert the prepared cutting into the hole, ensuring the leaf nodes are buried. Gently firm the soil around the stem. Aim to plant 2-3 cuttings per pot to maximize your chances.
- Creating Humidity: Now, give the cuttings a gentle watering to settle the soil. Then, pop them into clear plastic bags or cover them with a propagation dome. This traps moisture and creates that vital humid microclimate. If you’re using bags, you might want to support them with stakes so they don’t rest directly on the leaves.
The “Secret Sauce” (Pro Tips)
- The “Cleanliness is Next to Godliness” Rule: I cannot stress this enough. Always use sterilized tools and clean pots. Fungal diseases are the biggest enemy of cuttings, and a clean start is your best defense. A quick dip of your shears in rubbing alcohol between cuts goes a long way.
- Bottom Heat is Your Friend: If you have the option, place your pots on a seedling heat mat. The warmth from below encourages root development much faster than relying on ambient room temperature. It’s like giving your cuttings a cozy heating pad, and they really respond to it!
- Don’t Overwater! This is a tricky balance, isn’t it? You want the soil to be consistently moist, but not soggy. Check the moisture by gently pressing the soil. If it springs back, it’s good. If you can squeeze water out, you’ve gone too far. Soggy soil is a fast track to rot.
Aftercare & Troubleshooting
Once your cuttings are planted, find them a bright, indirect light spot. Avoid direct sun, which can scorch the delicate leaves. Keep them consistently moist, but not waterlogged.
You should start seeing signs of life—tiny new leaves or shoots—within 4-8 weeks, depending on the conditions. When you see good growth and resistance when you gently tug on a cutting (it shouldn’t pull out easily), that means roots have formed! At this point, you can gradually acclimate them to less humid conditions by opening the bag or dome a little more each day over a week. Then, you can transplant them into slightly larger pots.
Now, what if things go wrong? The most common issue is rot. If you see mushy, black stems, or leaves wilting and turning brown, it’s usually a sign of too much moisture and not enough airflow. Sadly, there’s not much you can do once rot sets in, so back to the drawing board with a focus on drainage and humidity control. Brown, dried-out tips can indicate that the environment is too dry, or perhaps a touch too much sun.
A Encouraging Closing
Propagating plants is a journey, my friends. It’s about patience, observation, and a little bit of intuition. Don’t be discouraged if your first attempt isn’t perfect. Each try is a learning experience. Embrace the process, enjoy the anticipation, and celebrate every success, no matter how small. Happy propagating!
Resource:
https://identify.plantnet.org/k-world-flora/species/Alnus%20pendula%20Matsum./data