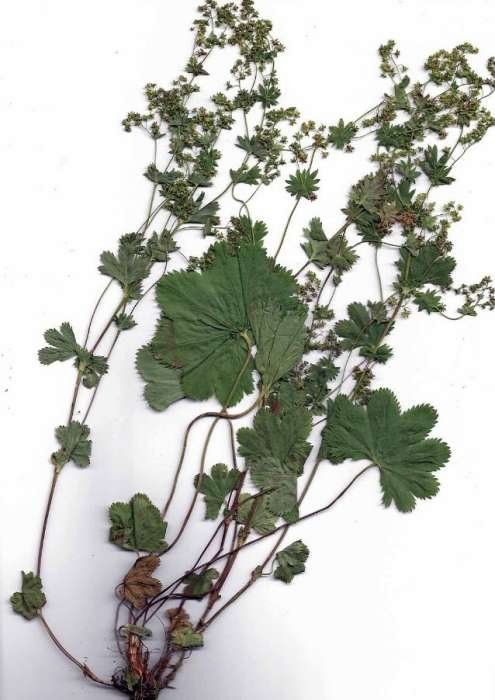
Oh, Alchemilla incisa! Isn’t it just a delight in the garden? Those lovely, deeply lobed, almost feathery leaves and those charming frothy sprays of chartreuse flowers in early summer. They bring such a soft, textured beauty to the border, especially in shady or dappled spots where they truly shine. And you know what? Propagating them is a wonderfully rewarding endeavor, much easier than you might think, even for those just dipping their toes into the world of plant propagation. It’s like having an endless supply of these beauties to share with friends or fill every little nook in your own garden.
The Best Time to Start
For Alchemilla incisa, the sweet spot for propagation is late spring to early summer, right after the plant has finished its glorious flowering or as it’s winding down. This is when the plant has plenty of energy stored and is actively seeking to grow. You’re essentially taking advantage of its vigorous growth phase.
Supplies You’ll Need
Gathering your tools beforehand makes the whole process so much smoother. Here’s what I find indispensable:
- Sharp pruning shears or a clean, sharp knife: For making neat cuts.
- Potting mix: A well-draining mix is key. I like a blend of equal parts peat moss, perlite, and a bit of compost. You can also buy a good quality seed-starting mix.
- Small pots or seed trays: Clean ones are a must to prevent disease.
- Plastic bags or a propagation dome: To maintain humidity around your cuttings.
- Rooting hormone (optional but recommended): A powder or gel can give your cuttings a helpful boost.
- Watering can with a fine rose: For gentle watering.
Propagation Methods
Alchemilla incisa is quite obliging and can be propagated in a couple of straightforward ways. I usually opt for division as it’s the most straightforward for this particular plant, but stem cuttings work beautifully too.
By Division
This is my go-to method for Alchemilla incisa. It’s simple, satisfying, and you get a mature plant back in the ground right away.
- Dig up the plant: In late spring or early summer, gently dig up the entire clump of Alchemilla incisa. Do this on a cloudy day or in the early morning to reduce transplant shock.
- Gently tease apart: Inspect the root ball. You’ll see that established plants often have multiple crowns. Use your hands or a trowel to gently separate the clump into smaller sections, ensuring each section has some roots and at least a couple of healthy stems.
- Replant immediately: Plant the divisions directly into their new homes or into pots filled with your well-draining potting mix. Water them thoroughly.
By Stem Cuttings
This method is fantastic for getting multiple new plants from a single parent.
- Take cuttings: Select healthy, non-flowering stems from your Alchemilla. Using your clean shears, cut a stem about 3-4 inches long, just below a leaf node (where a leaf attaches to the stem). Remove the lower leaves, leaving just a few at the top.
- Prepare the cutting: If you’re using rooting hormone, dip the cut end into the powder or gel.
- Plant the cuttings: Fill your small pots with the prepared potting mix. Make a small hole with your finger or a pencil and insert the cutting. Gently firm the soil around it.
- Create humidity: Water the pot gently. Then, slip the pot into a clear plastic bag, or cover it with a propagation dome. This creates a mini-greenhouse effect.
The “Secret Sauce” (Pro Tips)
Here’s where a little experience comes in handy. These small tricks often make all the difference.
- When taking stem cuttings, don’t let the remaining leaves touch the inside of the plastic bag. This is a prime spot for rot to set in. If they do, gently push them aside or trim the cutting slightly shorter.
- For stem cuttings, bottom heat can significantly speed up root development. If you have a heat mat designed for seedlings, placing your pots on it will often encourage roots to form a few weeks faster. It’s not essential, but it’s a nice boost.
- When propagating by division, don’t be afraid to be a little ruthless. If a clump is particularly large and dense, breaking it into smaller, manageable pieces, even if some have less root than others, will give you more successful divisions overall.
Aftercare & Troubleshooting
Once your new Alchemilla incisa starts to establish, you’ll want to give it a little extra TLC.
For divisions, keep the soil consistently moist but not waterlogged until they are visibly growing. After a few weeks, you can treat them like established plants.
For stem cuttings, check them regularly. You’re looking for signs of new growth, like tiny leaves emerging from the top, or resistance when you gently tug on the cutting. This usually takes 4-8 weeks. Once rooted, you can gradually acclimatize them to the open air by opening the plastic bag a little more each day. Water them as you would a young plant.
The most common issue you might encounter is rot. This usually happens if the soil is too wet or if you don’t have good air circulation. If you see a cutting turning brown and mushy, it’s best to discard it and try again, ensuring your soil is well-draining and you’re not overwatering.
A Encouraging Closing
Propagating Alchemilla incisa is a joy, it really is. It’s a chance to get your hands dirty, connect with your garden, and create more of those lovely plants you adore. Be patient with the process, celebrate every little success, and don’t be discouraged if a few don’t make it. Happy propagating!
Resource:
https://identify.plantnet.org/k-world-flora/species/Alchemilla%20incisa%20Buser/data